4.1.6. Configuration and use of the Salesforce connector

The Tale of Data Salesforce connector lets you read and write data in Salesforce directly from its Tale of Data environment. This section will guide you through the steps required to configure and use the connector.

4.1.6.1. Configuring a Salesforce data source

1. Access and Security

You must first obtain from your Salesforce administrator the account identifiers needed to access Salesforce from an external application, i.e. Tale of Data.

Note

Inform your Salesforce administrator that Tale of Data connects to Salesforce via the lAPI ‘partner SOAP’. Before you can acess Salesforce via a third-party application, the administrator must first create a Salesforce Connected App.

Your Salesforce administrator will send you:

  1. Login: a Salesforce username

  2. Password: a Salesforce password

  3. Security token

2. Creating a Salesforce data source

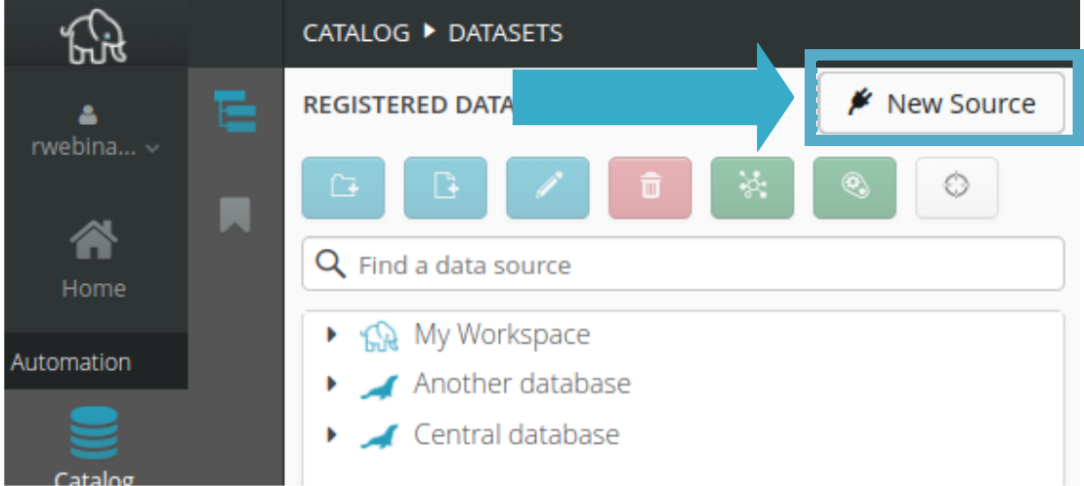
In Tale of Data, go to the catalog and click New source:

salesforce-image1

Follow the instructions on the screen to connect to Salesforce from Tale of Data.

Select:

  • API for data source category

  • Salesforce for data source type

salesforce-image2

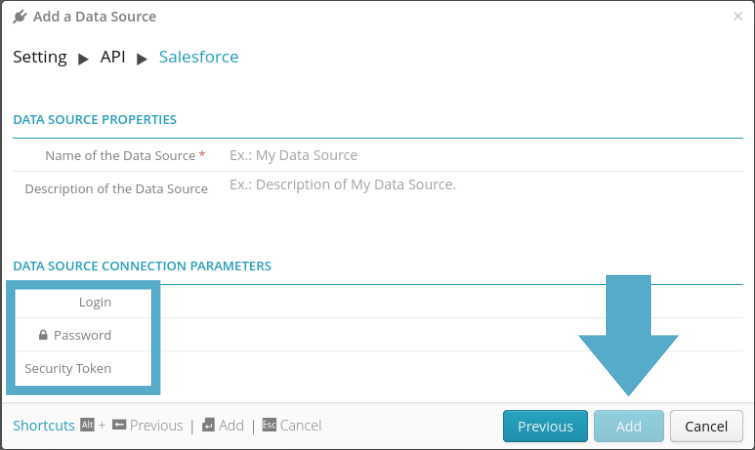
Then click Next and enter:

  • The name of the data source. This is the name displayed in the Tale of Data catalog. Entry is free form. You can call your data source ‘My Salesforce’ for example.

  • The login, password and security token provided by your Salesforce administrator

Finish by clicking Add:

salesforce-image3

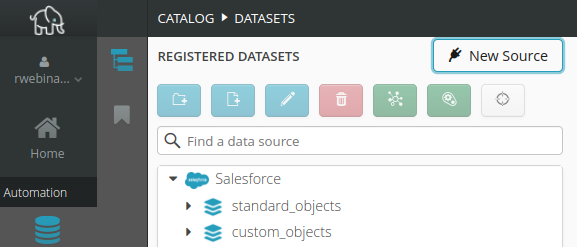
Once configured, the data source allowing you to access Salesforce will appear in the catalog:

salesforce-image4

Salesforce objects fall into two schemas:

  • standard_objects. Open this schema to access the main standard objects in Salesforce (accounts, contacts, etc.)

  • custom_objects. Open this schema to access all custom objects in Salesforce (i.e. objects created by your Salesforce administrator for the specific requirements of your company).

By clicking on the Contact table, you will for example obtain:

salesforce-image5

You can now:

  • Use your Salesforce data in any Tale of Data flow (to correct, enrich, validate, analyse etc. it)

  • Perform a quality audit of all your Salesforce data in the Mass Data Discovery module

  • Create dashboards and data stories

4.1.6.2. Using the Salesforce Connector

1. Creating Flows

Once your Salesforce data source has been configured, Salesforce datasets can then be used like any other Tale of Data dataset.

So long as your Salesforce account permits this, you can:

  • Read data in Salesforce

  • Correct/validate/cross-check/enrich your Salesforce data with data from other sources (files, databases etc.)

  • Write to Salesforce

2. Reading Salesforce data

Before you can read data in Salesforce, you must first create a flow and add a source node.

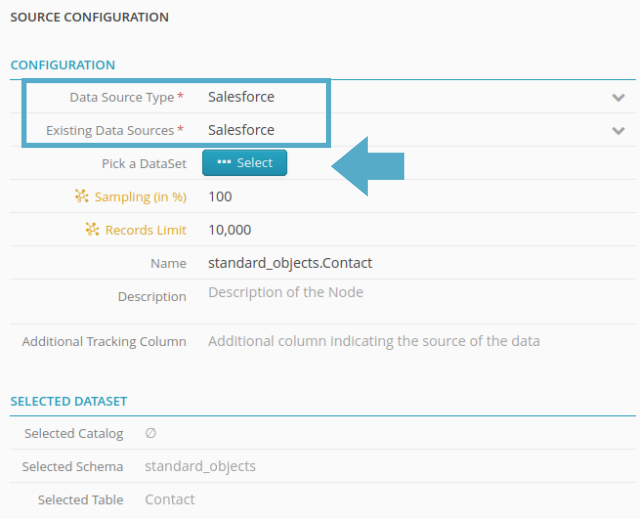
In the source node configurator:
  1. Select Salesforce from the Type of data source dropdown list.

  2. Select your Salesforce application from the Current data sources dropdown list.

  3. Click …Select (blue button) to select the data set to be read (accounts, contacts etc.)

salesforce-image6

3. Writing data to Salesforce

Before you can write data to Salesforce, you must first add a source node to your flow.

In the source node configuration panel:

salesforce-image7

  1. Select Salesforce from the Type of data source dropdown list.

  2. Select your Salesforce application from the Current data sources dropdown list.

  3. Select a write mode:

    1. Insert to add new records

    2. Update to alter existing records

  4. If you tick Stop at the 1st error, writing will stop as quickly as possible at the first error encountered (e.g. missing required field or a duplicate). Records written before the error will remain in Salesforce. If you do not tick this box however, the connector will write to Salesforce every record that does not create an error (best effort) but at the end of the flow will trigger an error to indicate that not all the records could be written. Failure details will be shown in the run window and also emailed to the flow owner.

  5. If you tick Bypass duplication rules the connector will ignore the Salesforce duplication rules. Attention: If you activate this option, you must ensure that your flow does not generate duplicates (to do this, use the advanced duplication functions in the Tale of Data Preparation Editor).

  6. Target Salesforce Object: the collection of Salesforce objects to which you wish to write data. In the screen capture above: Account

  7. Target Fields: this table displays matches (and match errors) between the columns from your Tale of Data flow and the fields expected by Salesforce. Match rules are as follows:

    1. The Tale of Data column must have exactly the same name (and case) as the matching Salesforce target field.

    2. The Tale of Data column type must be compatible with that of the matching Salesforce target field (e.g. you cannot write a text value to a Salesforce date field)

salesforce-image8

Example of a match error in a field name

Other types of error (shown in red) in the table of target fields:

When you are in Update write mode, your flow MUST when output generate a column labelled Id (case-sensitive, text-type) containing the unique Salesforce identifier for the records to be updated. Please note that only the fields produced by this flow will be updated. If you want to e.g. update just column C, the output from your flow must contain only columns Id and C. No other fields will be changed.

salesforce-image9

When you are in Insert write mode, your flow must not when output generate any columns labelled Id. ‘Id‘ is the name used only for the unique identifier for all Salesforce objects. Salesforce alone can attribute a value to this field:

salesforce-image10

If a Salesforce field is required but is not provided by your flow, target node configuration will trip into error, preventing the running of the flow:

salesforce-image11

Important: in Update mode, Tale of Data lets you, within the same flow, read and write in the same Salesforce table