3. Flow Designer
3.1. Create a flow in the flow view
You can create a Tale of Data flow in Flows  by clicking Add a Flow
  . Existing flows will display as thumbnails
  .
.
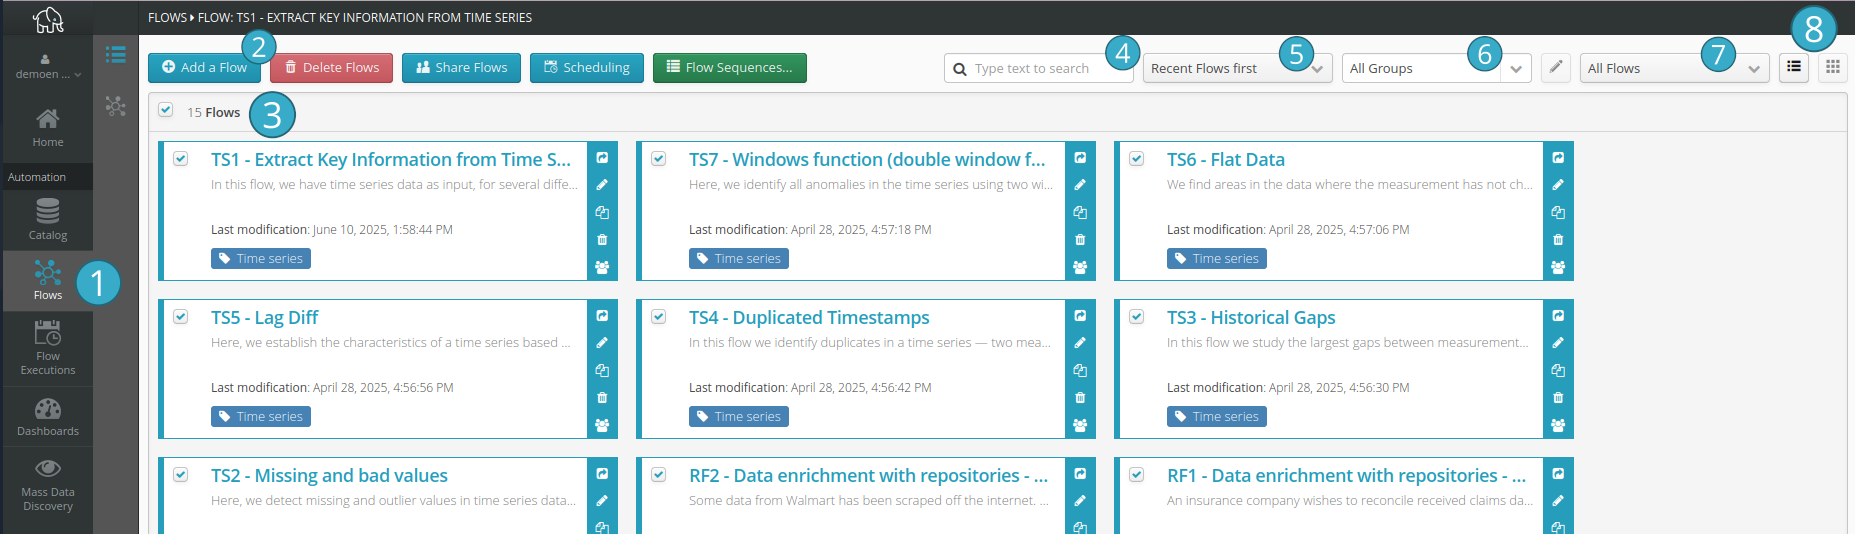
Text search
 by flow name.
Flow sort
 by:
by:Name (ascending/descending).
Date of creation (earliest/latest).
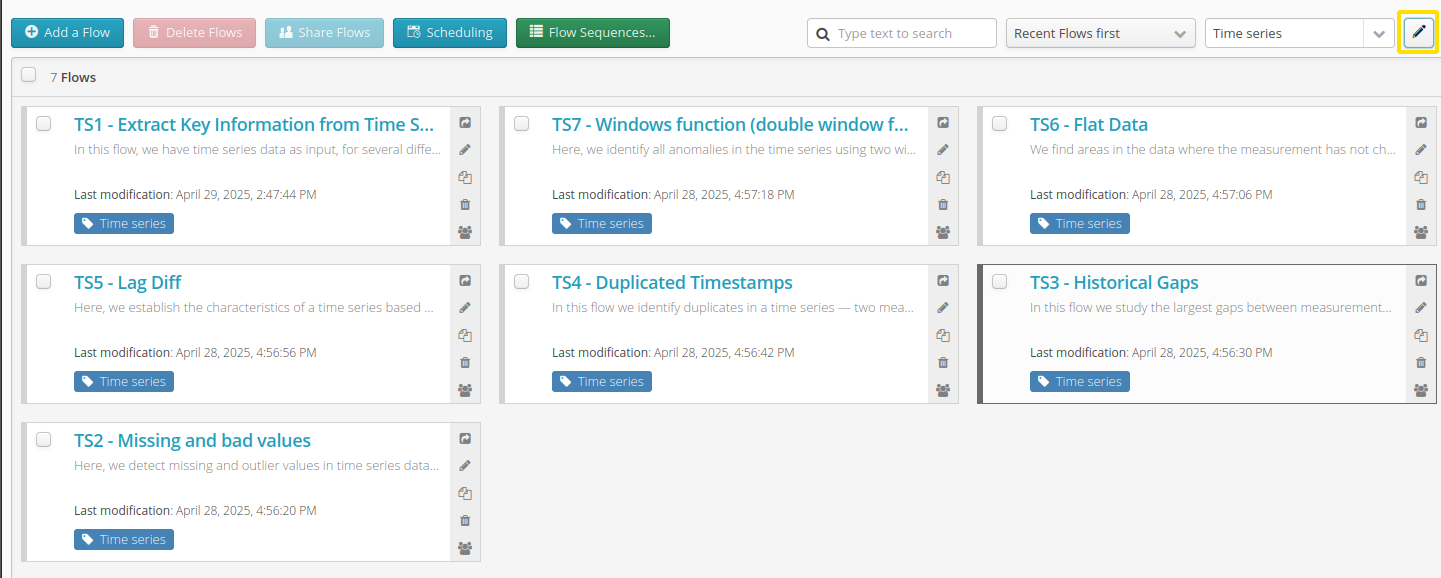
Flow filter by group
 .
.Flow display filter
 to limit the display to just:
Flows created by the connected user.
Flows shared by or with other users.
Switch to list or thumbnail (default) mode
 .
.Display the Flow Sequence Executions section
 .
.
3.2. Scheduling of flows and sequences view
It is possible to view the scheduling of all flows and their sequences from the Flow Designer, as well as from the sequence executions tab.


3.3. Rename the selected group
To rename a group, start by selecting it from the group list to filter it. You can then edit it by clicking on the edit icon.

3.4. Flow Designer
Once you have created the flow, the following flow designer screen will appear:
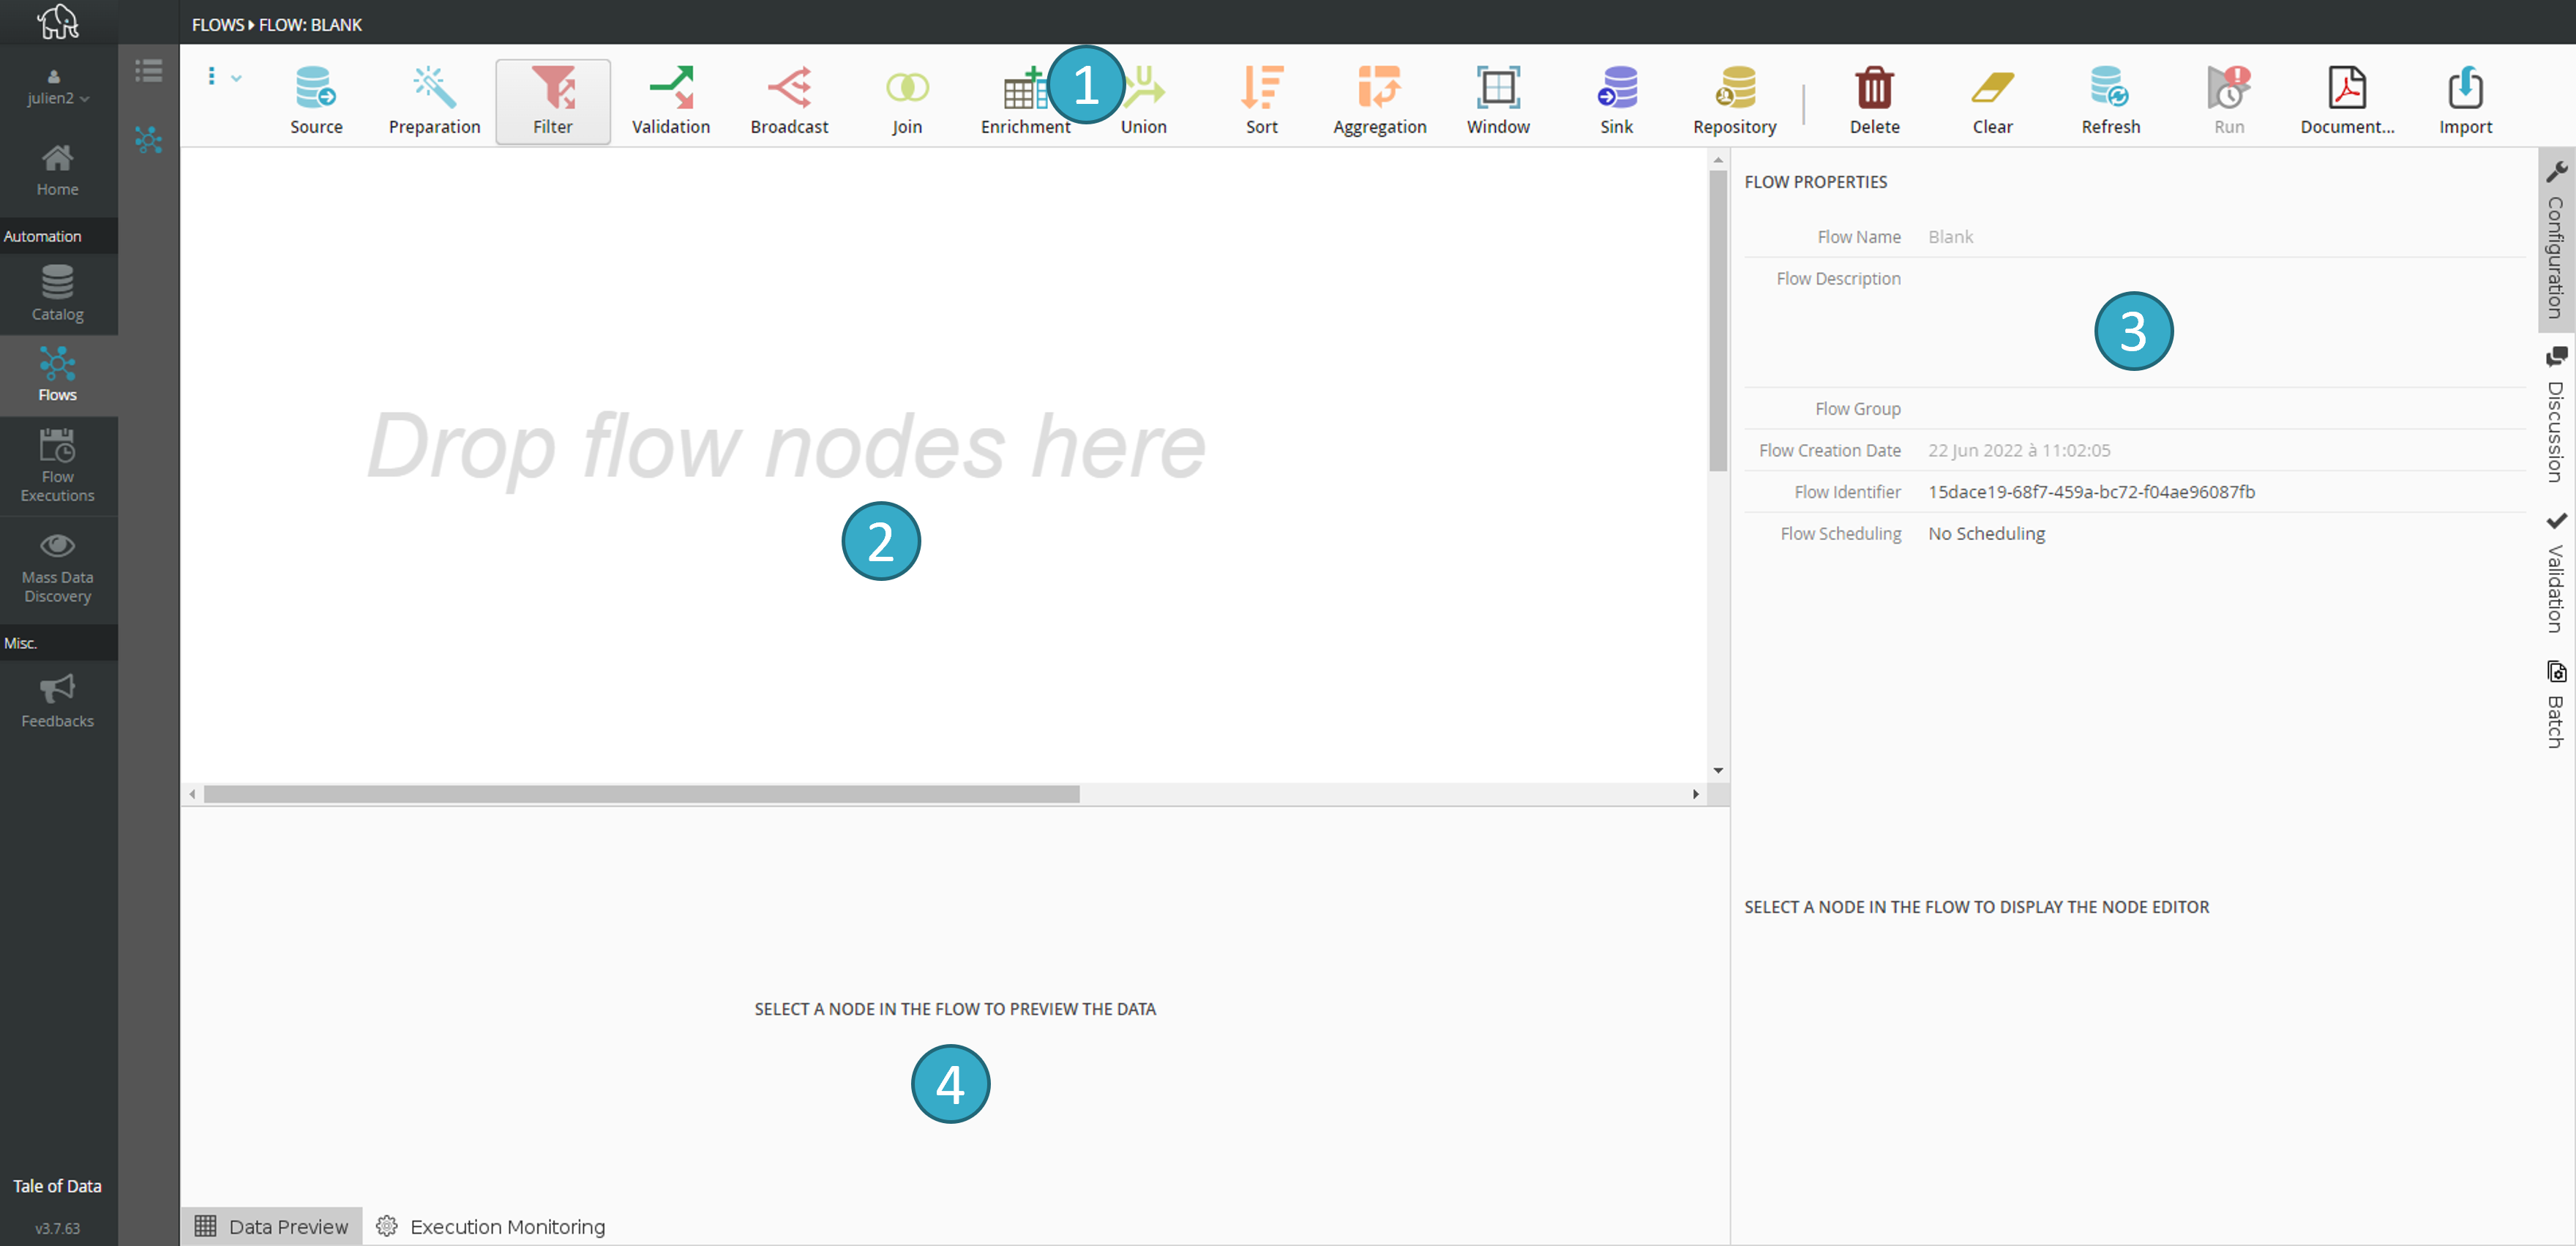
Toolbar
from which you can drag and drop sources, sinks and processors onto the canvas.Canvas
: the zone in which the flow will be designed.Configuration zone
for the nodes making up the flow (source, sink, processor).Preview zone
for the input and output data of the selected node.
- Flow Designer lets you:
connect input sources with output sinks so that you can read and write data for all the tables in the catalog.
add nodes for processing data during its transfer from flow sources to sinks.
preview data throughout the flow.
start processing immediately and schedule the start.
create new flows from sinks and flow sources, and dashboards from flow sinks. In a similar way, you can add these sinks and sources to other existing flows.
3.5. Flow Designer interface
Flow Designer lets you explore and manage your flows. In it, you can also start the running of a flow. In this section we shall recapitulate all the aspects of the interface.
It is also important to note that you can zoom in and out using the CTRL + mouse wheel up or down shortcut.
To make it easier to view the flow, simply double-click on a blank area of the canvas to collapse or restore the preview and configuration windows. Moving around the canvas is intuitive: either by dragging the mouse to the left or right, or by using the keyboard arrow keys.
3.5.1. Show and hide the documentation on the canvas
You can enrich the flow documentation with descriptions :
on the flow as a whole
on the flow’s individual nodes
The following section shows how to add, modify, or remove these descriptions.
Tale of Data allows displaying descriptions directly on the canvas, as shown in the screenshot below:
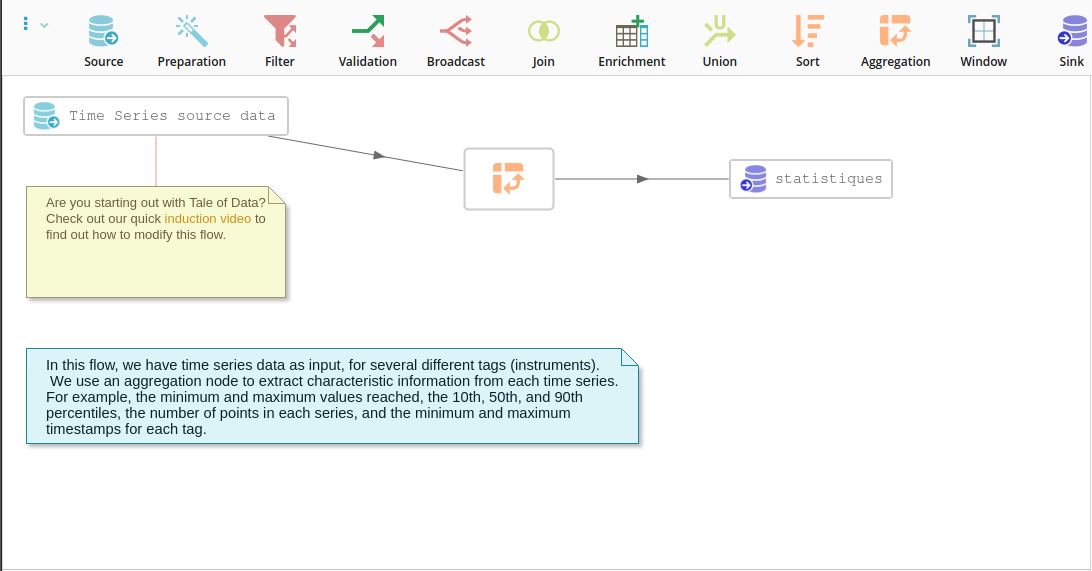
By default, the descriptions will be visible for all flows created.
For flows created before this feature was supported, it will be necessary to manually enable the display of descriptions to make them appear on the canvas.
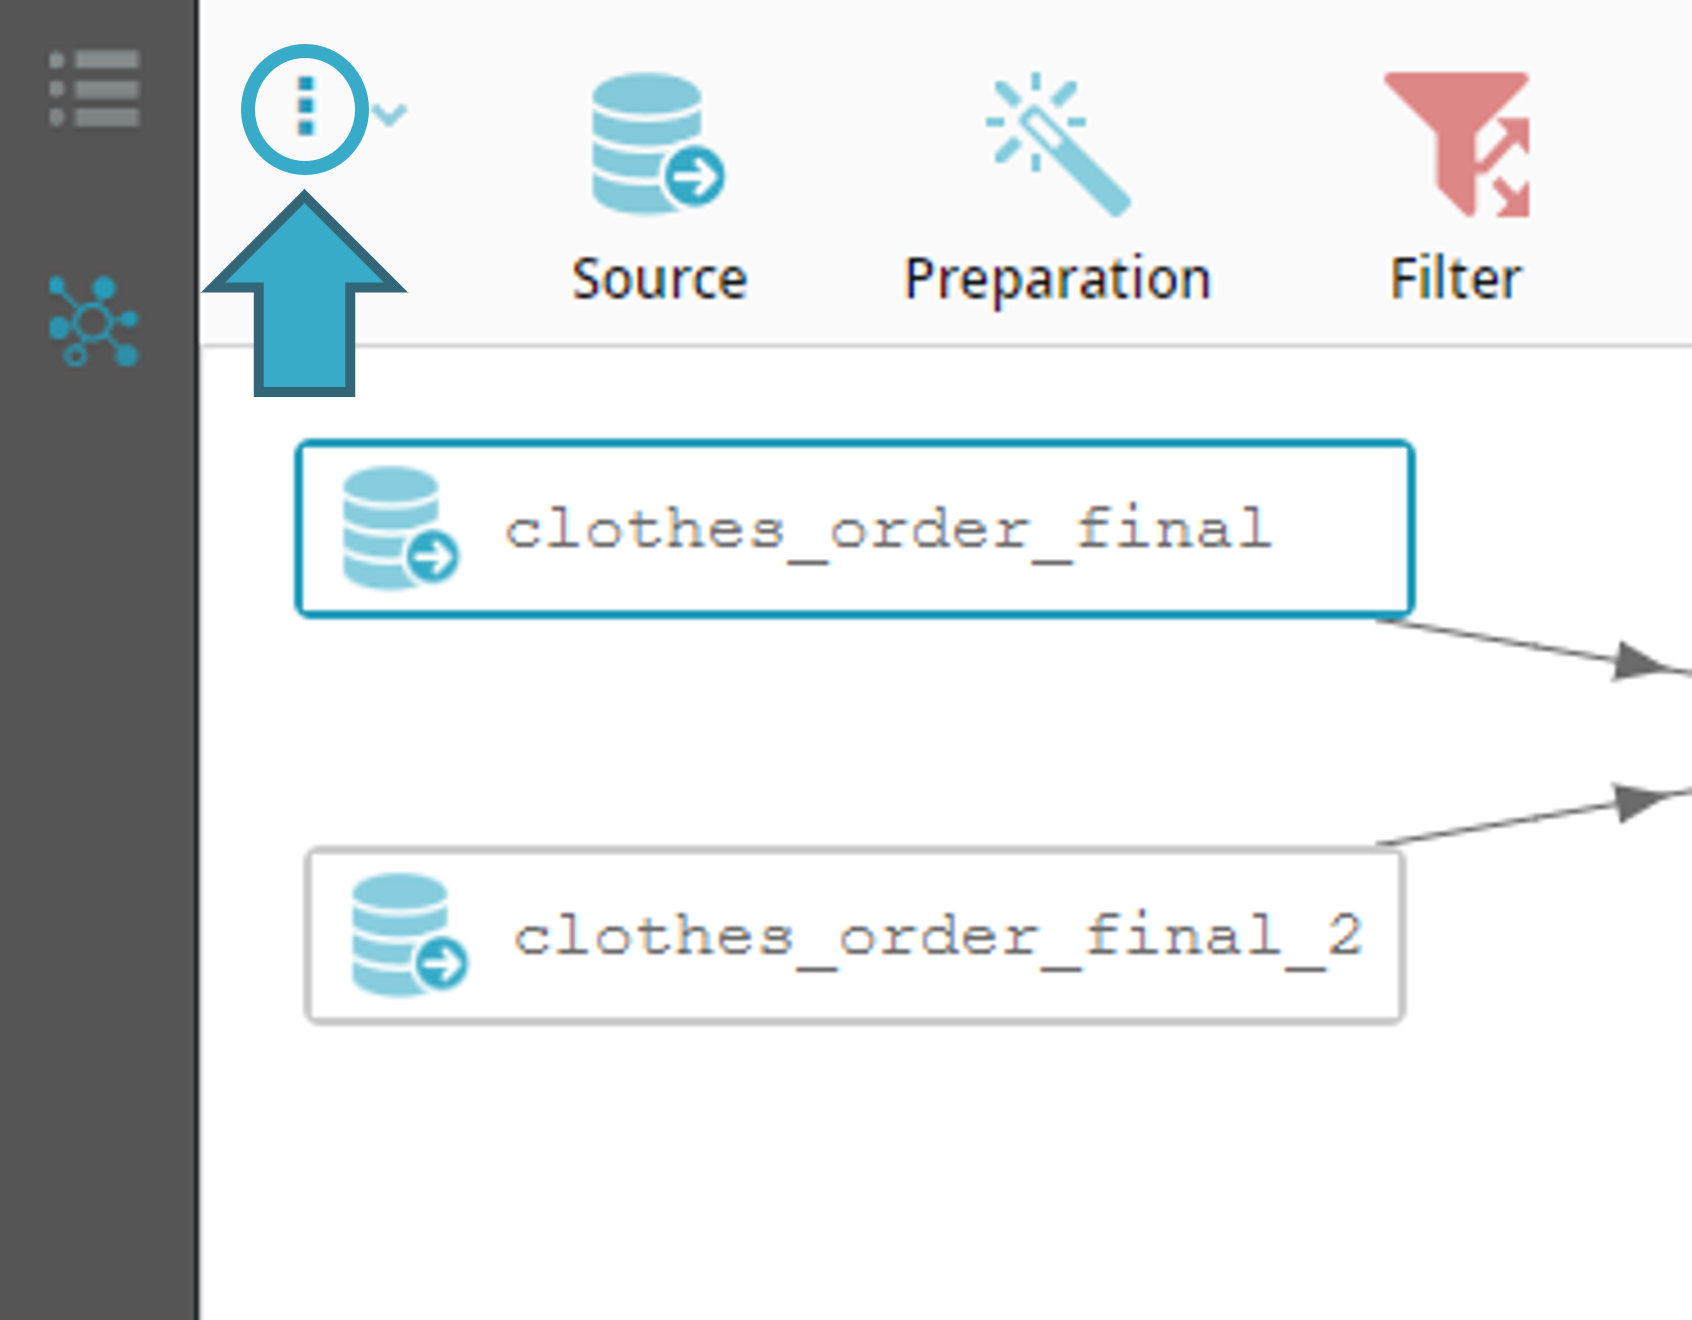
Finally, to show or hide the descriptions in a flow, use the menu located on the left side of the flow designer.
3.5.2. Add or modify descriptions on nodes or on the flow.
Descriptions are written in HTML, and TOD offers a WYSIWYG editor to make formatting easier.
It is thus easy to :
create numbered or bulleted lists
make text bold
change the font size
It is also possible to add HTML links within the descriptions of nodes or the flow. Clicking on one of these links will automatically open the target in a new browser tab.
To enter the text of a description for a source or a target, click here:
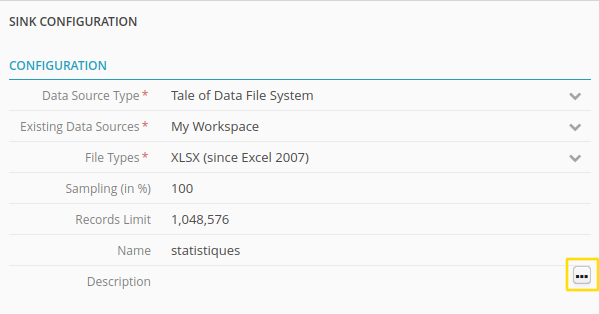
To enter the text of a description for a node (excluding source and target), click here:”

3.5.3. Flow history
Back to the Future: Flow History and Documentation
You can get back whenever you want to how a particular flow was at a give time in the past. This is very flexible because it allows you to go back to a particular state, do some trials and make changes, and then come back to how the flow was just before you started experimenting. When you combine that with the ability to duplicate flows (in the Flow list), the possibilities are pretty endless.
During flow design, all changes made to it will create a version of the flow that will be saved immediately.
The list of saved versions is the flow history.
You can restore any version of the flow that is stored in the history. This can be very useful if you want to take a step backwards in your work on the flow design.
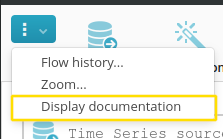
To restore an archived version of the flow, click the three little dots in the top left of the toolbar and then from the drop-down menu select: Flow history.
|
The history window will open:
|
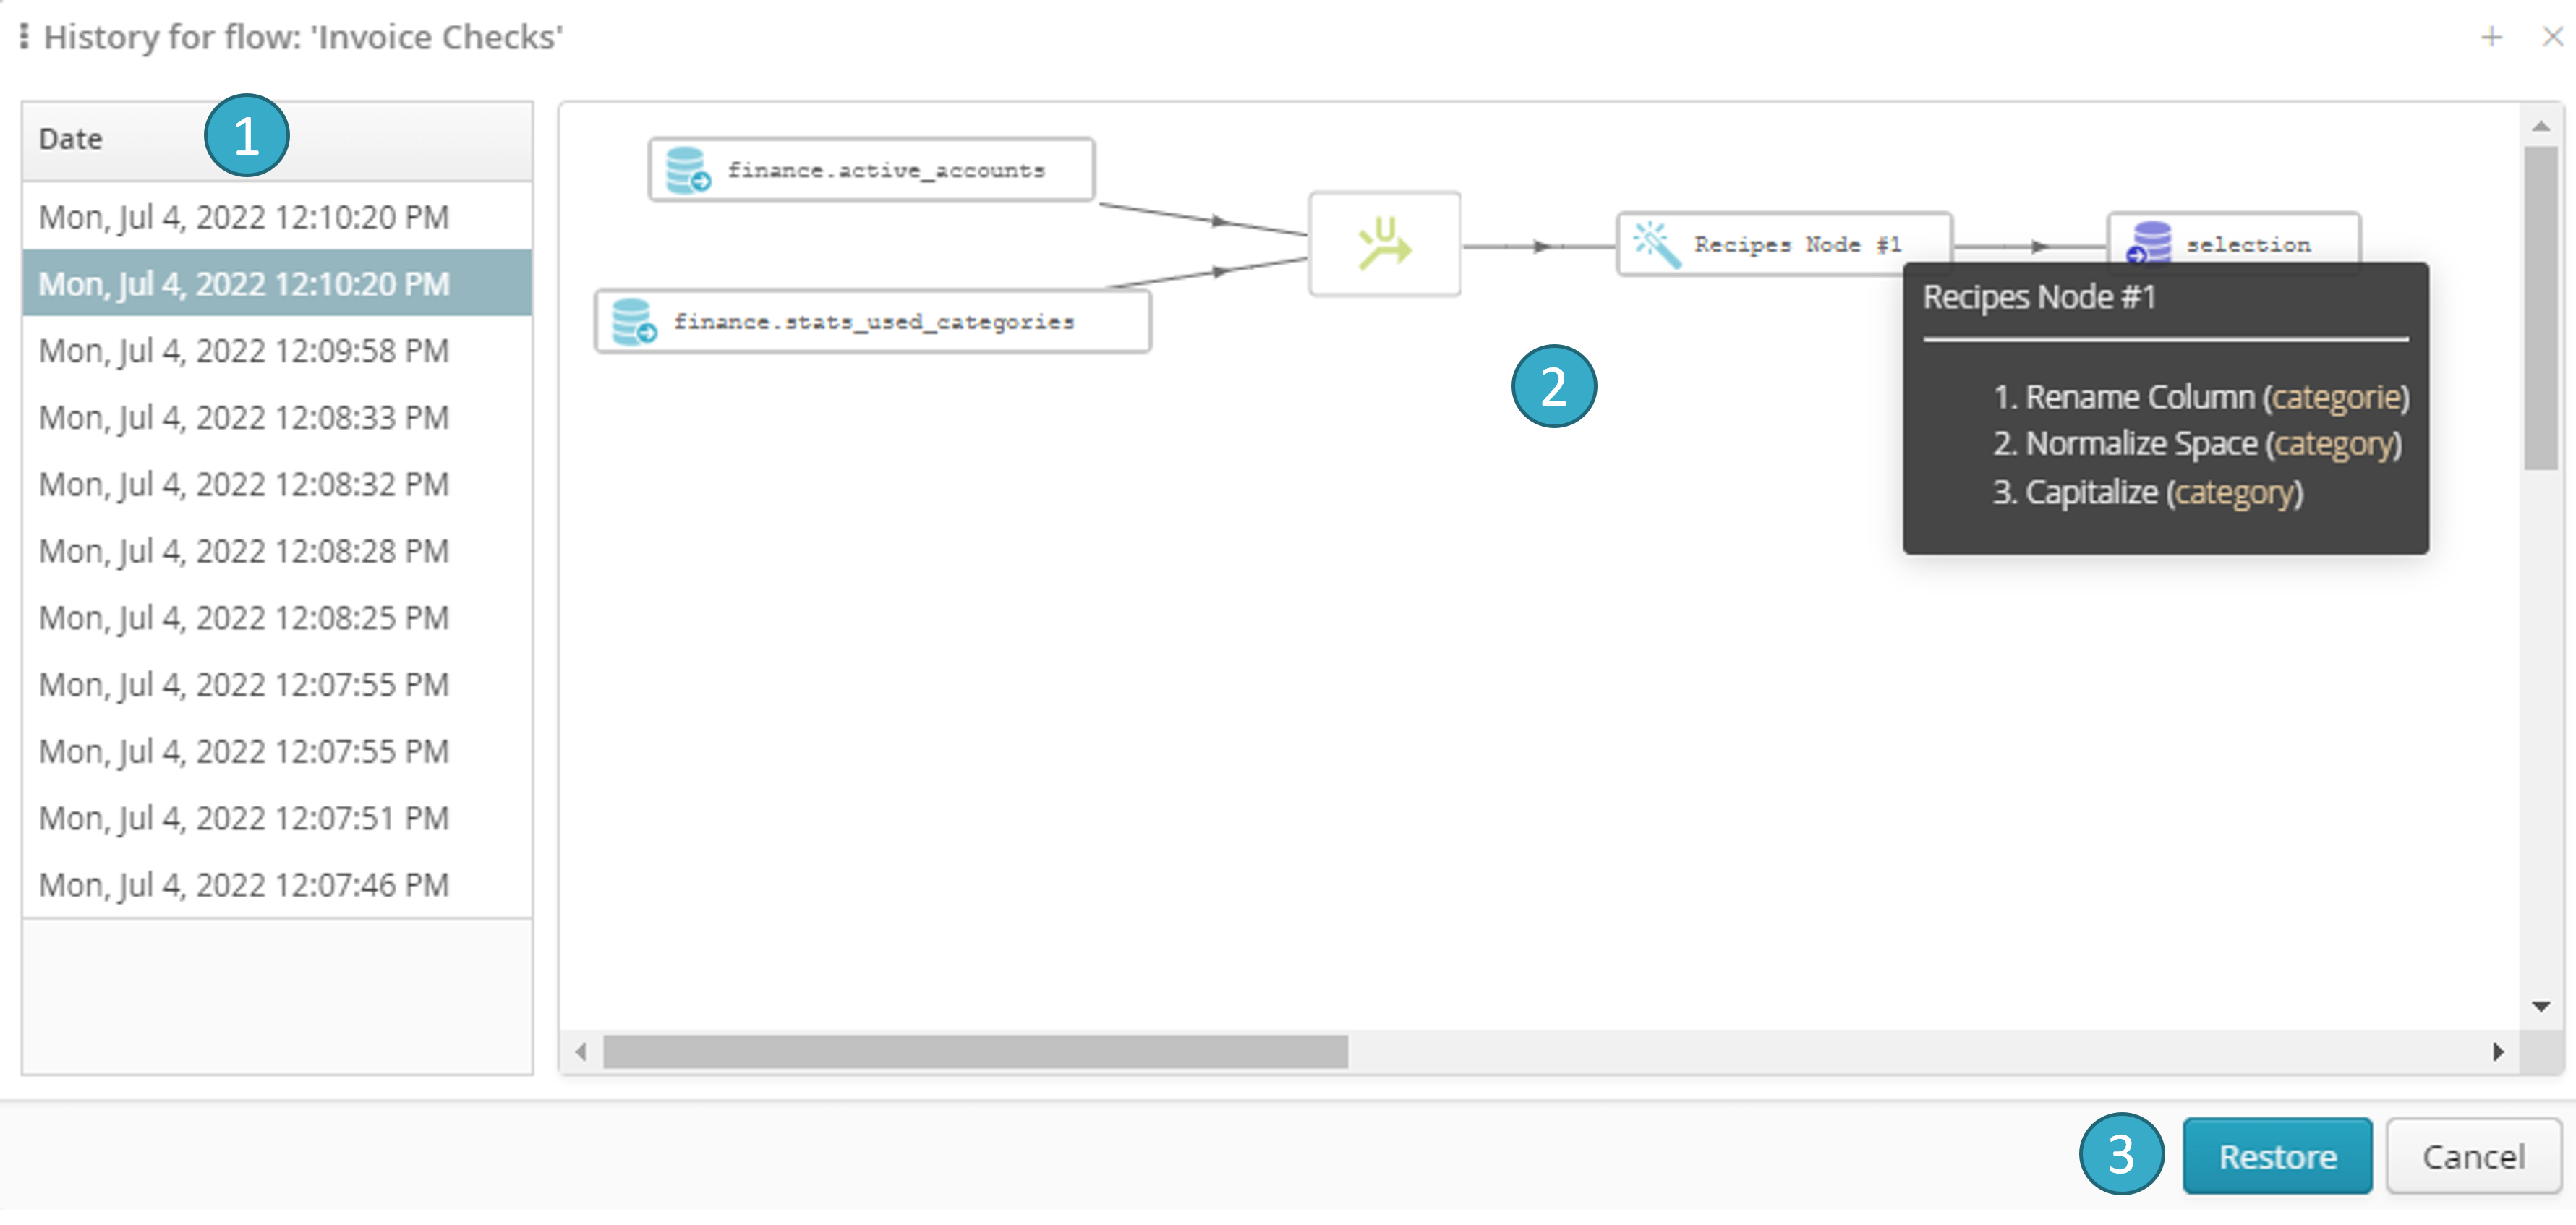
Zone for selecting the version of the flow that is to be restored
.Zone for previewing the version of the flow selected in the previous step. Hover the mouse over flow items to see the status of each node/function in this version.
Restore button
. Click this to move the current version of the flow to the history and replace it with the version selected at step 1.
Note
By default, the last 30 versions of any flow will be saved to the history.
3.5.4. Delete
 Deletes a node or a selected flow link. This action can be performed more quickly via the
 DEL, CTRL+DEL or backspace keyboard shortcuts.
3.5.5. Refresh
 Reloads data from source nodes.
3.5.6. Generating flow documentation
To make it easier to discuss, understand and track a flow, you can generate pdf documents that clearly describe the configuration of each node in the flow. To do this, just click the Documentation icon in the flow toolbar:
|

3.5.7. Importing flow nodes and functions
Certain types of processing that use various types of flow nodes may need to be re-used in other flows. By importing flow nodes you can duplicate one or more nodes from a source flow in the (current) sink flow. The source and sink flows* can be the same **flow.
To import one or more nodes into the (current) sink flow, click the Import icon  on the flow toolbar:
|

The following selection window will open:
|
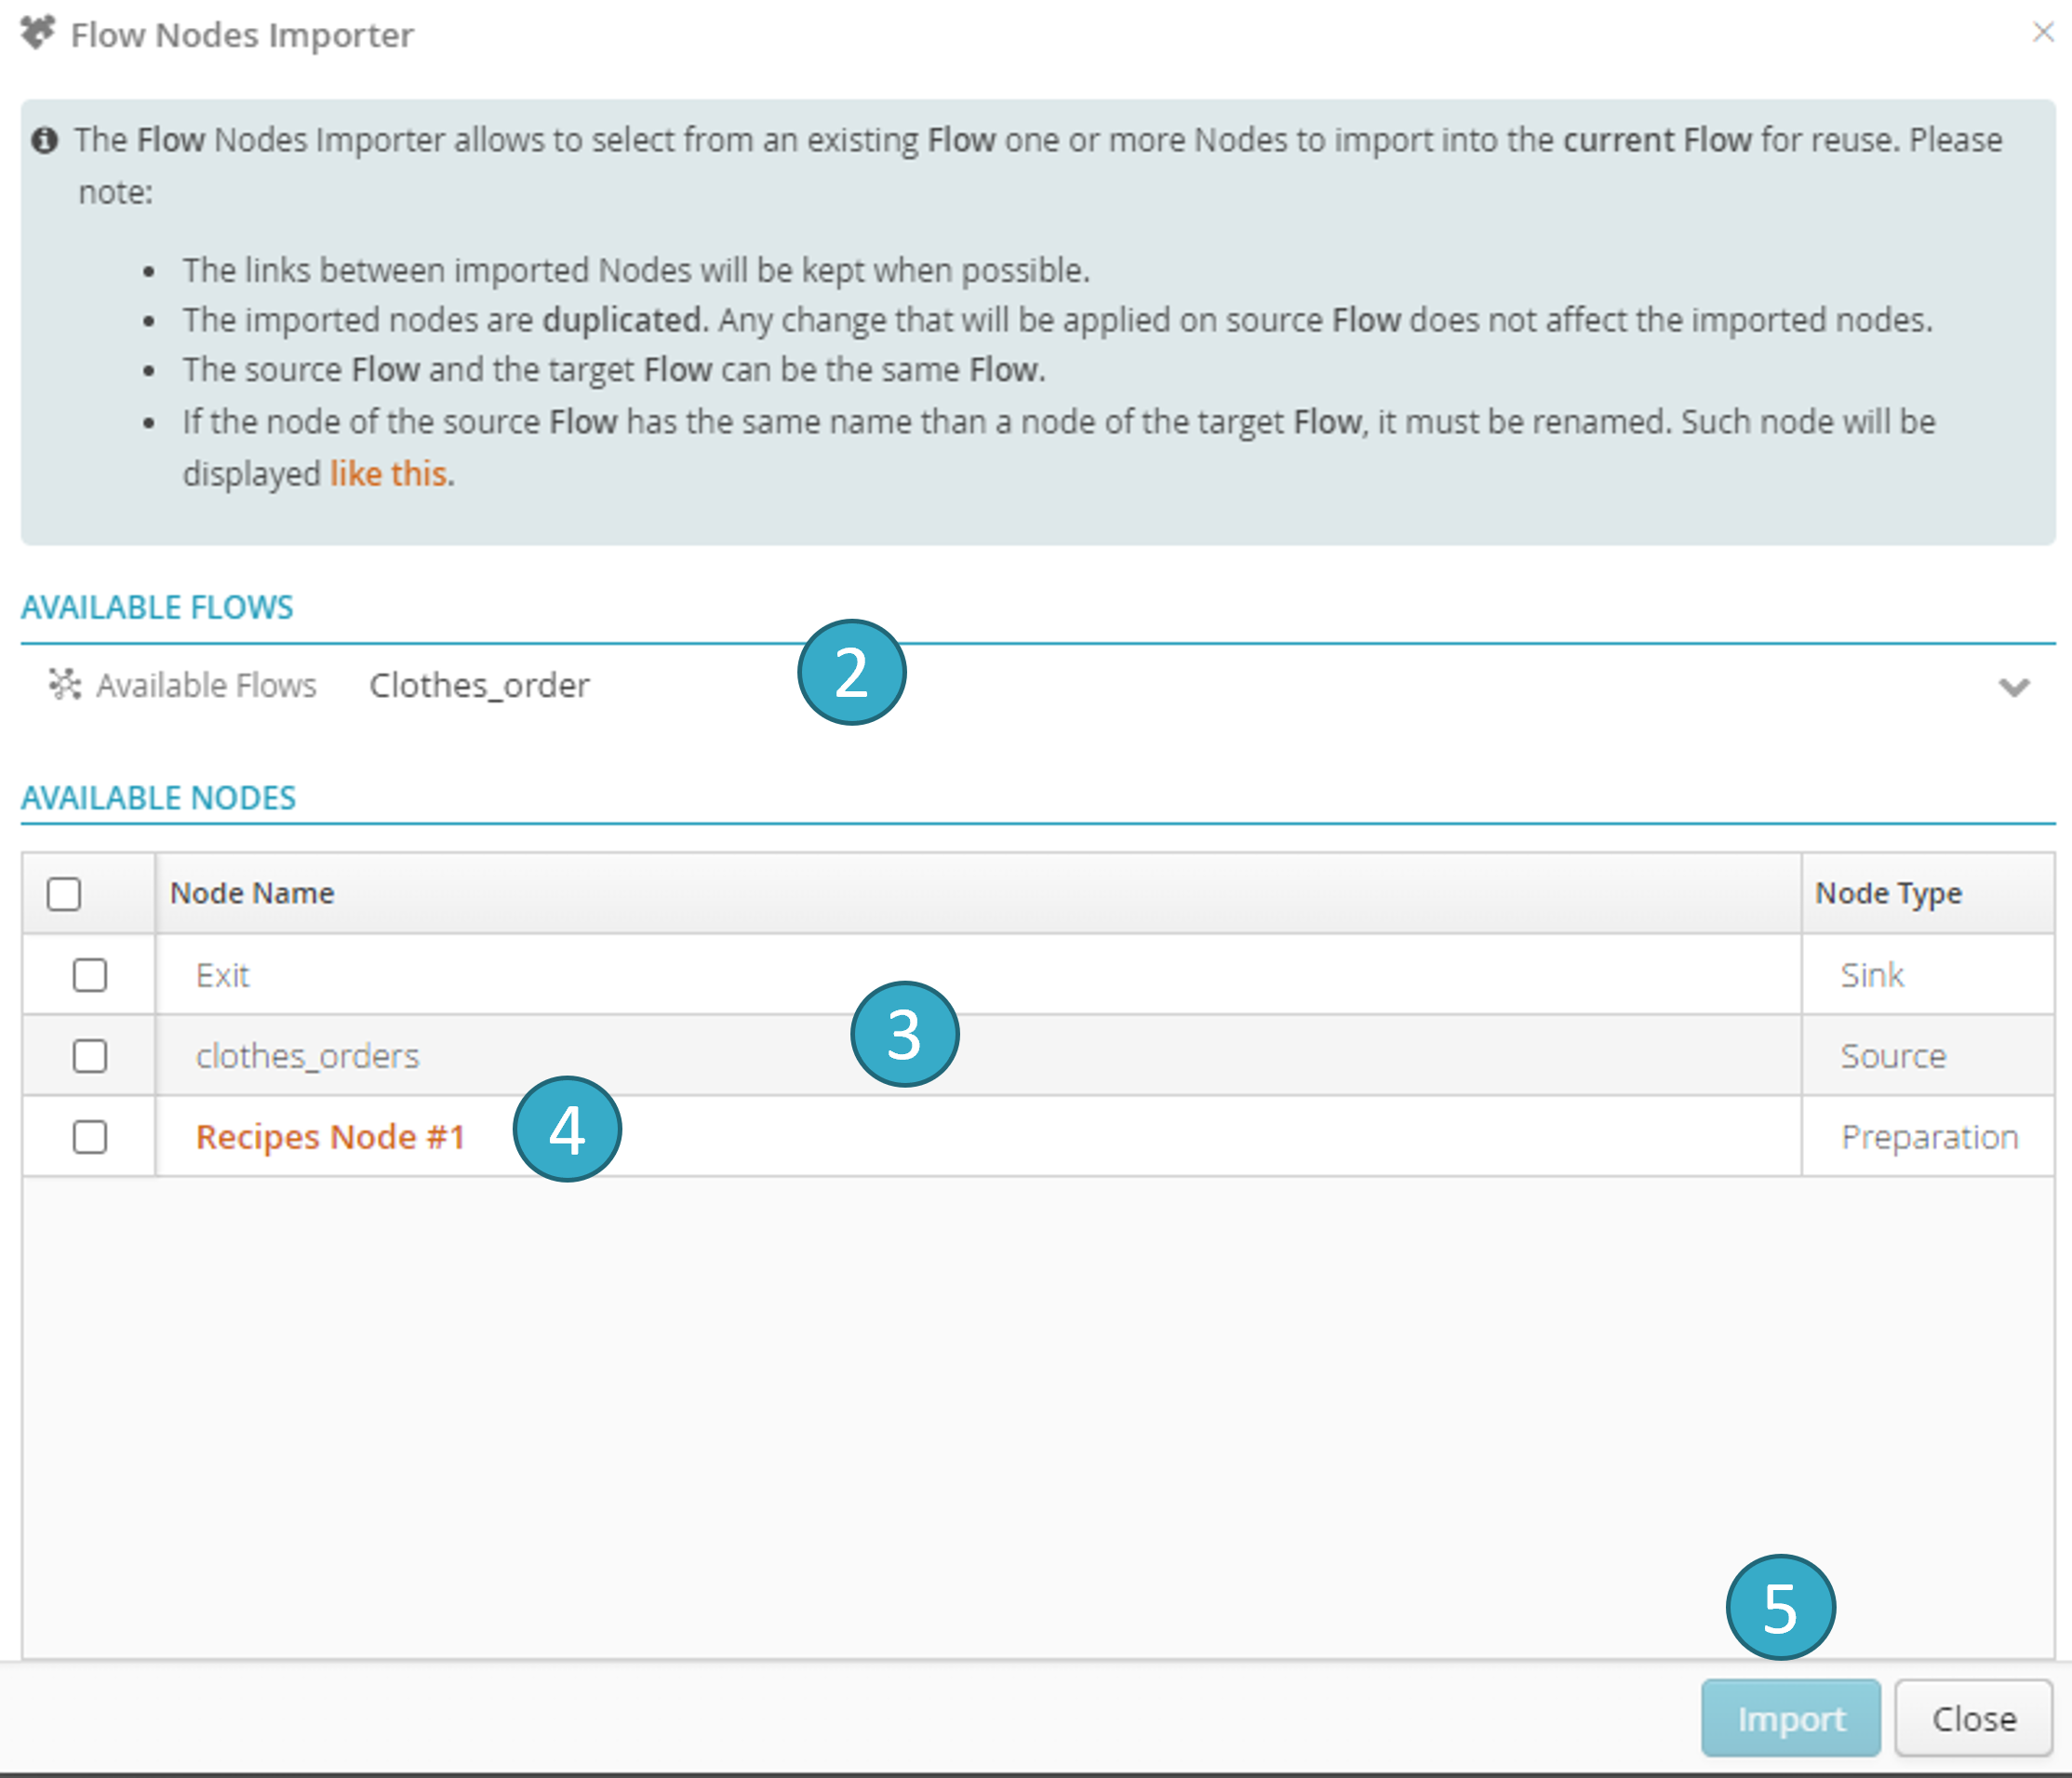
Zone for selecting a source flow
.Zone for selecting the nodes to be imported
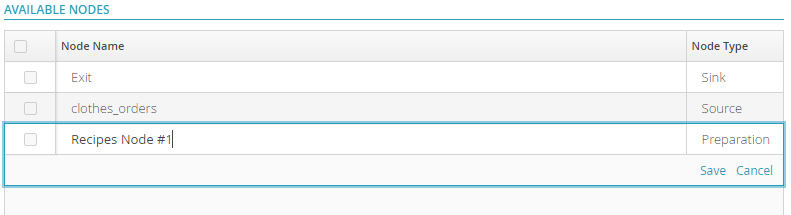
.If a node in the source flow has the same name as a node in the sink flow
, you must set the name the node will have in the sink flow so that you can deduplicate it.
Double-click the name of the node to display an editing zone:
|
Once the nodes have been selected and named, click Import to validate the import. .