6.3. Data quality
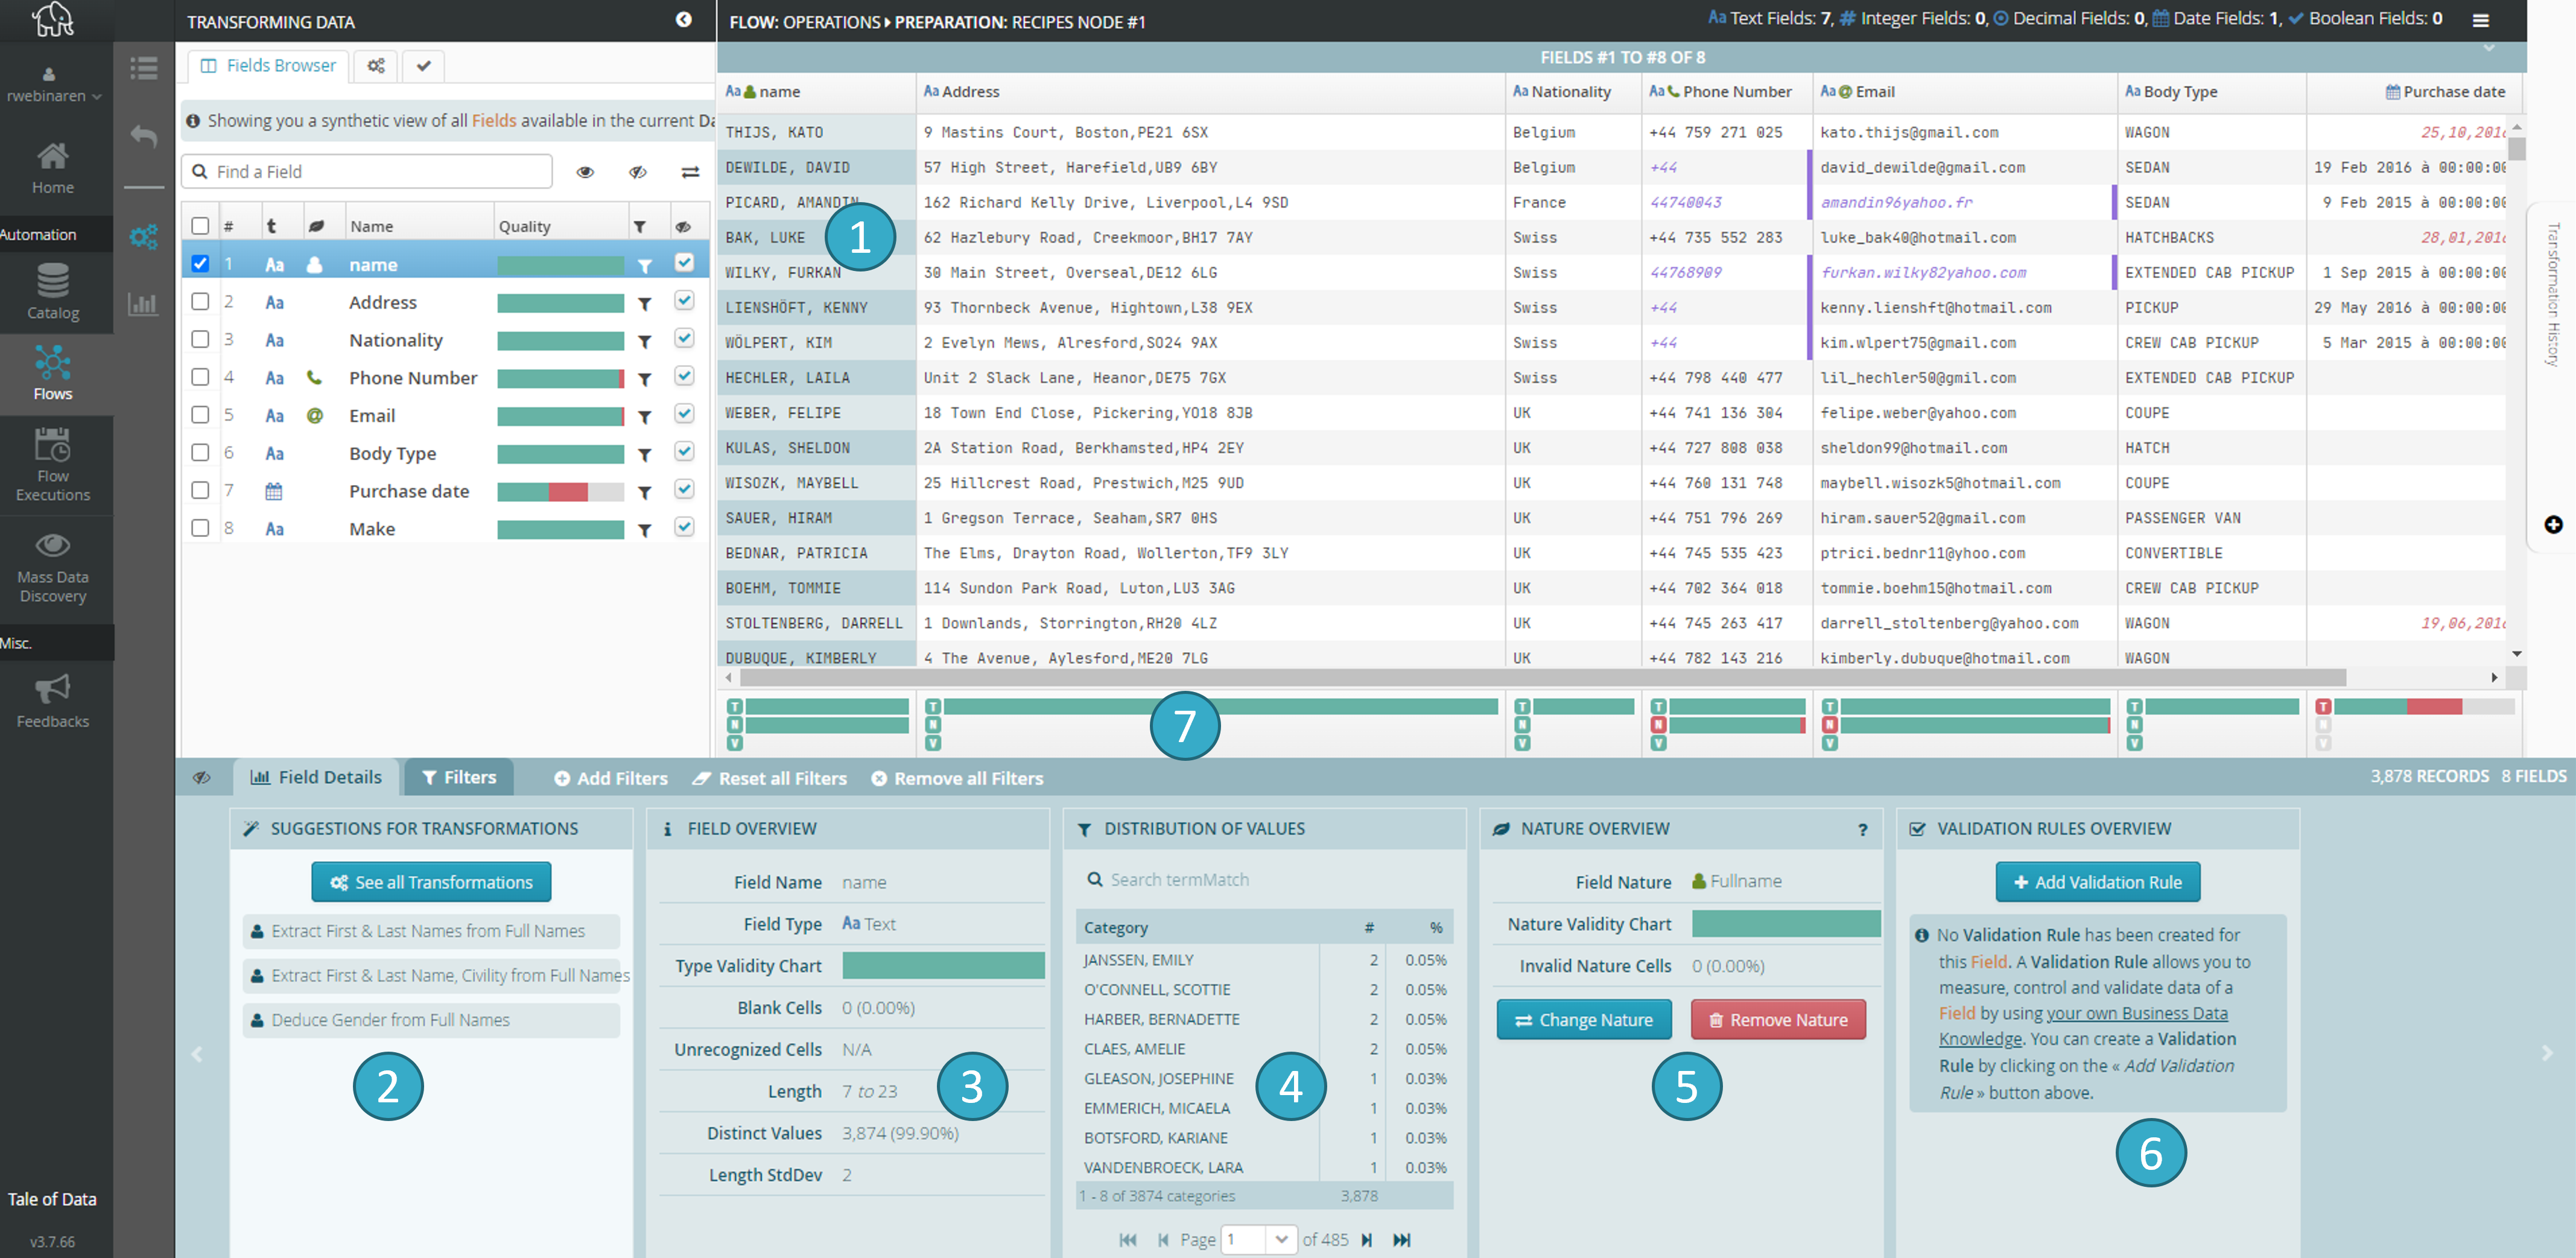
Data quality zone displays when you double-click a field
 . Double-click again to hide the zone.
Transformation suggestion zone
 .
.Box presenting statistics for the selected field
 .
.Box for distributing values for the selected field
 .
.Box for managing the nature of the selected field and viewing its validity statistics
 .
.Box for managing the field validation rules for the selected field and viewing its validity statistics
 .
.TNV (Type – Nature – Validation Rules) zone
 showing in chart format the data quality status of every field in the dataset.
Tip
You can click any chart in Data Quality to filter the dataset.
6.3.1. Managing natures
A nature is an item of business data that is governed by common rules known to everyone, e.g. telephone numbers, emails, etc.
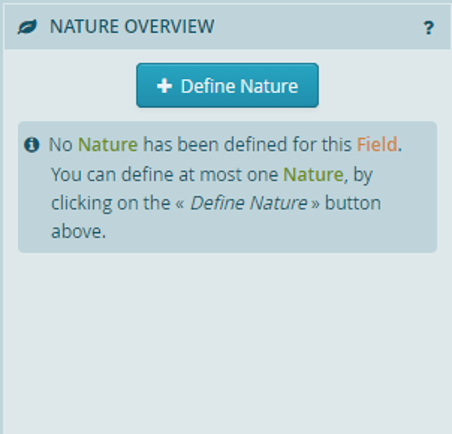
If no nature has been attributed to a field, this view will display.
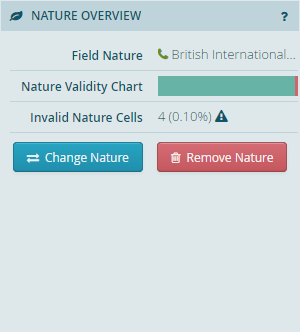
If a nature has already been attributed to a field, this view will display.
Just one nature can be attributed per field.
6.3.2. Available natures
The following natures are available:
Email.
Telephone number: FR / US (international and national); Formats: E164, International.
Postcode, INSEE municipality code.
GTIN : GTIN-8, GTIN-12, GTIN-13, GTIN-14.
ISBN-10.
IPv4.
SIREN, SIRET.
Gender, title.
Surname, first name, full name.
RIB, IBAN.
French Social Security number.
Pôle-emploi login.
URL.
Country code (ISO-3166-1 alpha2, ISO-3166-1 alpha3).
6.3.3. Add Field Validation Rule
A field validation rule is a business constraint that is usually known only to business experts and serves to ensure that there are no inconsistencies or, if there are inconsistencies, to measure them.
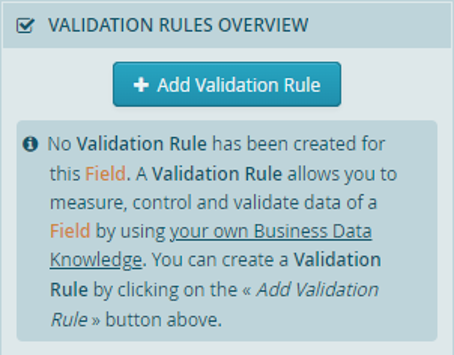
If no field validation rule has been attributed, the box above will become available. Click Add a validation rule to add a new field validation rule to the selected field.
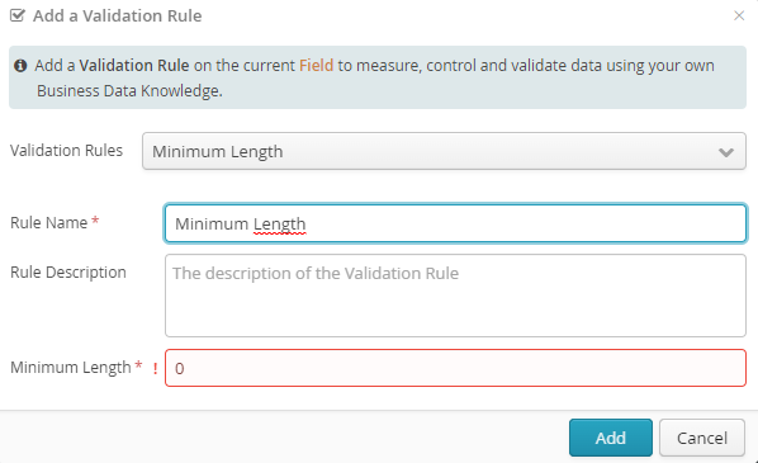
The list of available field validation rules will vary, depending on the type of data in the selected field.
Text fields:
Pattern (regular expressions).
Minimum length.
Maximum length.
Precise length.
Enumeration by value.
Not empty.
Numeric fields:
Range of values.
Not empty.
Date fields:
Range of values.
Not empty.
Just one type of field validation rule can be attributed per field. In other words, you cannot e.g. set two minimum length field validation rules for the same field.
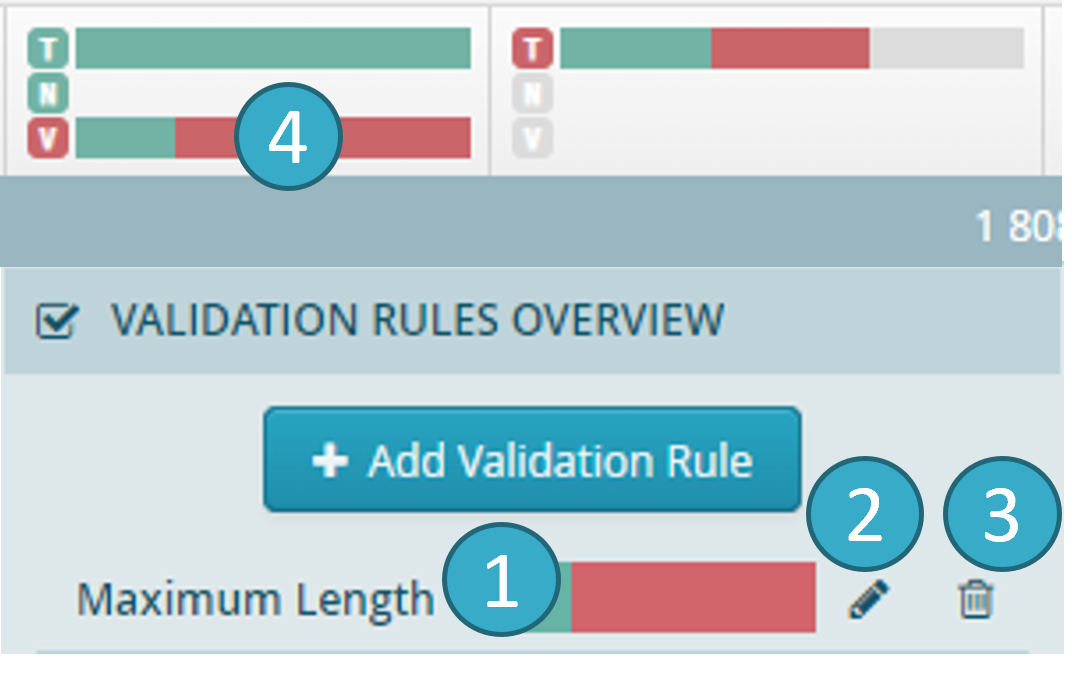
List
of field validation rules for the selected field.Editing
a field validation rule.Deleting
a field validation rule.The V in the TNV zone
shows the average validity of the field validation rules added to each field.
Note
Practical example : Add Field Validation Rule
Before Transformation:
ID |
Name |
Status |
|
|---|---|---|---|
1 |
Alice |
Active |
|
2 |
Bob |
Pending |
|
3 |
Carol |
Cancelled |
Transformation Configuration:
Rule: add an Enumeration by value constraint to the status field. Allowed values are : Active, Pending.
After Transformation:
ID |
Name |
Status |
|
|---|---|---|---|
1 |
Alice |
Active |
|
2 |
Bob |
Pending |
|
3 |
Carol |
Cancelled* |
*This example shows that after adding the Field Validation Rule, the value Cancelled will be considered invalid (in the preparation editor, a purple bar will appear on the right of the cell).
6.3.4. Update Field Validation Rule
A field validation rule is a business constraint applied to a single column. The Update Field Validation Rule transformation is automatically added to the transformation history when a Field Validation Rule is updated in the preparation editor.
It’s important to note that updating a field validation rule does not modify the dataset in any way. The notion of Field Validation Rule is a marker managed by Tale of Data, which can be used later to separate invalid from valid rows, for example.
Note
Practical example : Update Field Validation Rule
Suppose a field validation rule is set on the age column, indicating that the age must be greater than or equal to 30.
Before Transformation:
ID |
Name |
Age |
|---|---|---|
1 |
Alice |
30 |
2 |
Bob |
27 (field rule violation) |
3 |
Charlie |
35 |
According to our field rule, Bob’s age is invalid.
Transformation Configuration:
No configuration, just update, in the preparation editor, the field rule. For example, set it to: Age must be greater than or equal to 32
After Transformation:
ID |
Name |
Age |
|---|---|---|
1 |
Alice |
30 (field rule violation) |
2 |
Bob |
27 (field rule violation) |
3 |
Charlie |
35 |
Once the rule has been update, the only valid row is #3. This is the only row for which the age is greater than or equal to 32.
6.3.5. Remove (Field) Validation Rule
A field validation rule is a business constraint applied to a single column (“Field” is implied”). The Remove Validation Rule transformation (“Field” is implied”) is automatically added to the transformation history when a Field Validation Rule is removed in the preparation editor.
It’s important to note that removing a field validation rule does not modify the dataset in any way. The notion of Field Validation Rule is a marker managed by Tale of Data, which can be used later to separate invalid from valid rows, for example.
Note
Practical example : Remove (Field) Validation Rule
Suppose a field validation rule is set on the age column, indicating that the age must be greater than or equal to 30.
Before Transformation:
ID |
Name |
Age |
|---|---|---|
1 |
Alice |
30 |
2 |
Bob |
27 (field rule violation) |
3 |
Charlie |
35 |
According to the field rule, Bob’s age is invalid.
Transformation Configuration:
No configuration, just remove, in the preparation editor, the field rule Age must be greater than or equal to 30
After Transformation:
ID |
Name |
Age |
|---|---|---|
1 |
Alice |
30 |
2 |
Bob |
27 |
3 |
Charlie |
35 |
Once the rule has been deleted, all values in the age column are valid.
6.3.6. Add a Record validation rules
Record validation rules let you check a particular record (or row) without having to write any code. The checks can involve combinations of conditions across several fields (e.g. fieldA < fieldB).
Structure of record validation rules:
IF : <Add conditions separated by AND/OR>.
Then: tick one of the two options: The row is valid if condition IF is true or The row is invalid if condition IF is true.
Click Add to create a new record validation rule:
The record validation rules editor will display the following fields:
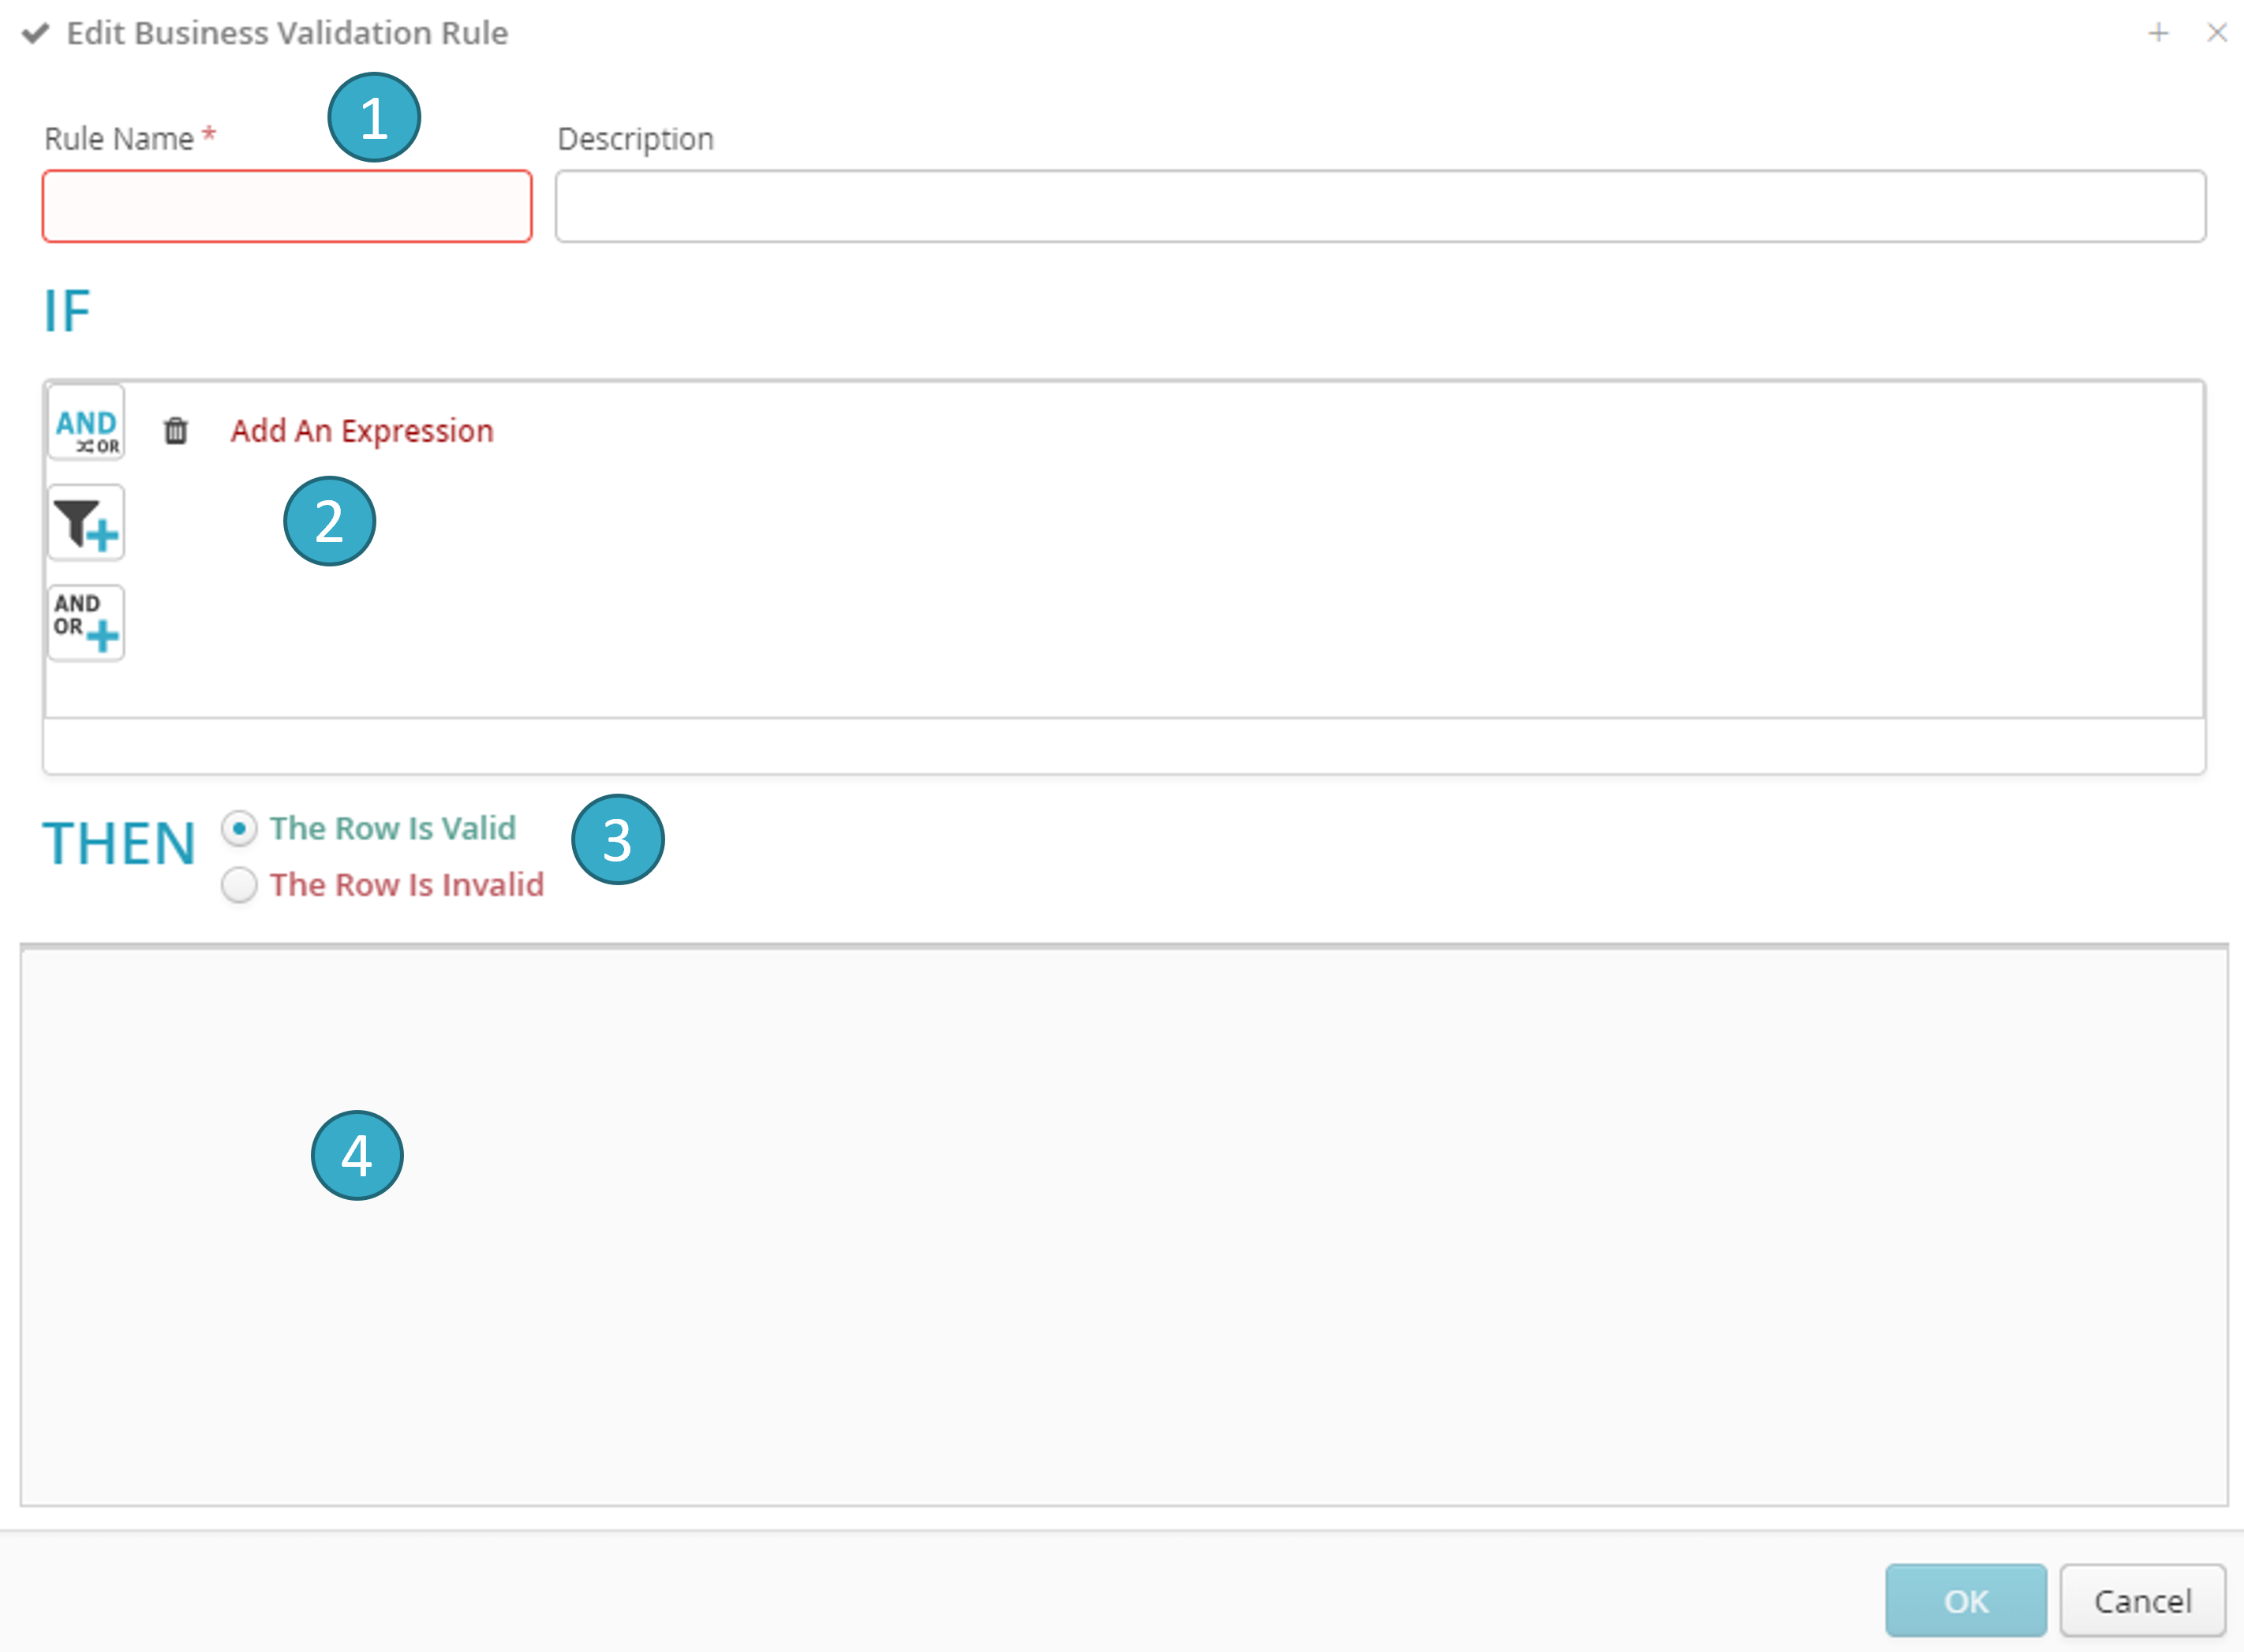
Zone for naming and describing the rule
.Zone for defining condition IF
.Zone for setting the rule valuation mode
. Two options: The row is valid if condition IF is true or The row is invalid if condition IF is true.Zone for previewing the result of rule evaluation
.
To add a condition, click “Add an Expression” in the zone . A dialogue window will open:
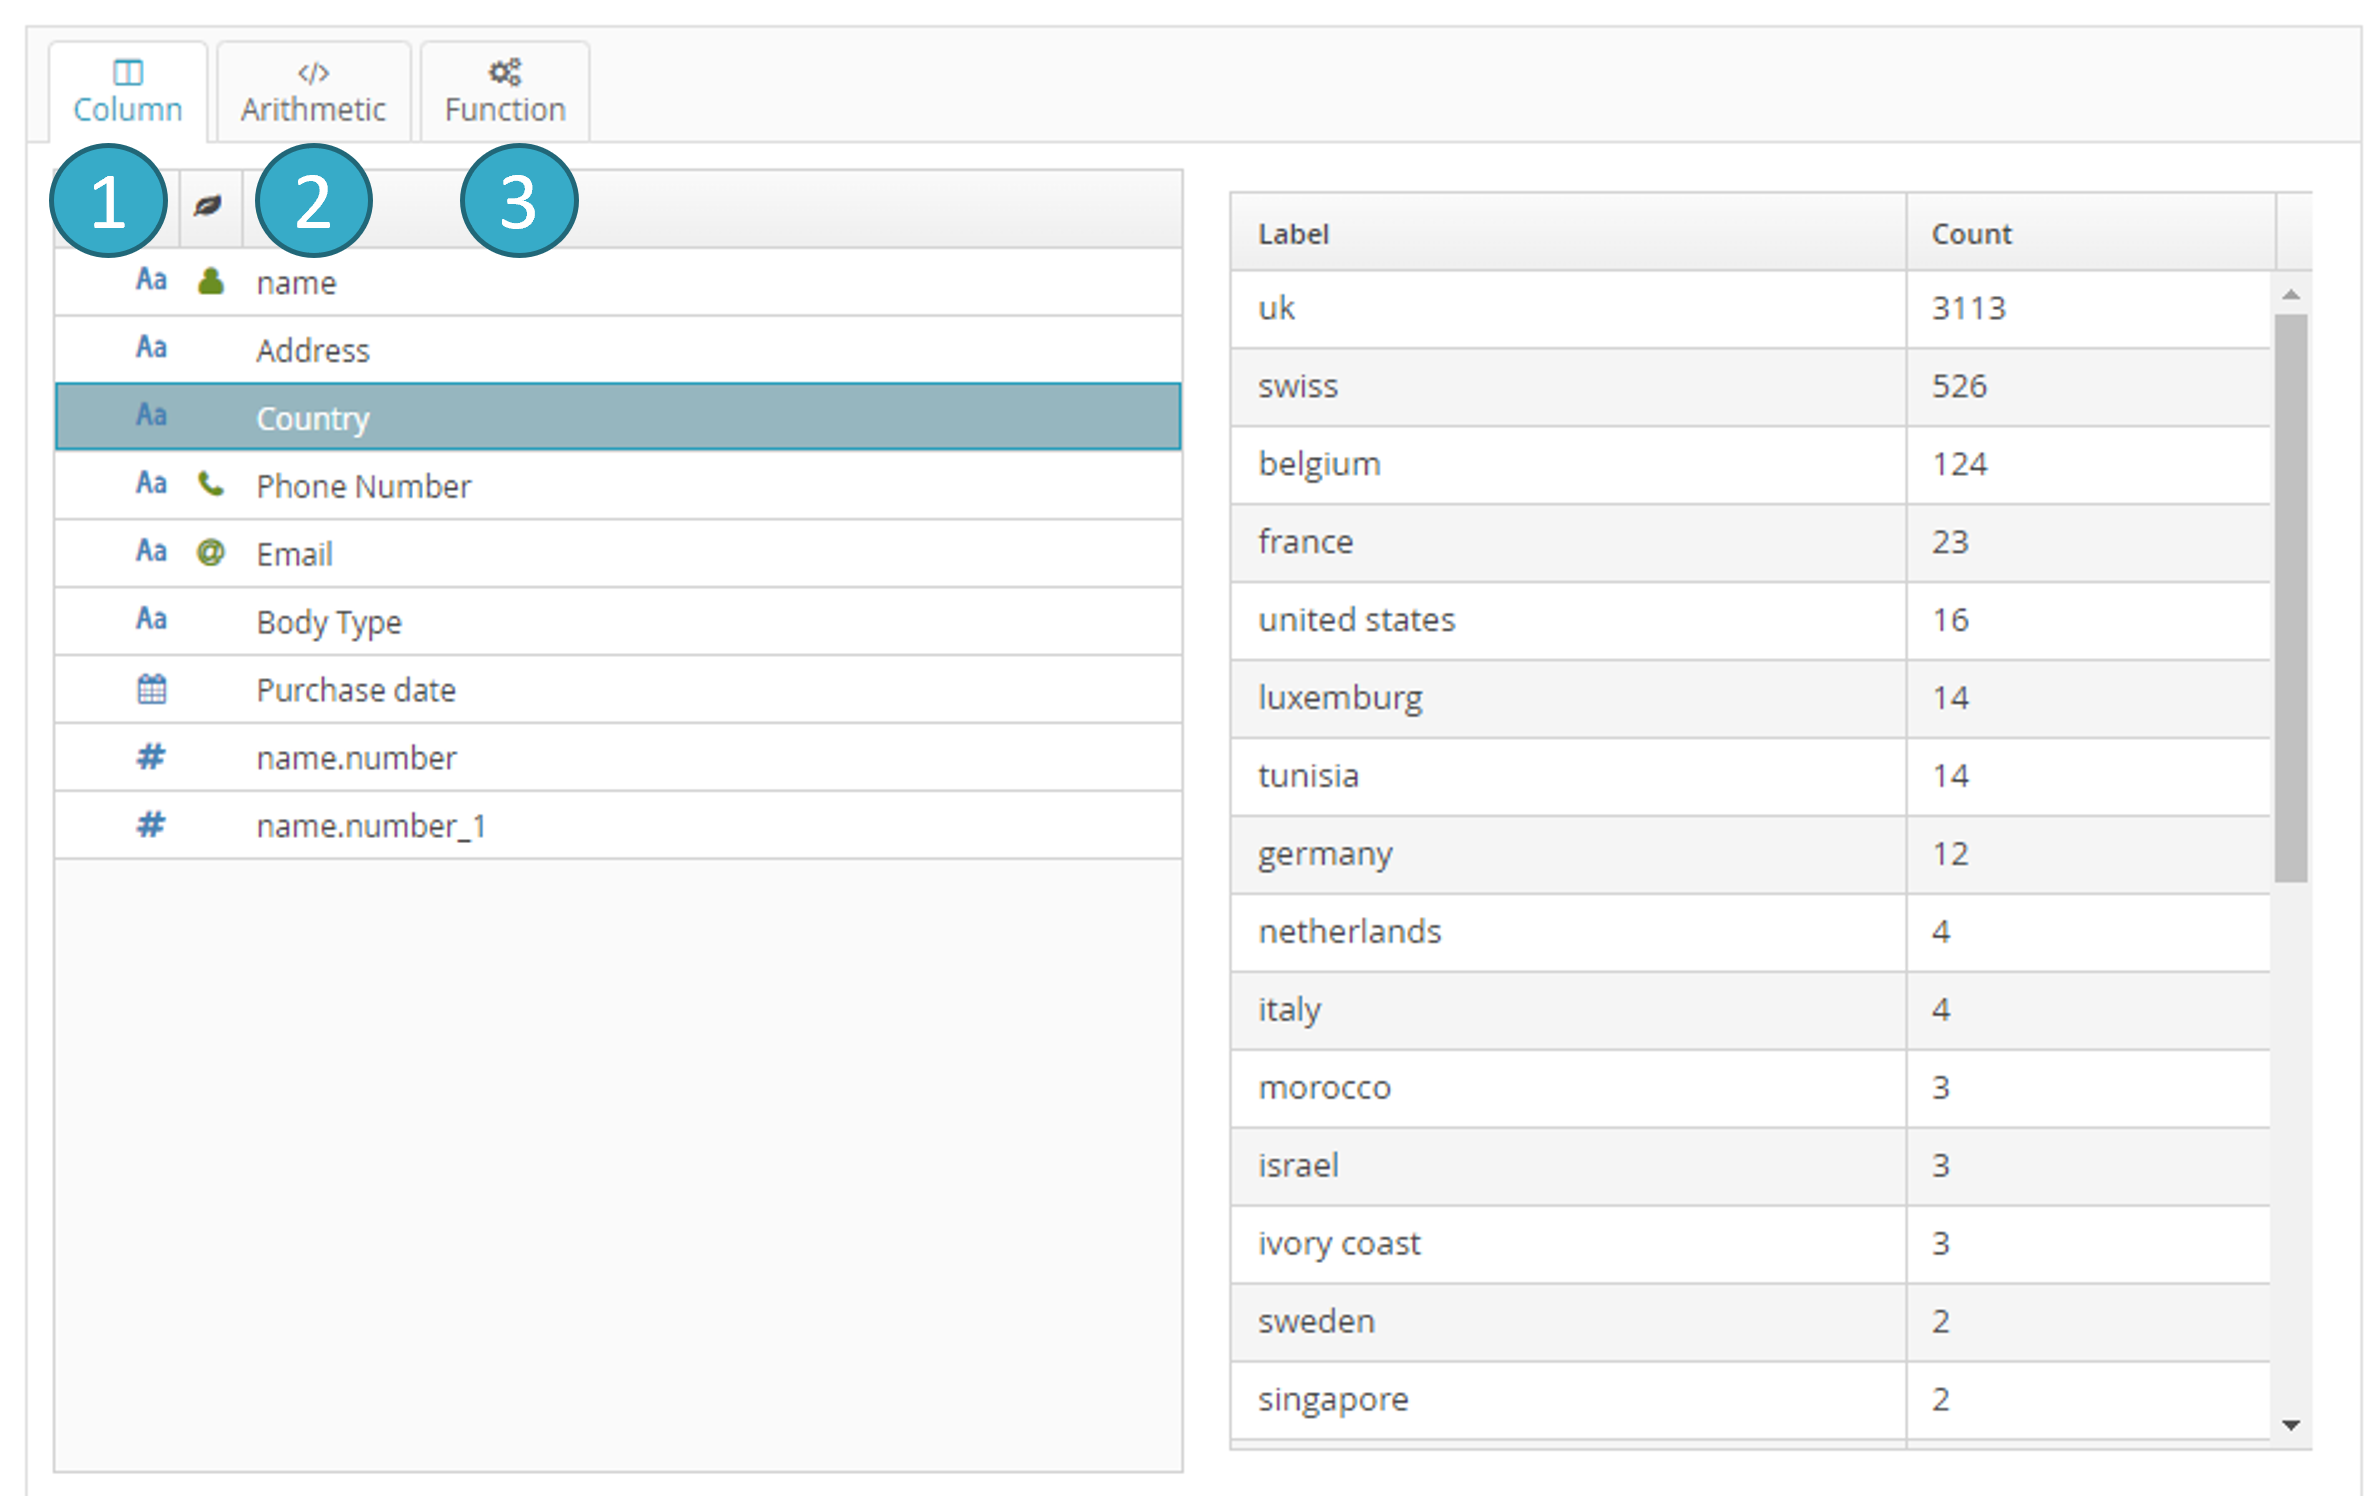
In the left section of a condition, you can add:
A field
. Just double-click the name of the field.An arithmetic expression
, e.g. field1 + field2.A function
, e.g. contains, starts with, etc.
As the screen capture below shows, you must then add the right section of the condition by clicking Add an Expression to the right of the operator:
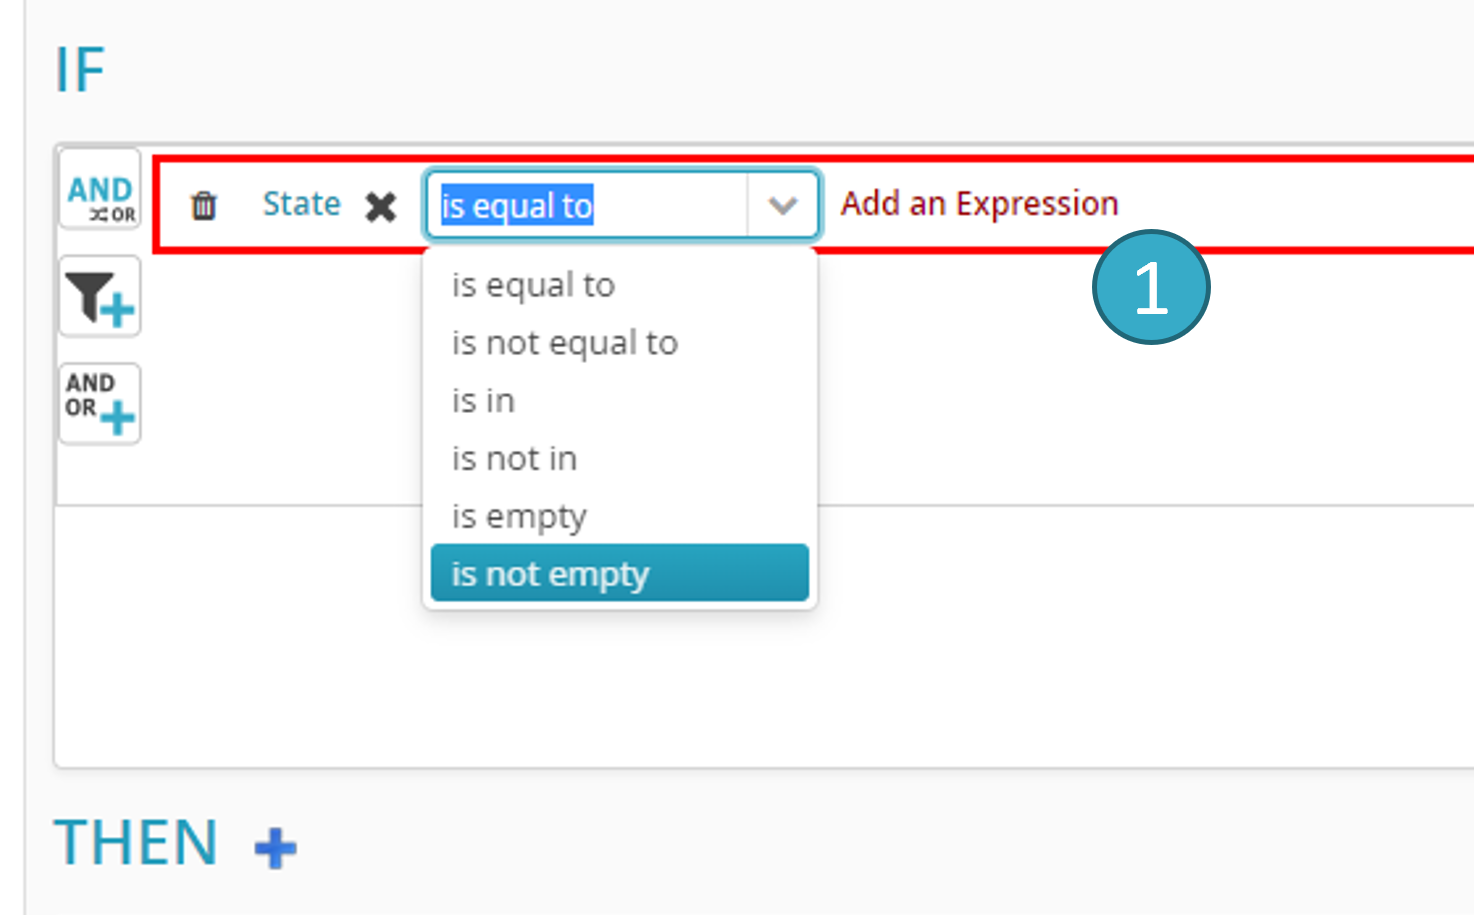
In the right section of a condition you can enter:
A literal (a number, text, date, etc.).
The value of a different field (e.g. IF field1= field2).
The result of a function.
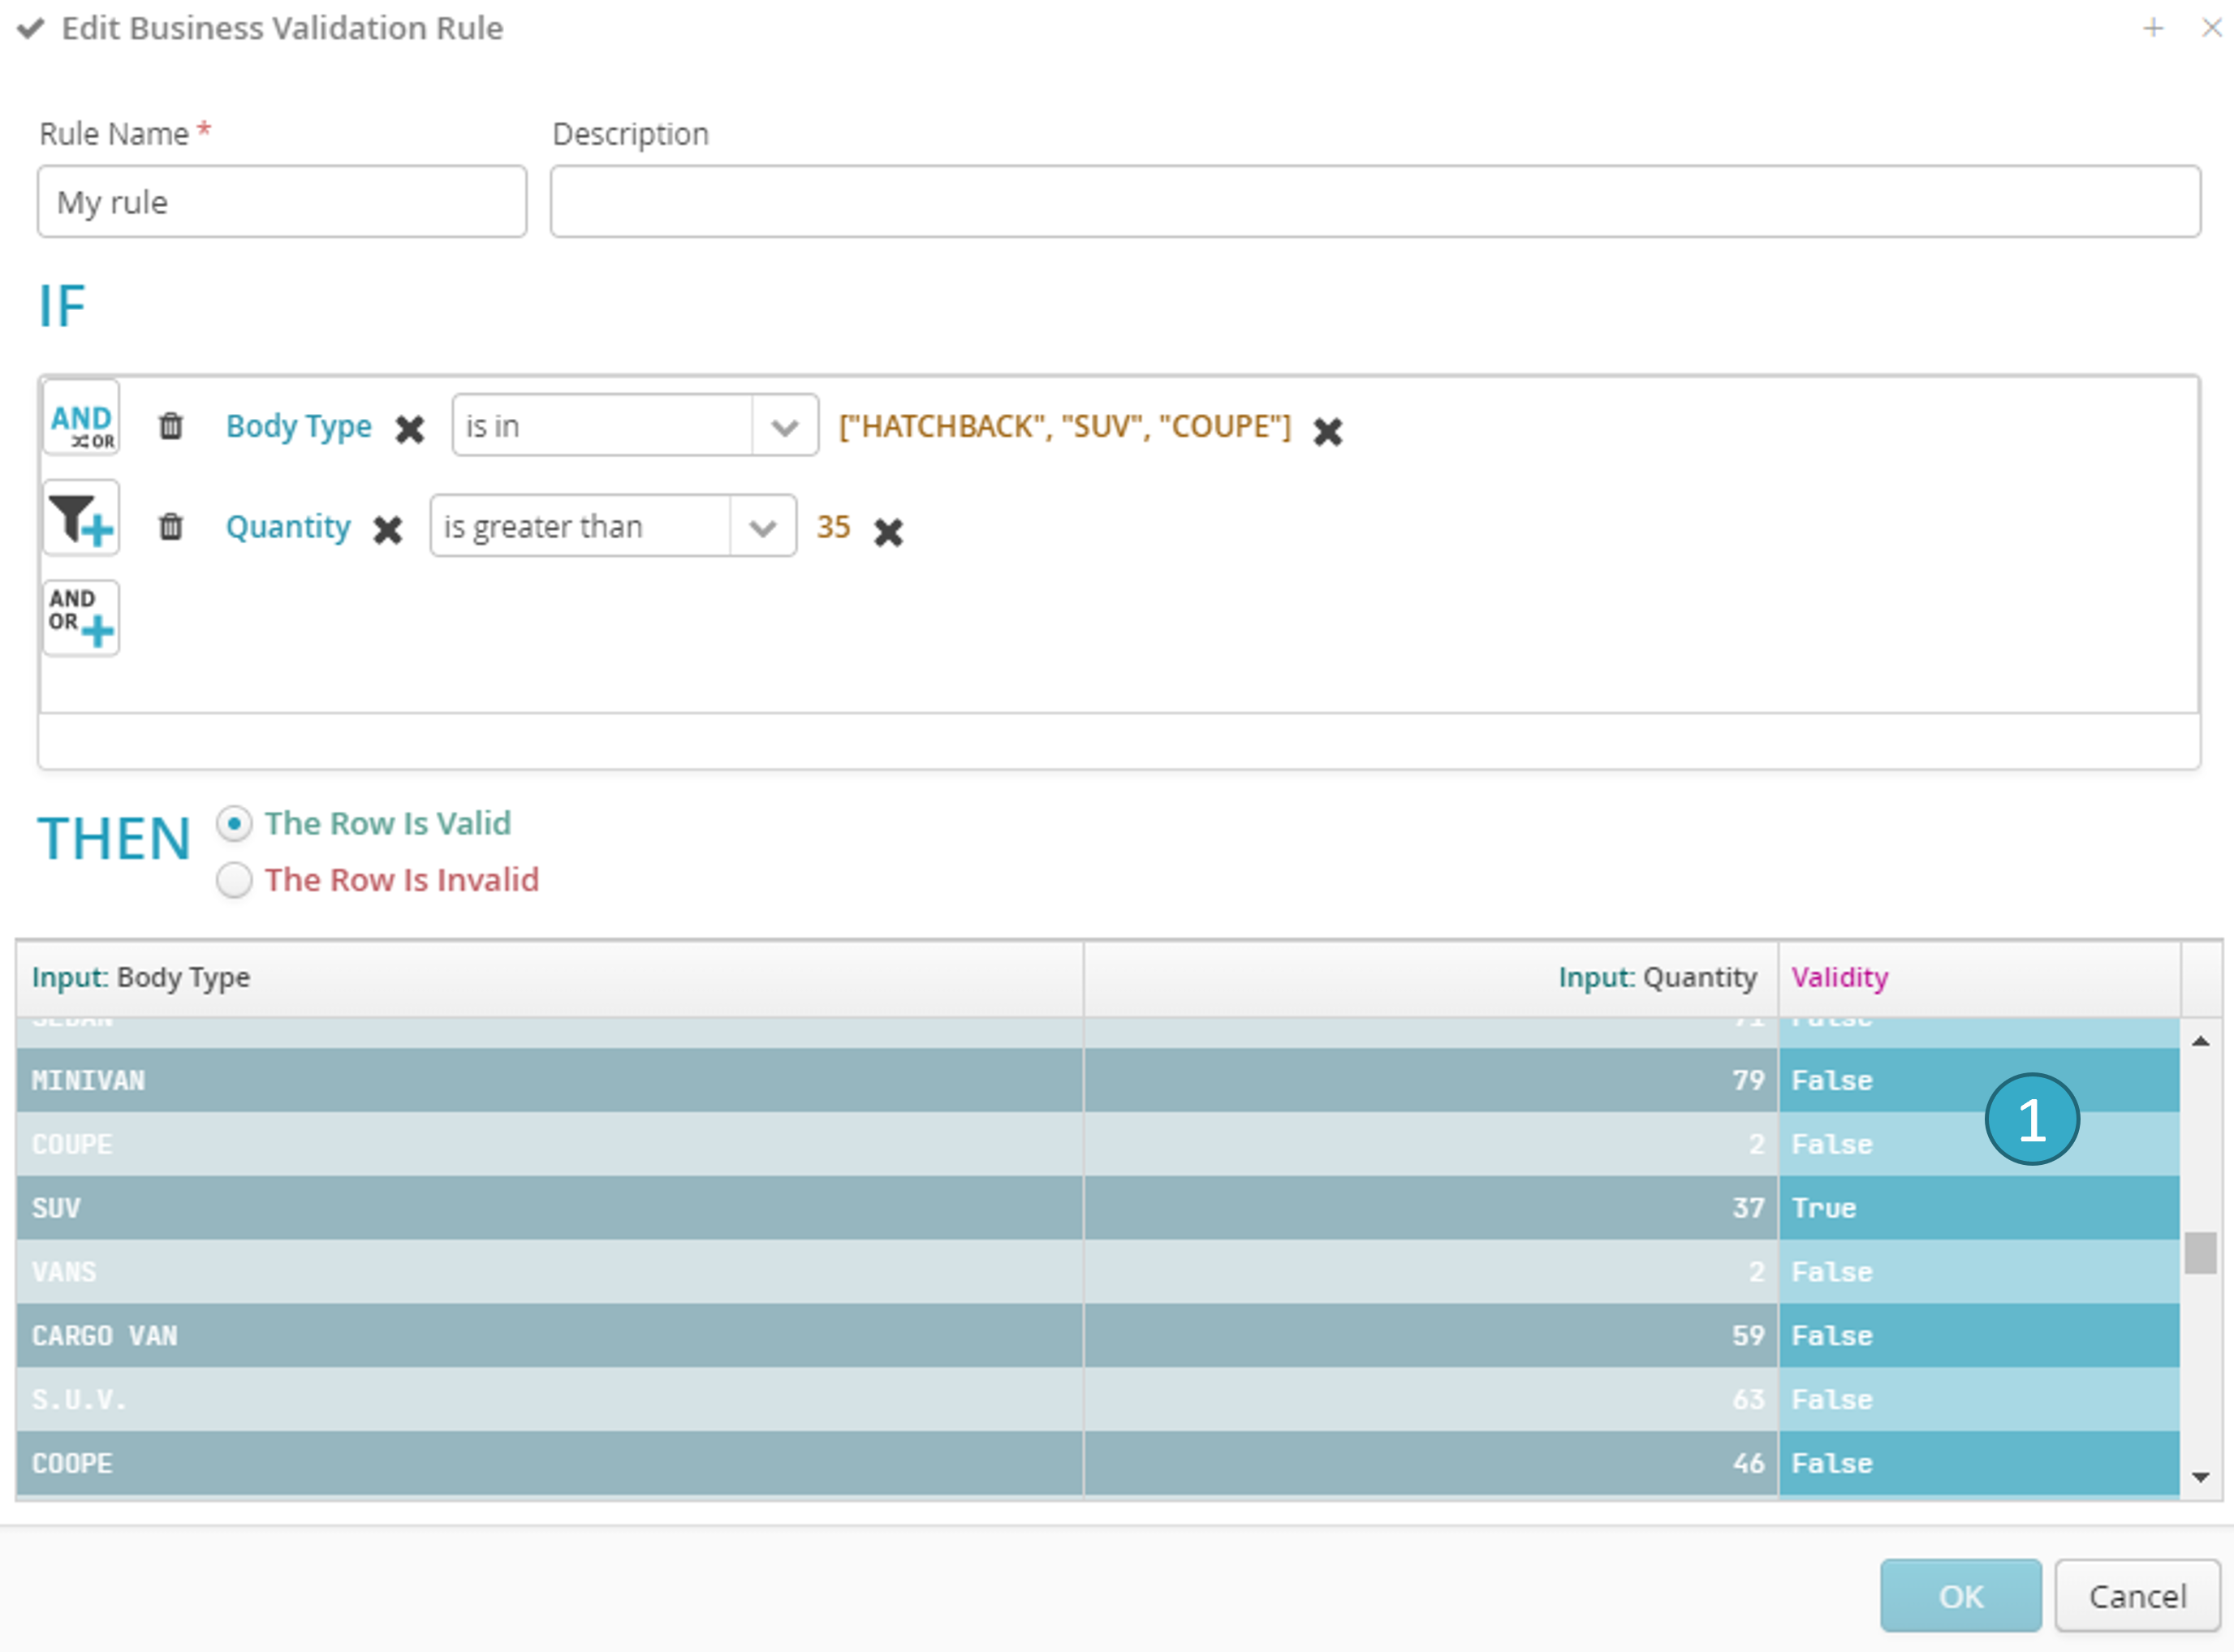
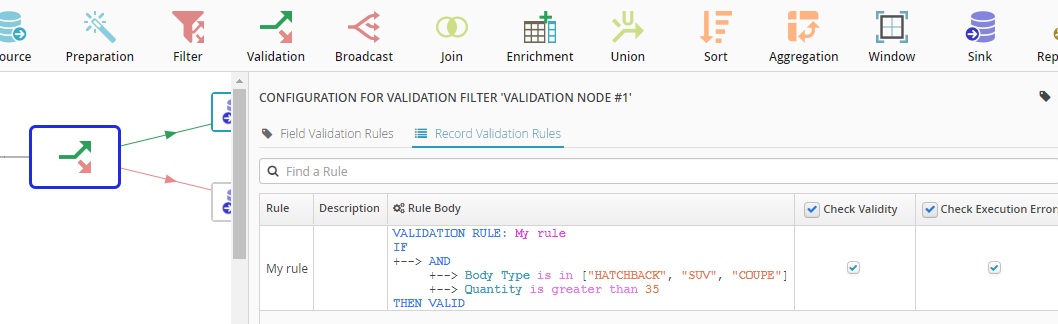
The screen capture below shows an example of rule creation:
IF the Body Type is in HATCHBACK, SUV or COUPE
AND the Quantity is greater than 35
THEN the record is valid.
A preview of the evaluation will be displayed in the zone .
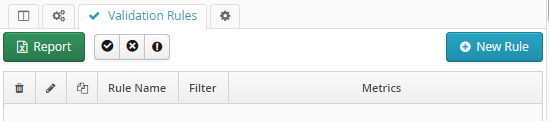
When the record validation rule has been saved, it will appear in the “Validation Rules” tab.
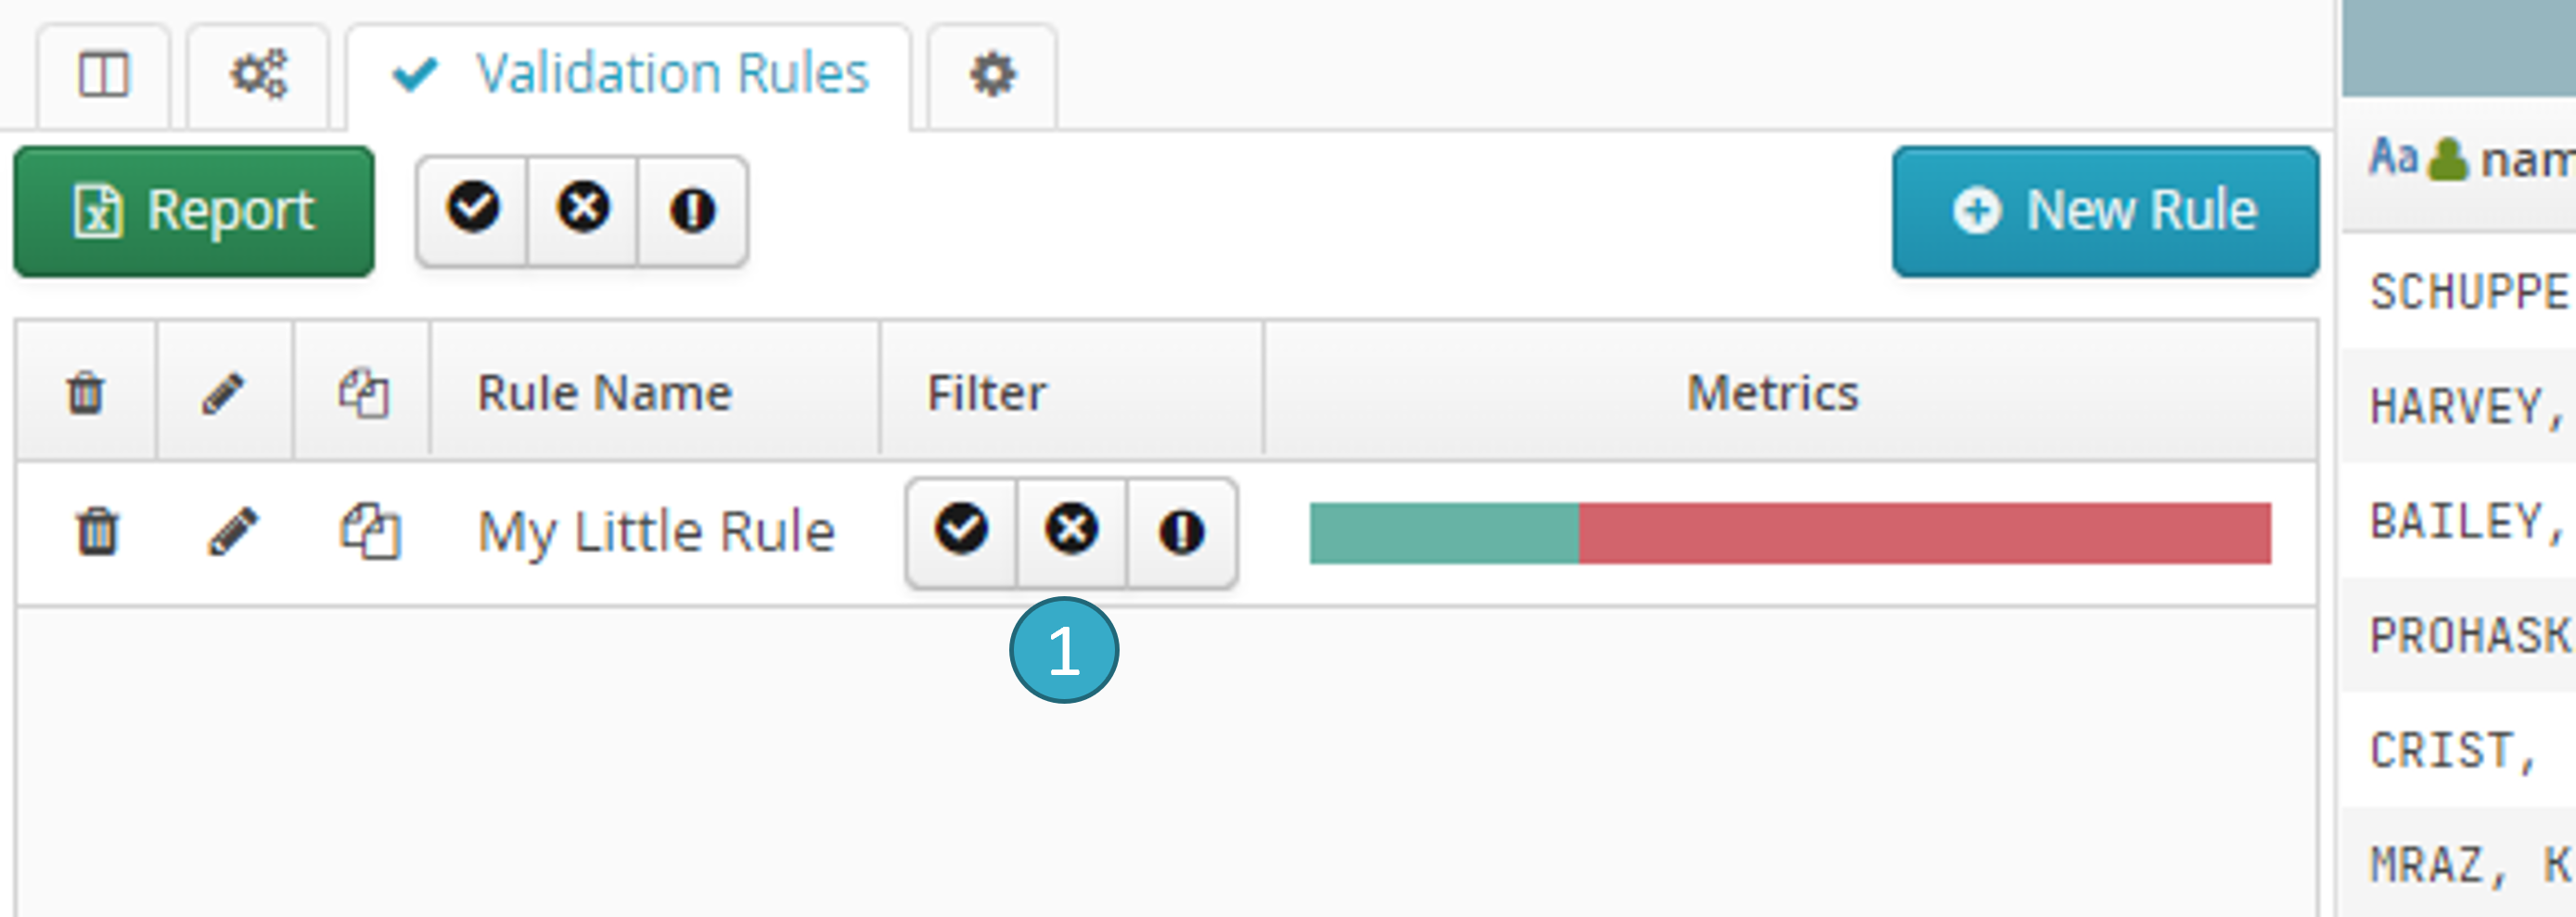
You can then apply filters () to the record validation rules to apply transformations only to the rows for which the rule is valid or invalid.
Note
A record validation rule can have one of three statuses: valid, invalid or error. Error status may apply if the rule has not been evaluated because e.g. an item of data is missing or malformed.
Record validation rules can be re-used in the flow via a validation processor downstream of the preparation. In the Row validation rules tab of the validation processor’s configurations you can tick the Verify validity option to send records that are not valid for the rule in question to the second processor output.
Note
Practical example : Add Record Validation Rule
Before Transformation:
ID |
Order |
Order Date |
Delivery Date |
Delivery Mode |
|---|---|---|---|---|
1 |
Order #1 |
15/09/2024 |
18/09/2024 |
Express |
2 |
Order #2 |
17/09/2024 |
21/09/2024 |
Normal |
Transformation Configuration:
Rule: If the delivery method is Express, then the time between the order date and the delivery date must not exceed one day
After Transformation:
ID |
Order |
Order Date |
Delivery Date |
Delivery Mode |
|---|---|---|---|---|
1 |
Order #1 |
15/09/2024 |
18/09/2024 |
Express |
2 |
Order #2 |
17/09/2024 |
21/09/2024 |
Normal |
In the example above, the order with ID 1 will have an invalid marker because 3 days have elapsed between the order date and the delivery date. This marker can be used in further processing to isolate rows for which the delivery service did not work correctly.