7.2. Interface
7.2.1. Open the editor
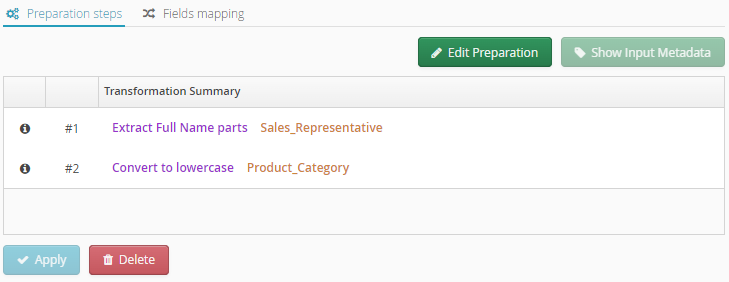
To open the preparation editor, simply click Edit Preparation  at the top of the configurator.
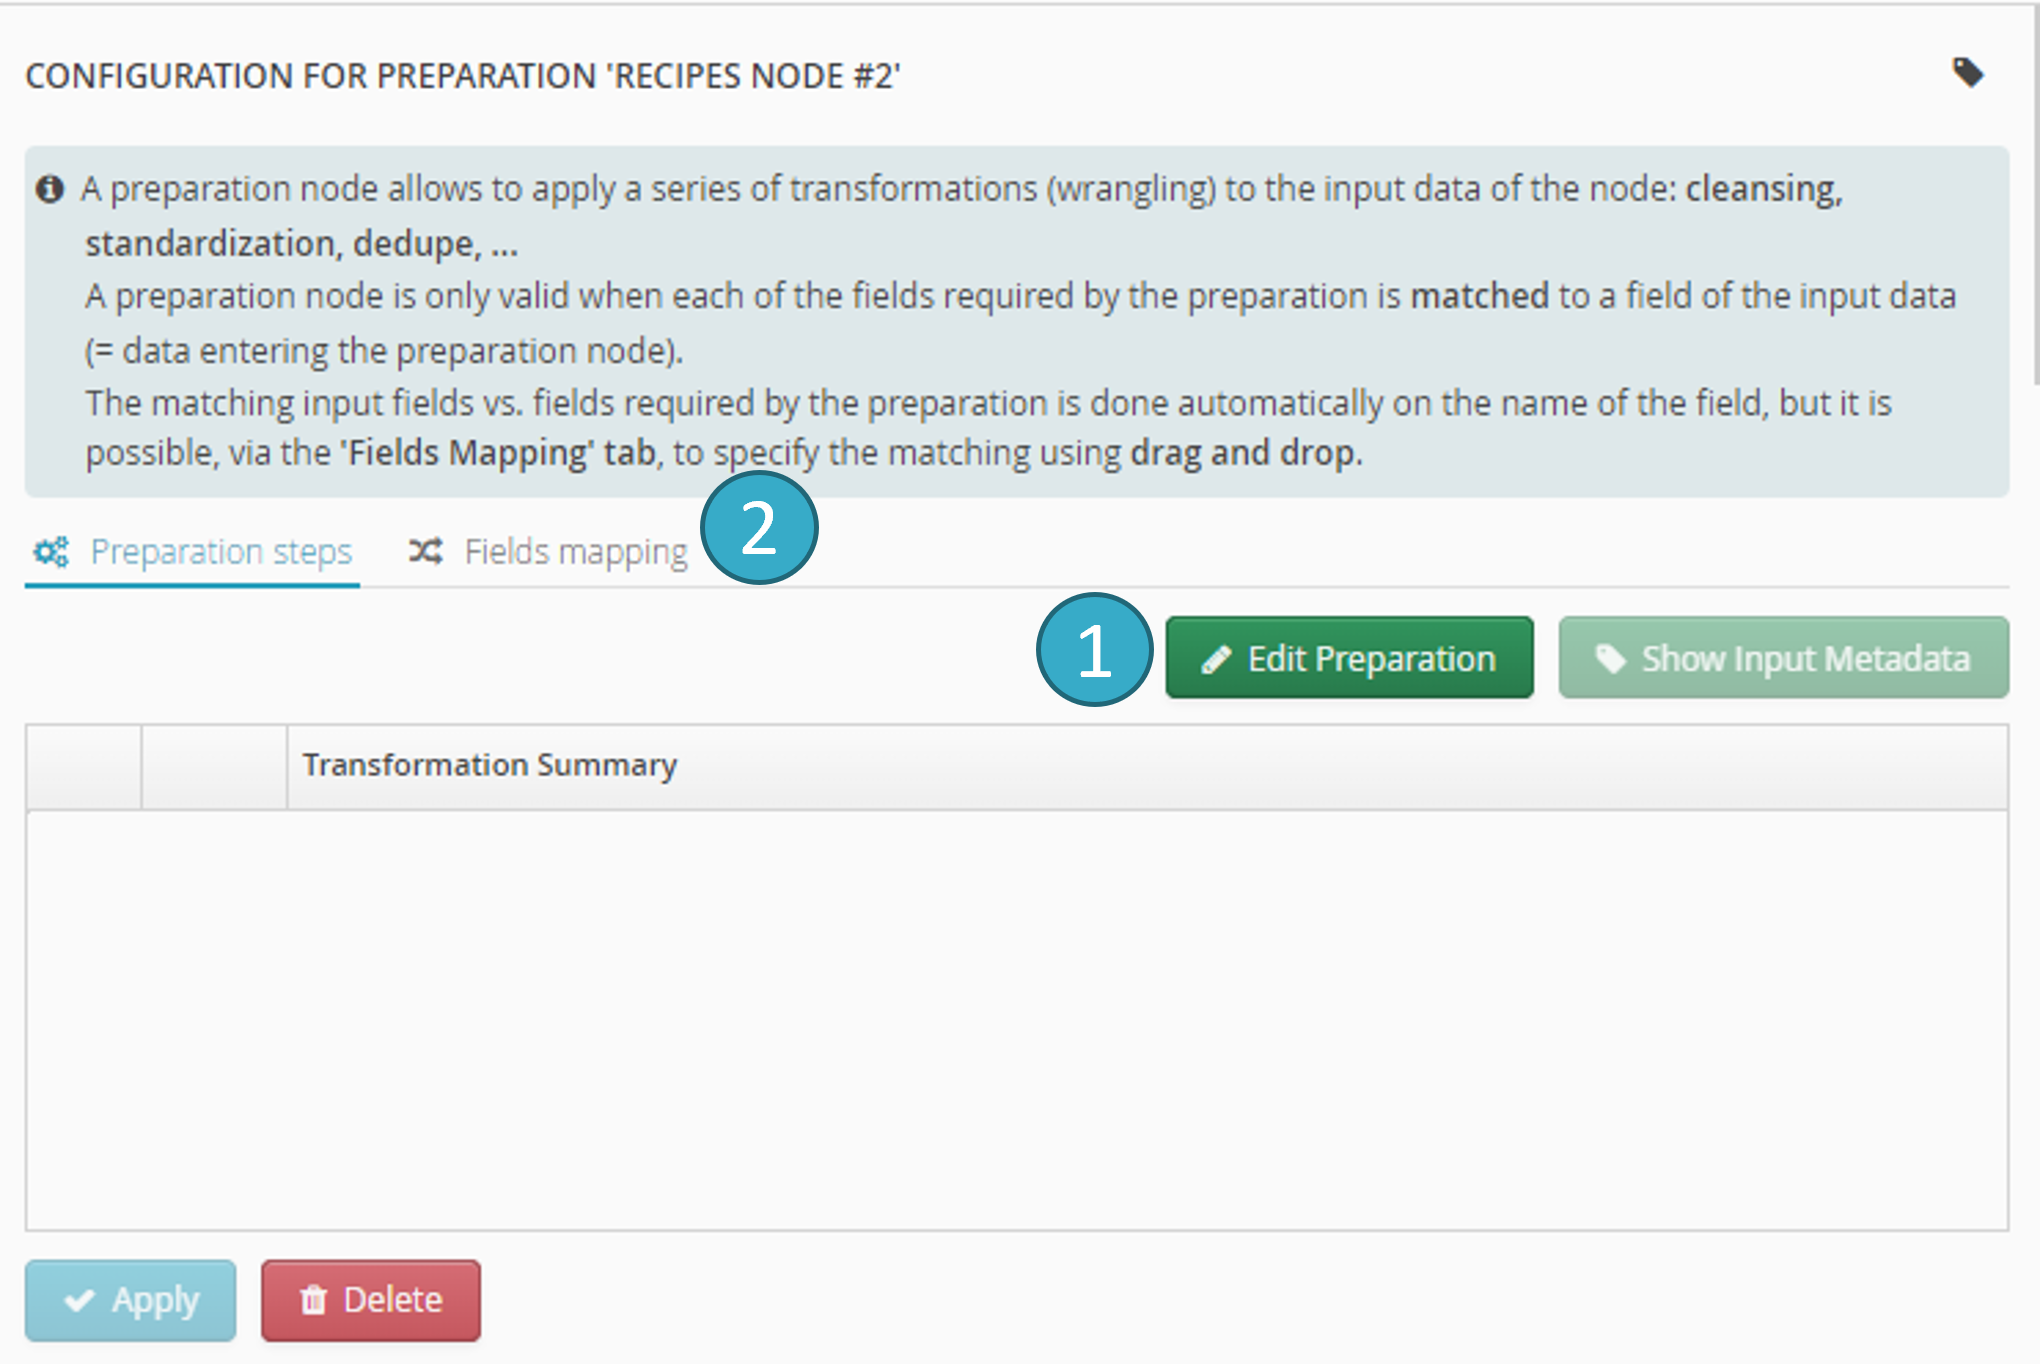
To edit an existing preparation in order to add, change or delete transformations, click Edit Preparation  (this will replace Create Preparation once the preparation has been created).
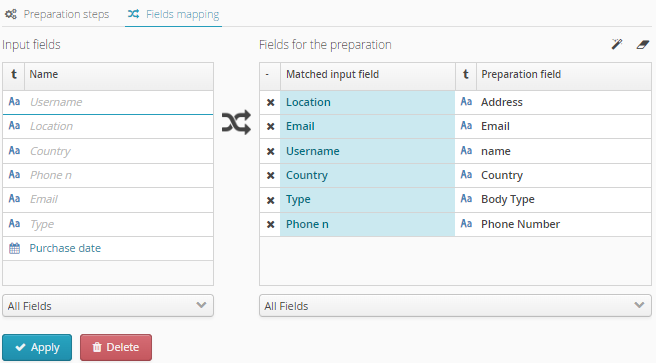
If you change the structure of the data input into the preparation function, you must map fields. The Field Mapping tab  allows a la carte Mapping of the input data and the fields expected by the preparation, even if neither the name nor the type of input field are a match for what is expected (renaming and type conversion is automatic).
Field Mapping therefore gives you considerable flexibility if you want to reuse existing preparations with other input data:
Warning
If you change the input data in the preparation function, the function itself will be invalid unless each field required for the preparation has been mapped to an input data field (= data input into the preparation function). Until the mapping is complete, you will not be able to click either Edit Preparation or Apply.
7.2.3. Data transformation view
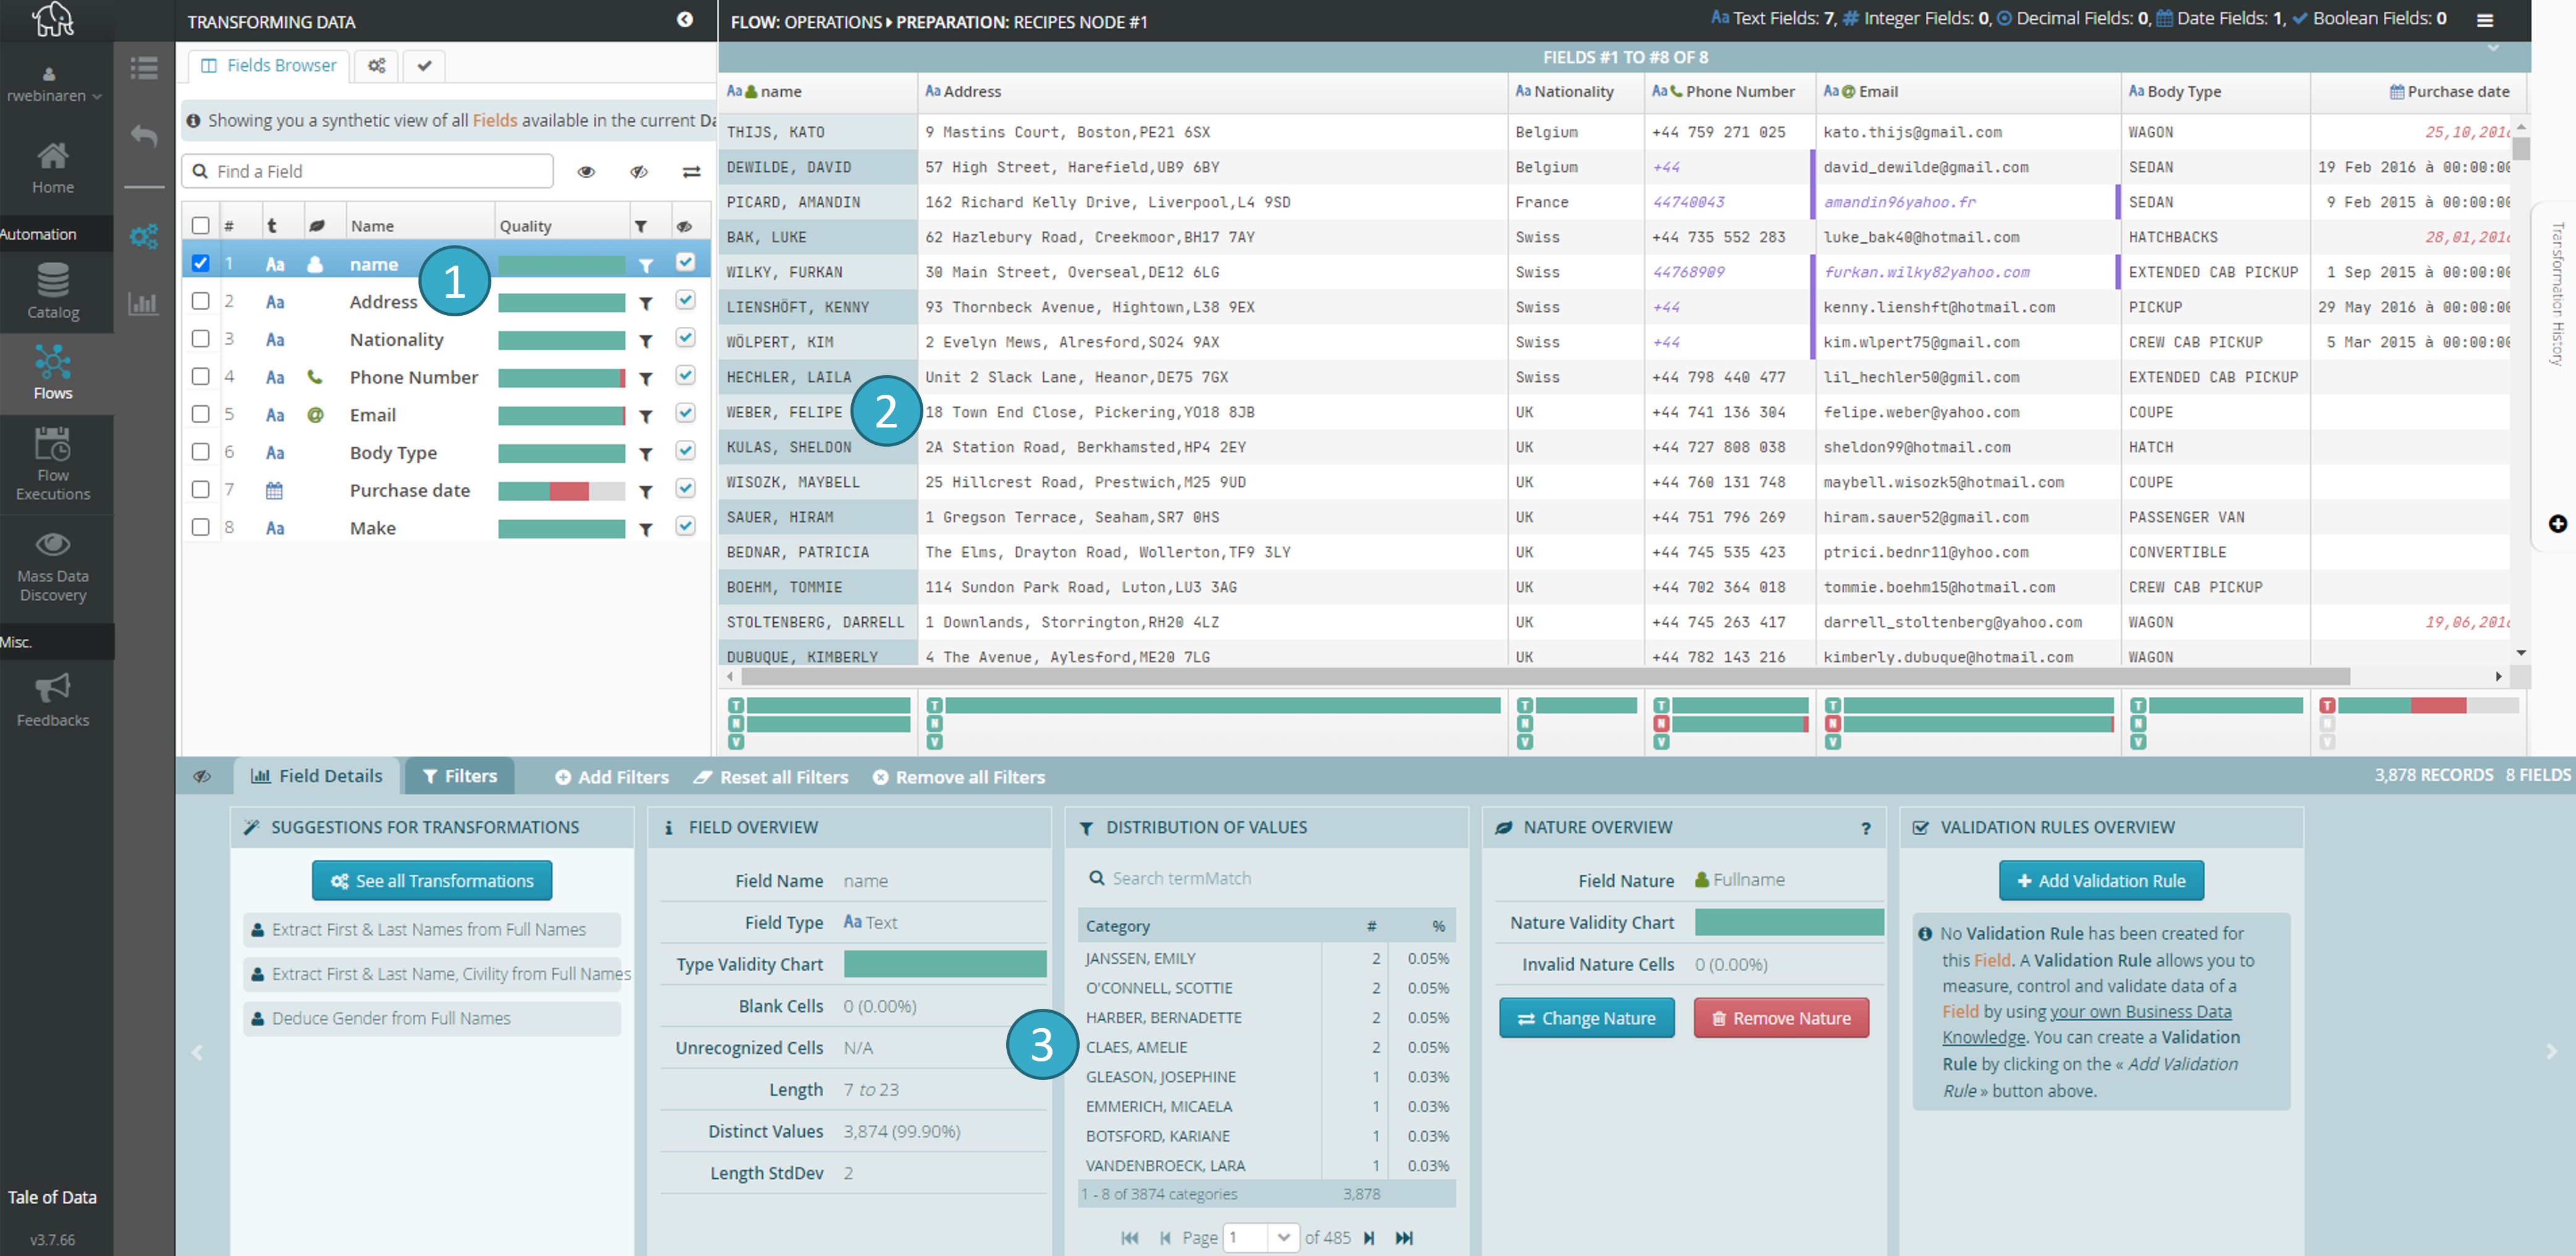
The interface is made up of a main data viewing zone that lets you see all the data.
The interface also has three sections:
The (left) data transformation section, which is open by default.
The (right) transformation history section.
The footer section with column information and filter management.
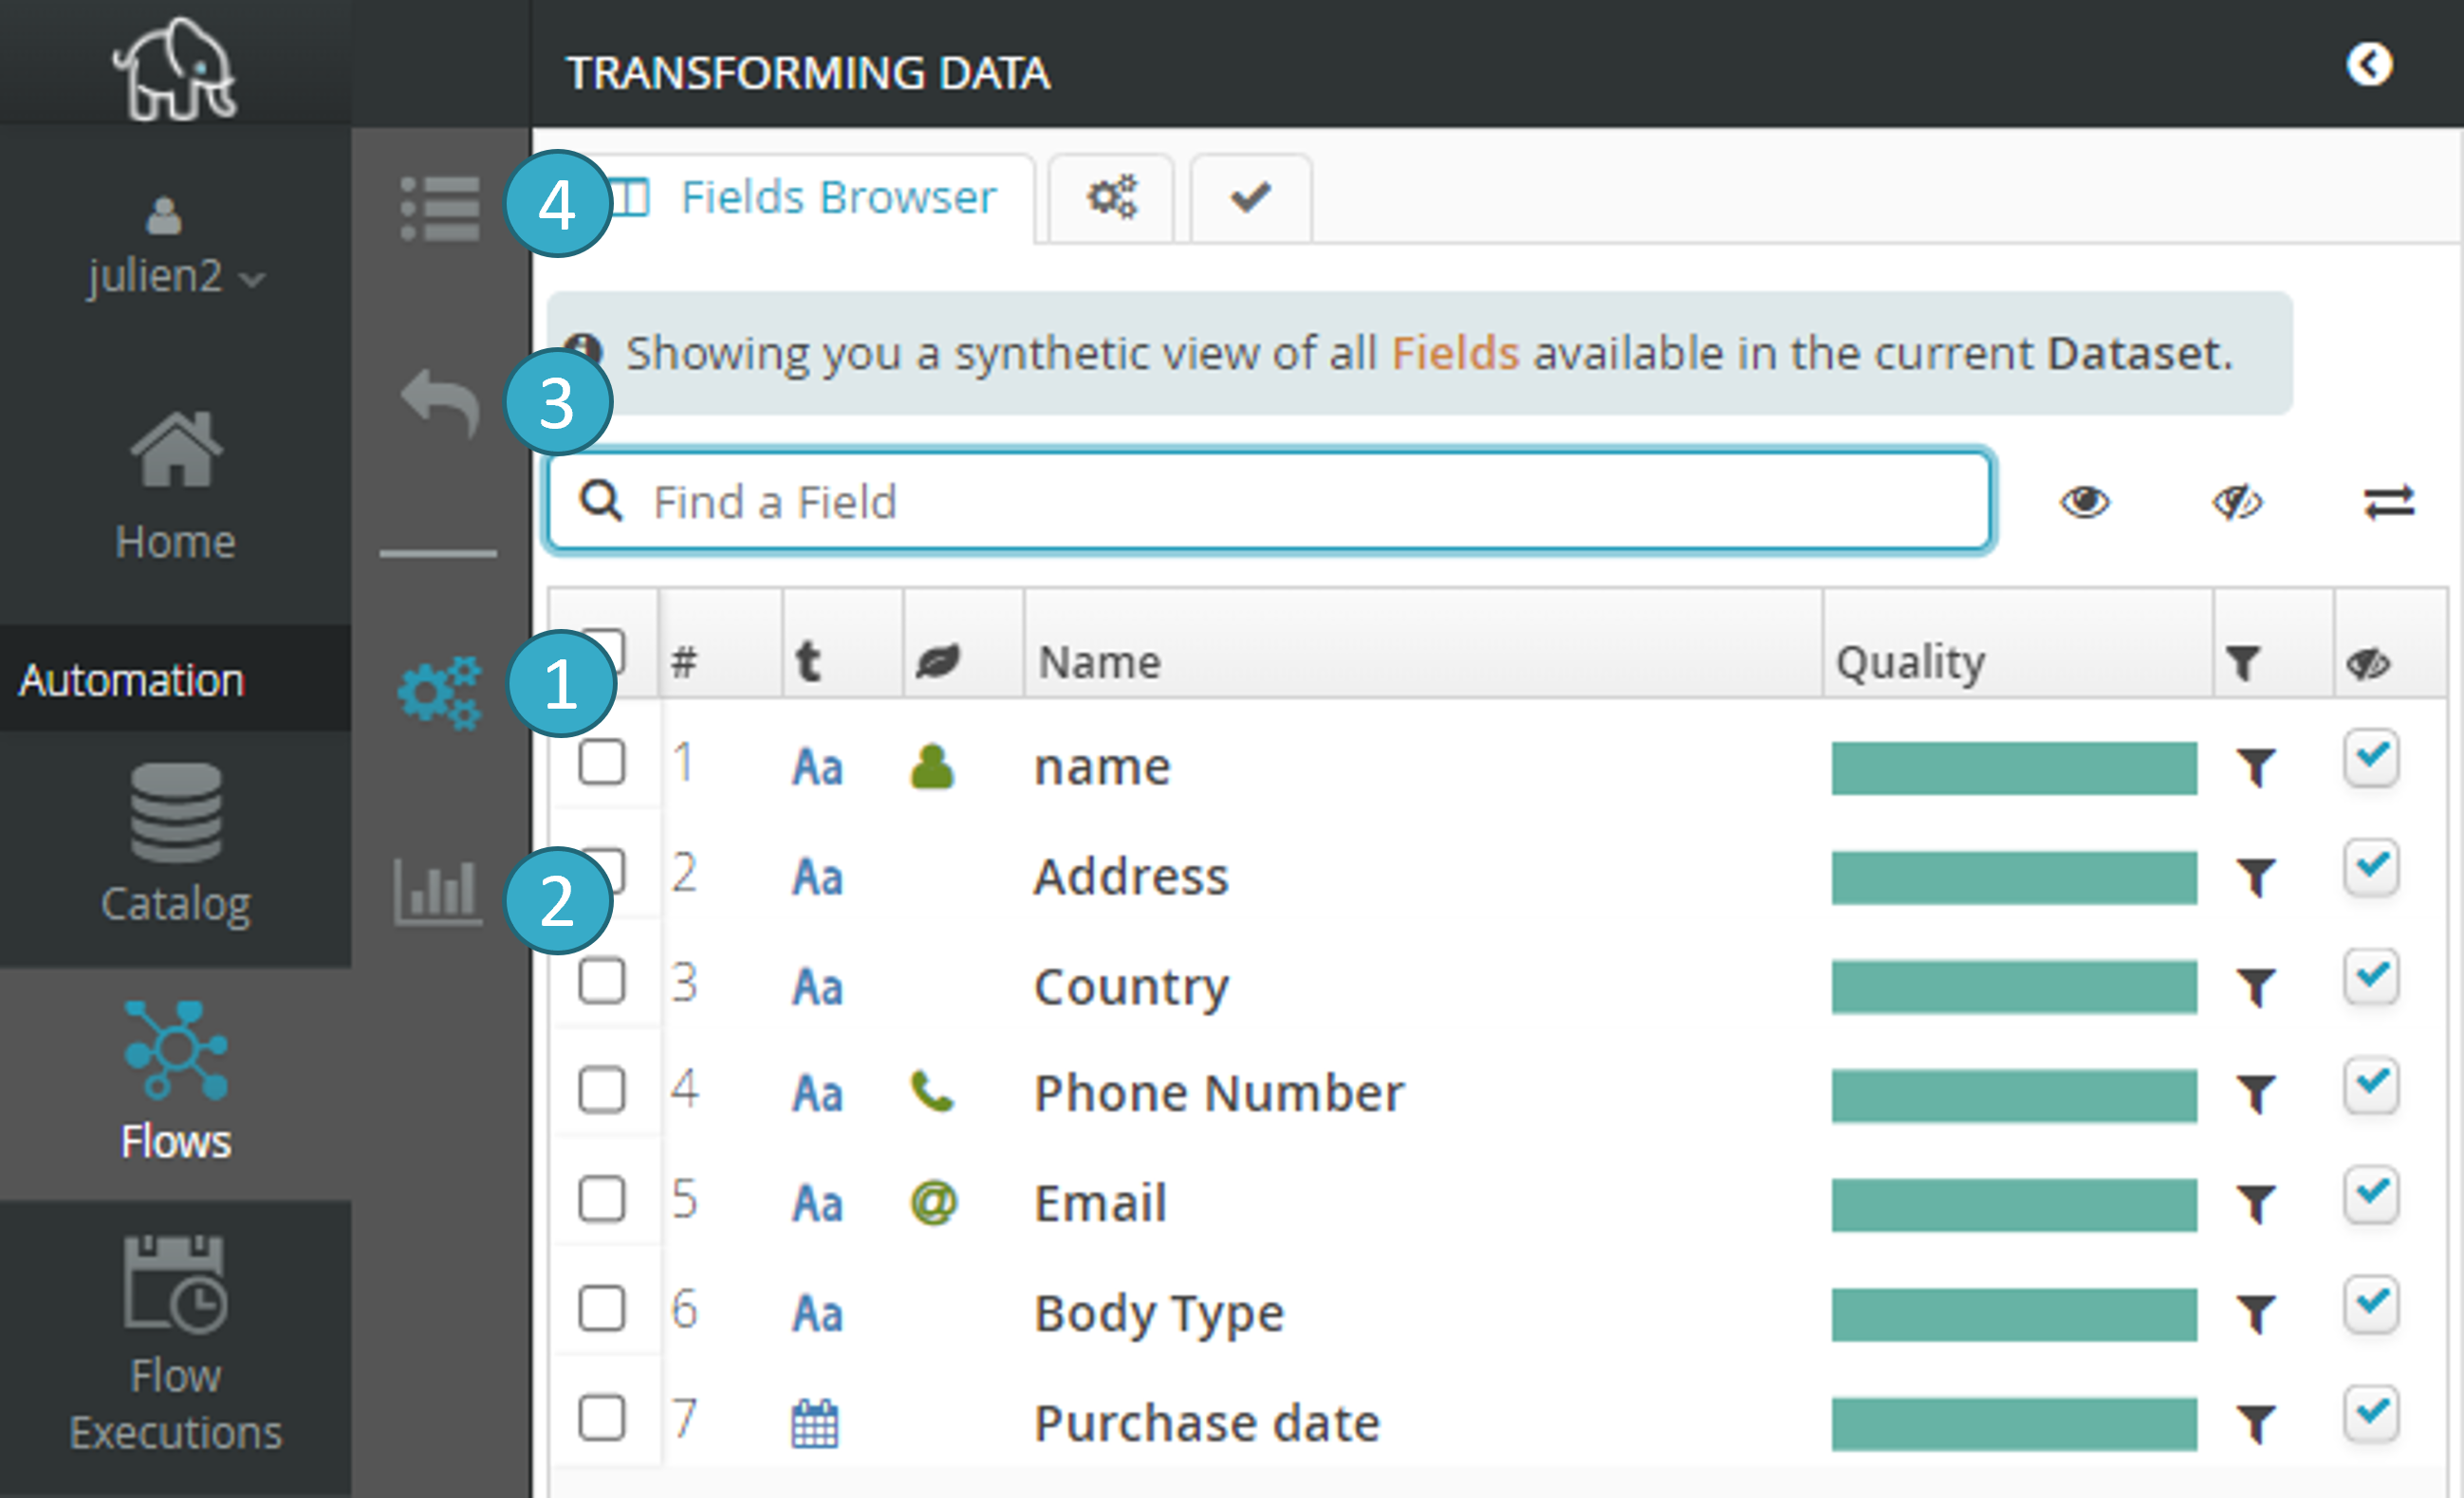
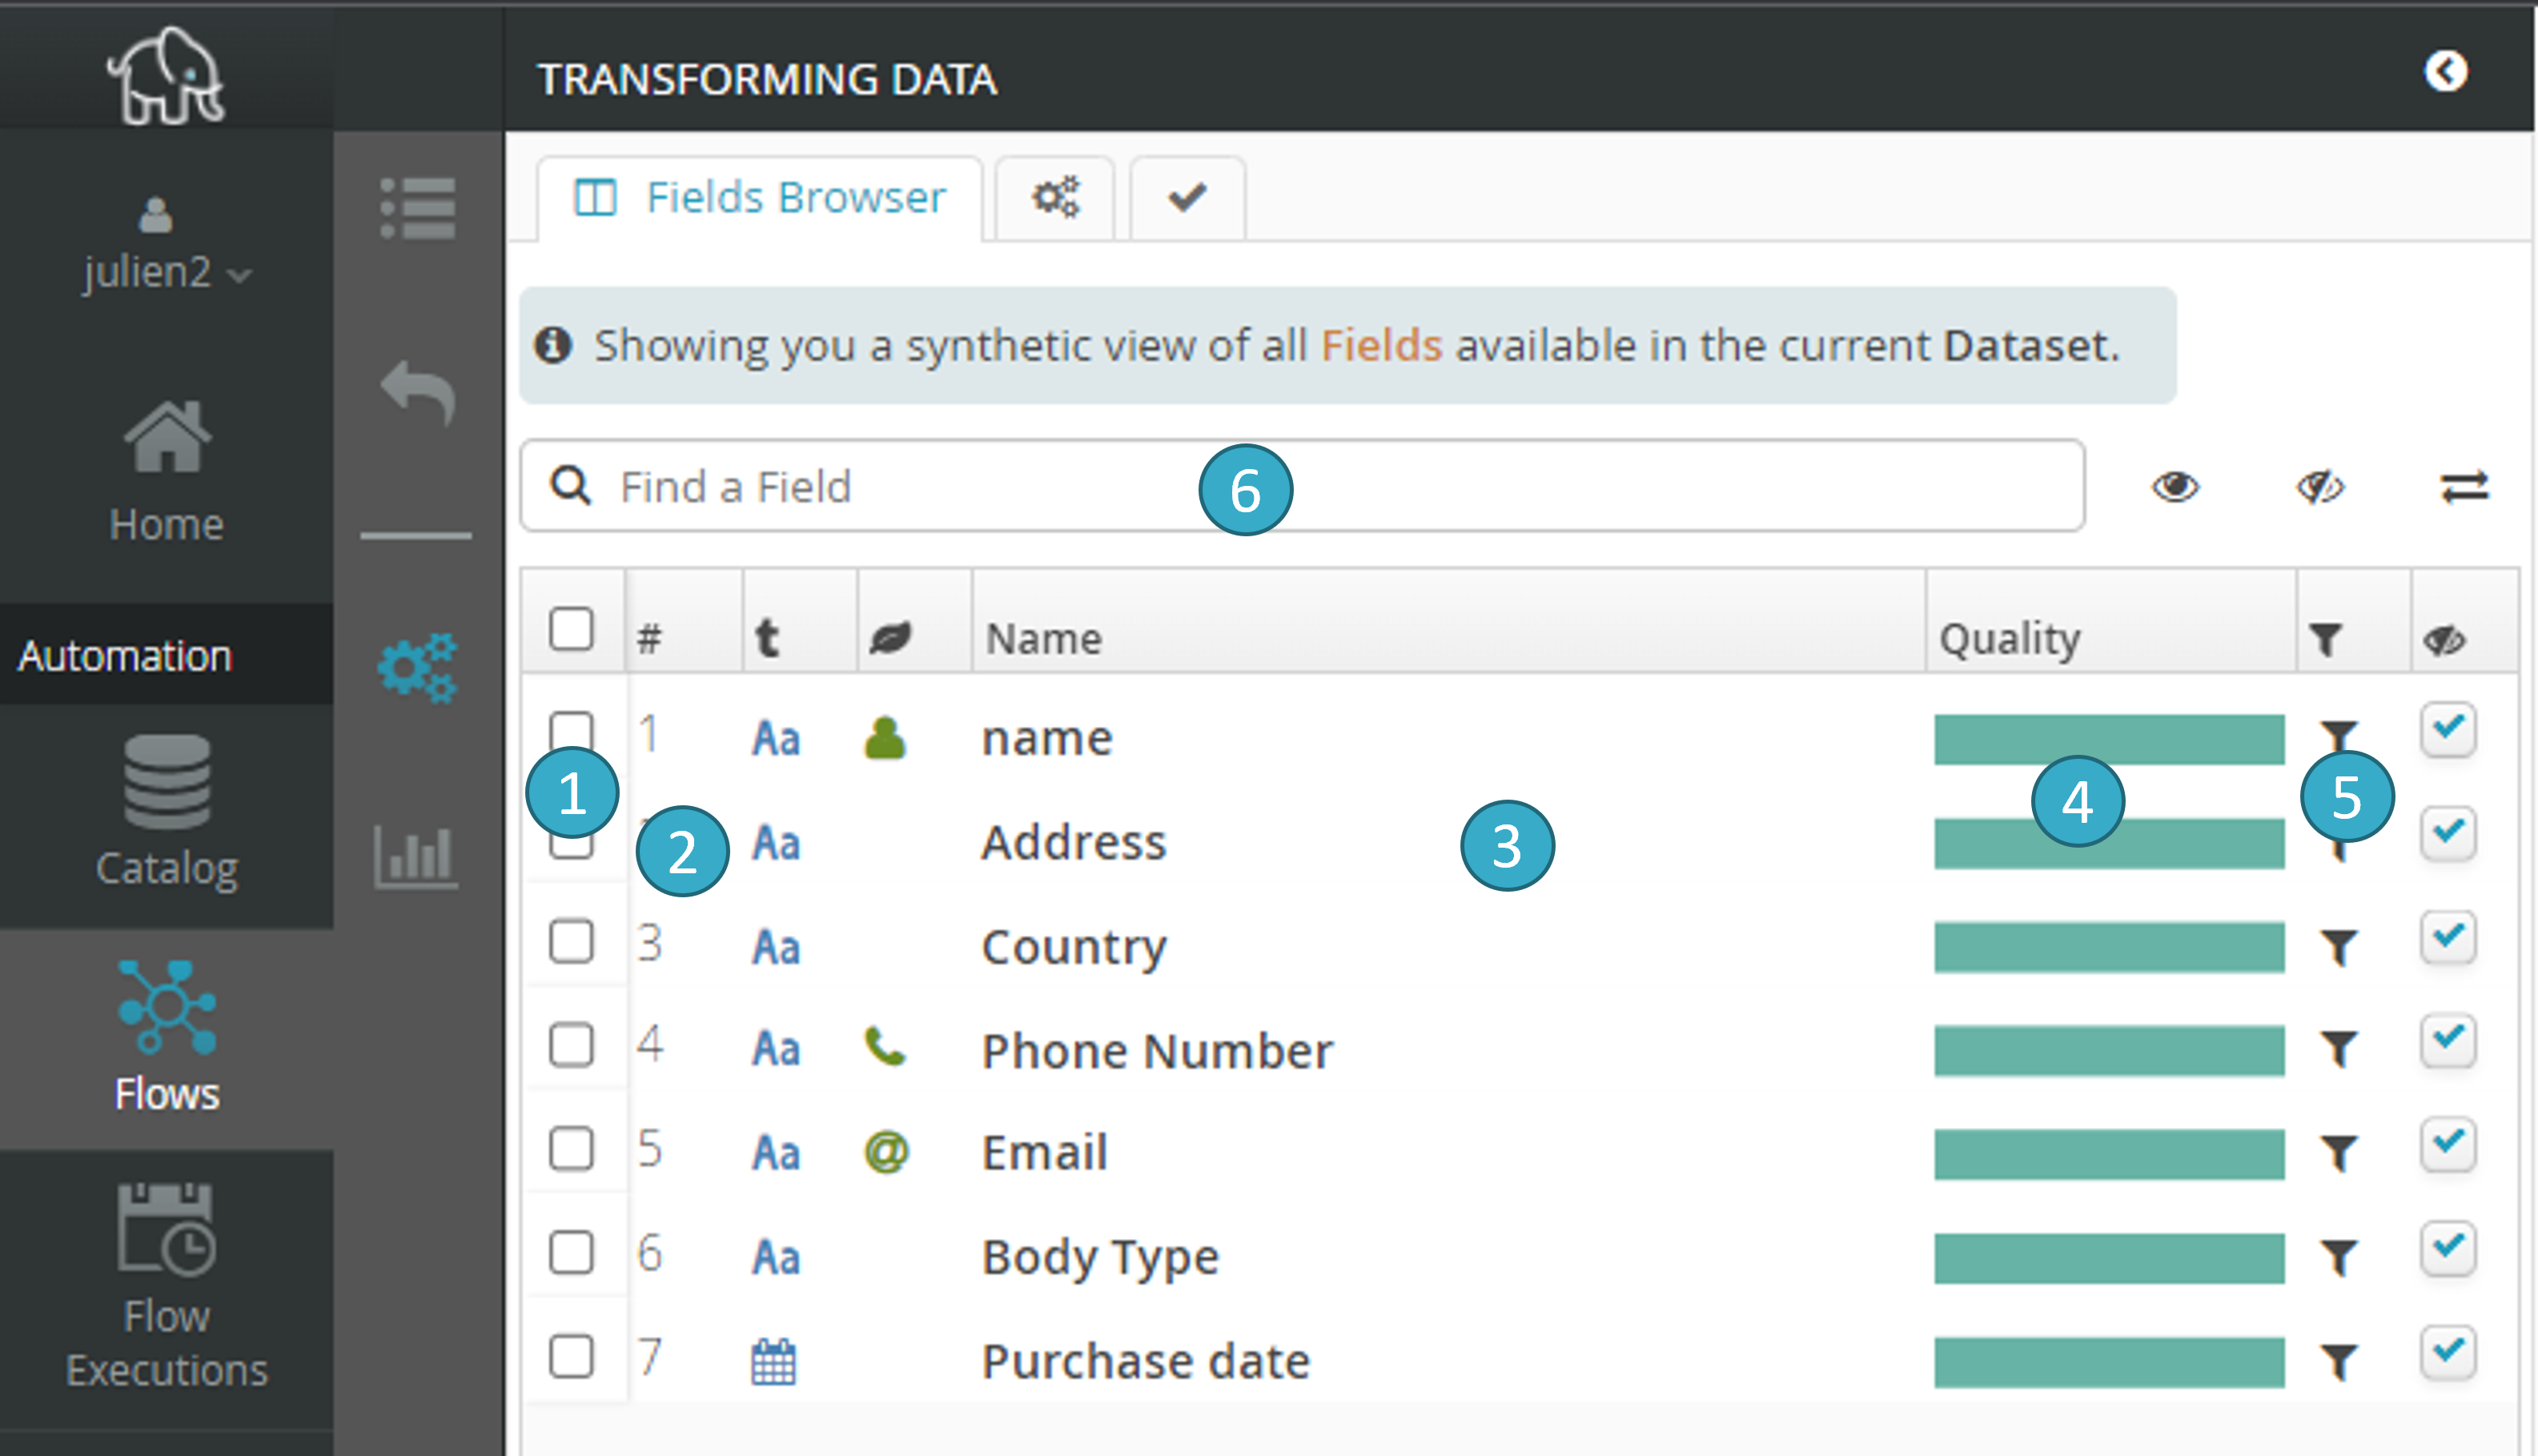
The general data preparation interface is shown below:
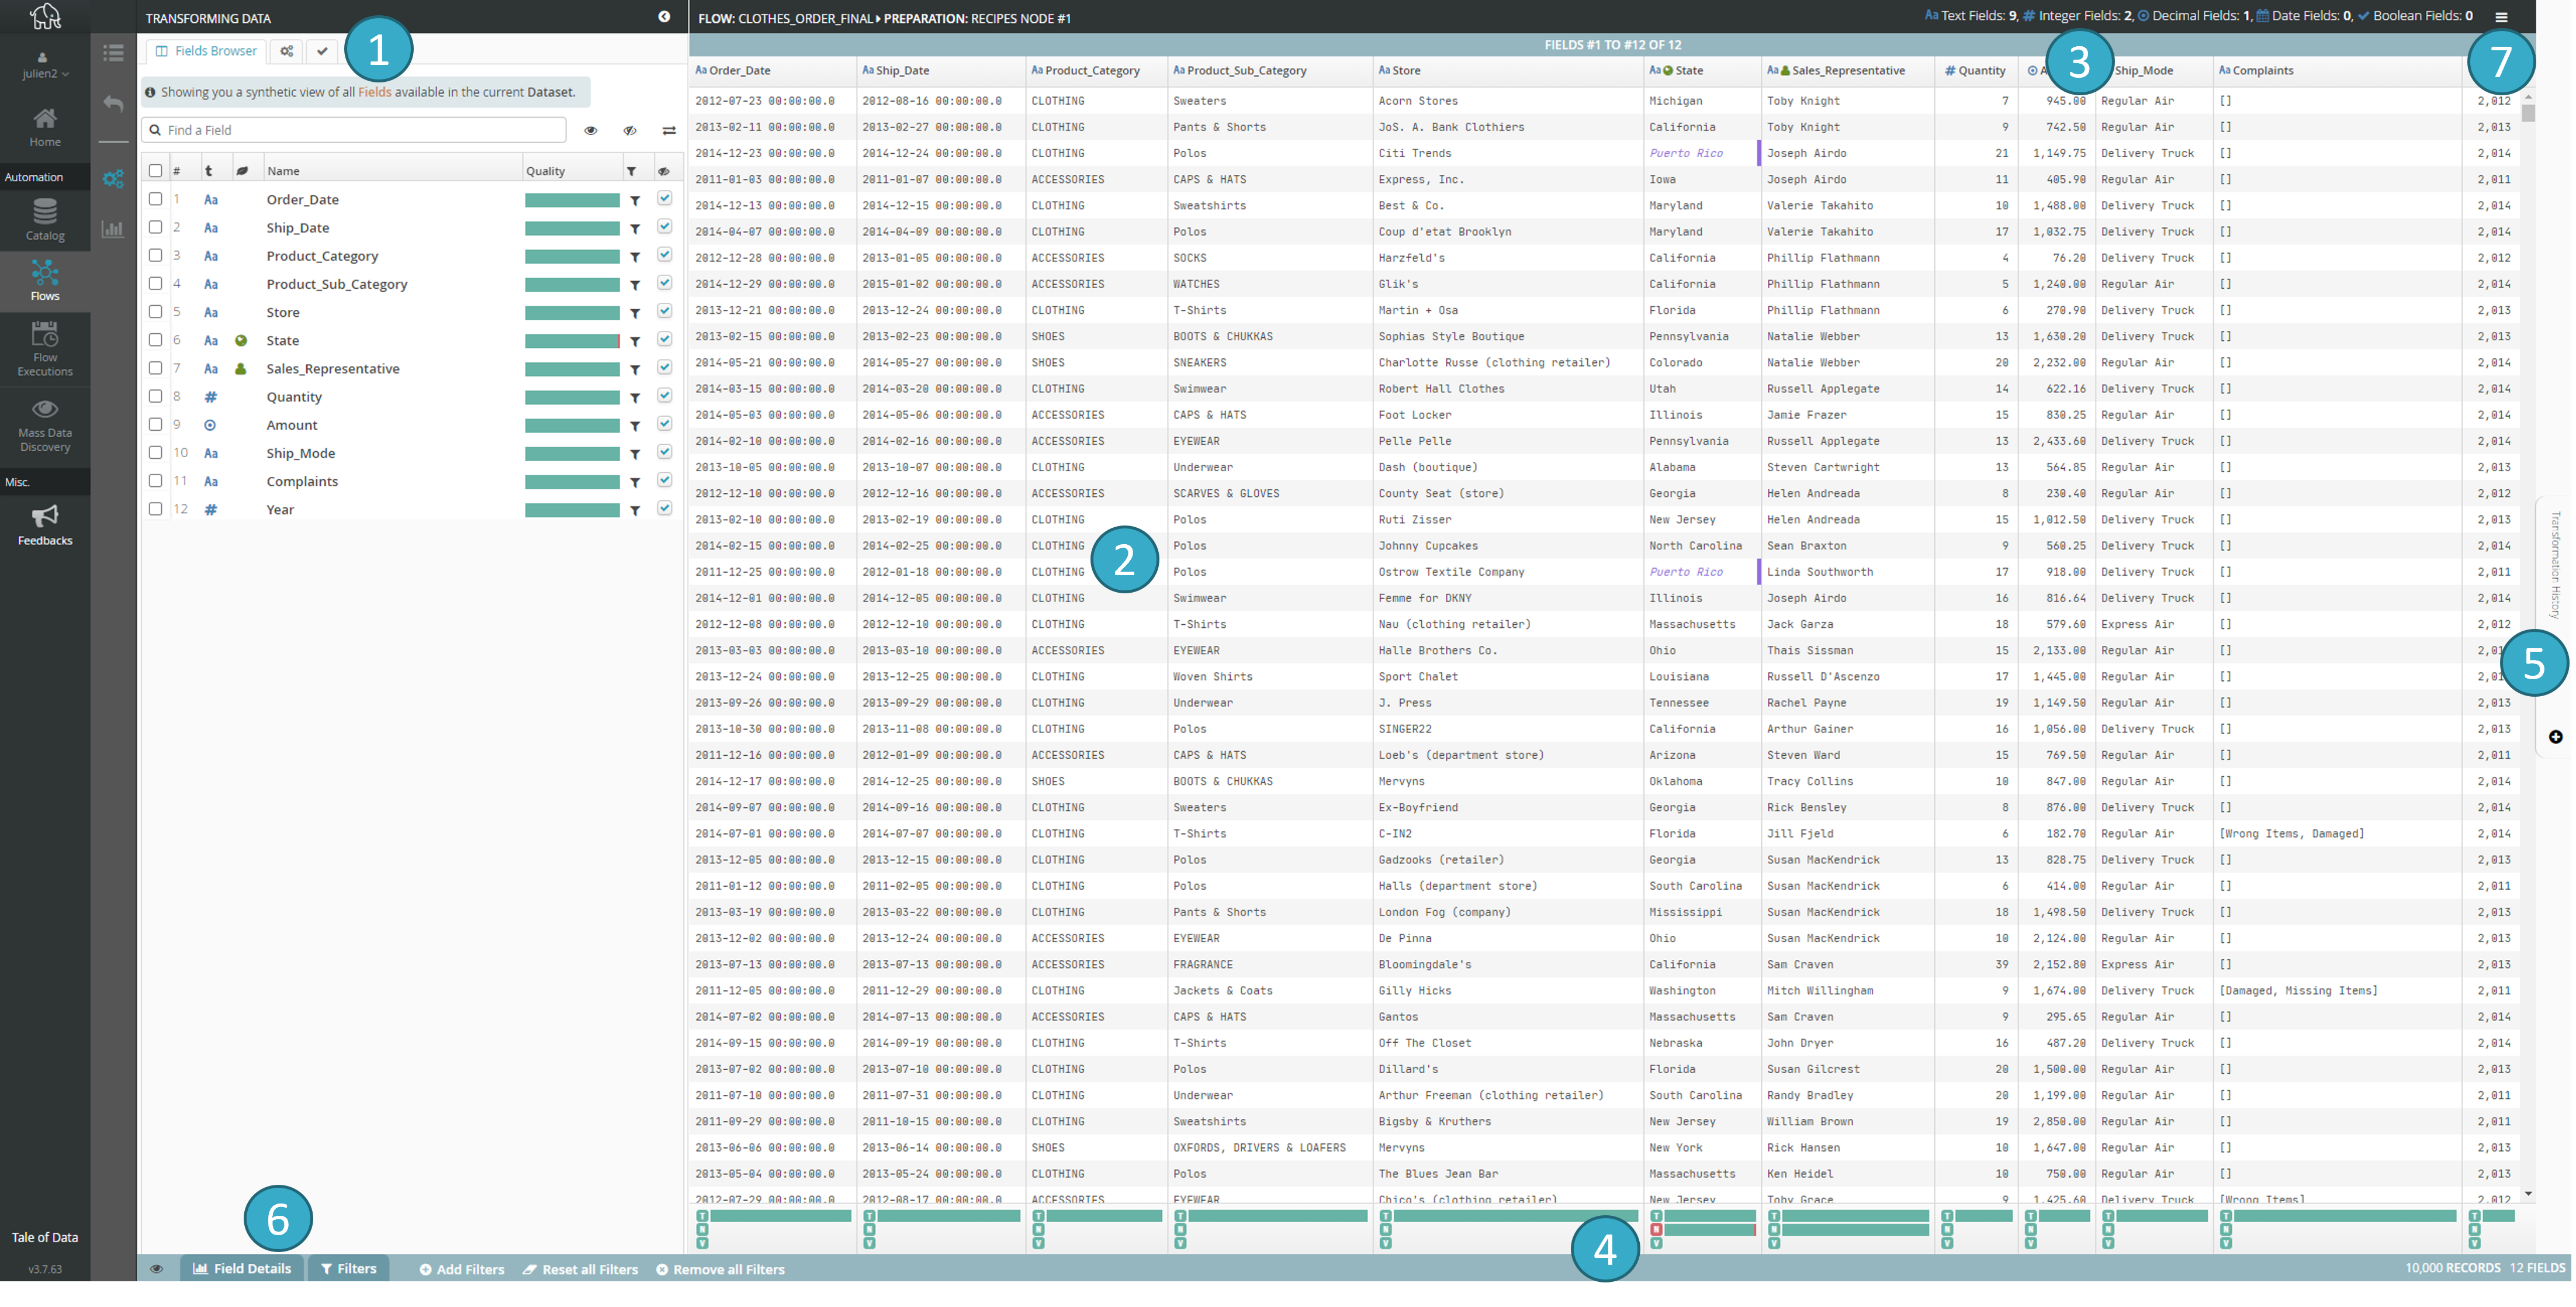
Data transformation section
 with three tabs:
Field Browser (displays by default).
List of Transformations.
Record validation rules.
Opens the section with information and filters for the current field
 (Information and filters, advanced section).
7.2.3.2. List of Transformations
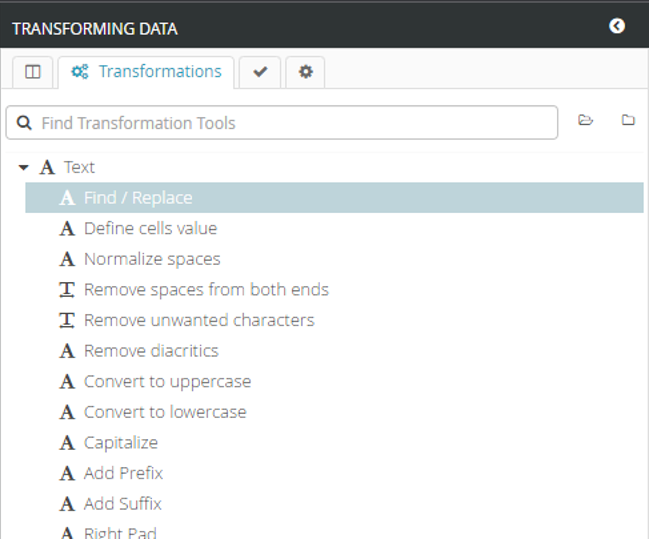
The Transformations tab displays all the transformations that Tale of Data can apply, organized into categories:
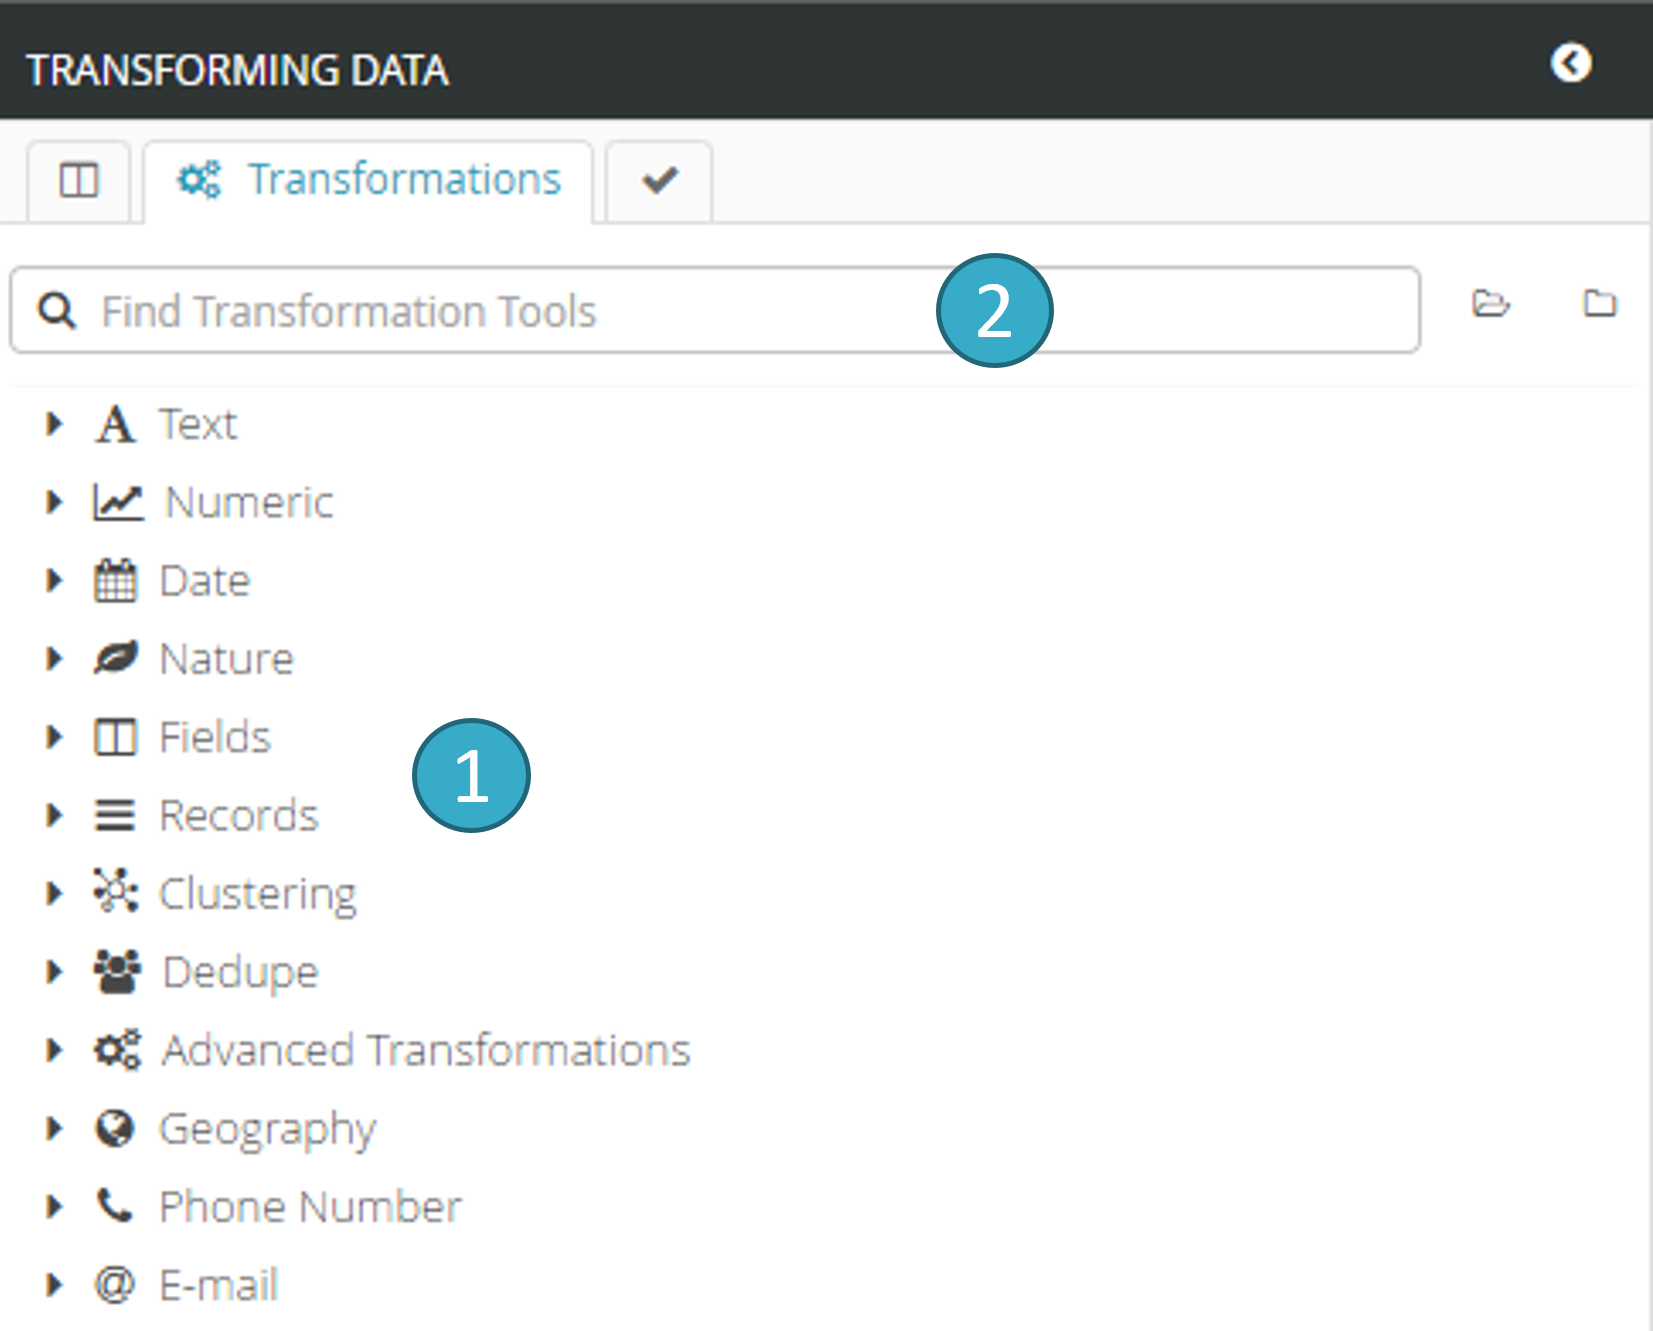
Transformations search bar
 that makes it easier to find a specific transformation. The search shortens the list of transformations by displaying only those that match.
Details of each transformation can be found in the Palette des transformations advanced section. This section contains Find / Replace for the transformation.
The transformation can be found under the Text category in the list of transformations (shown as an overlay in the first image below).
As its name implies, this transformation lets you search for one particular text among all the values in a specific field and replace that text whenever it occurs with a substitute text.
Click the transformation to open a new tab that lets you configure and apply the transformation to the dataset :
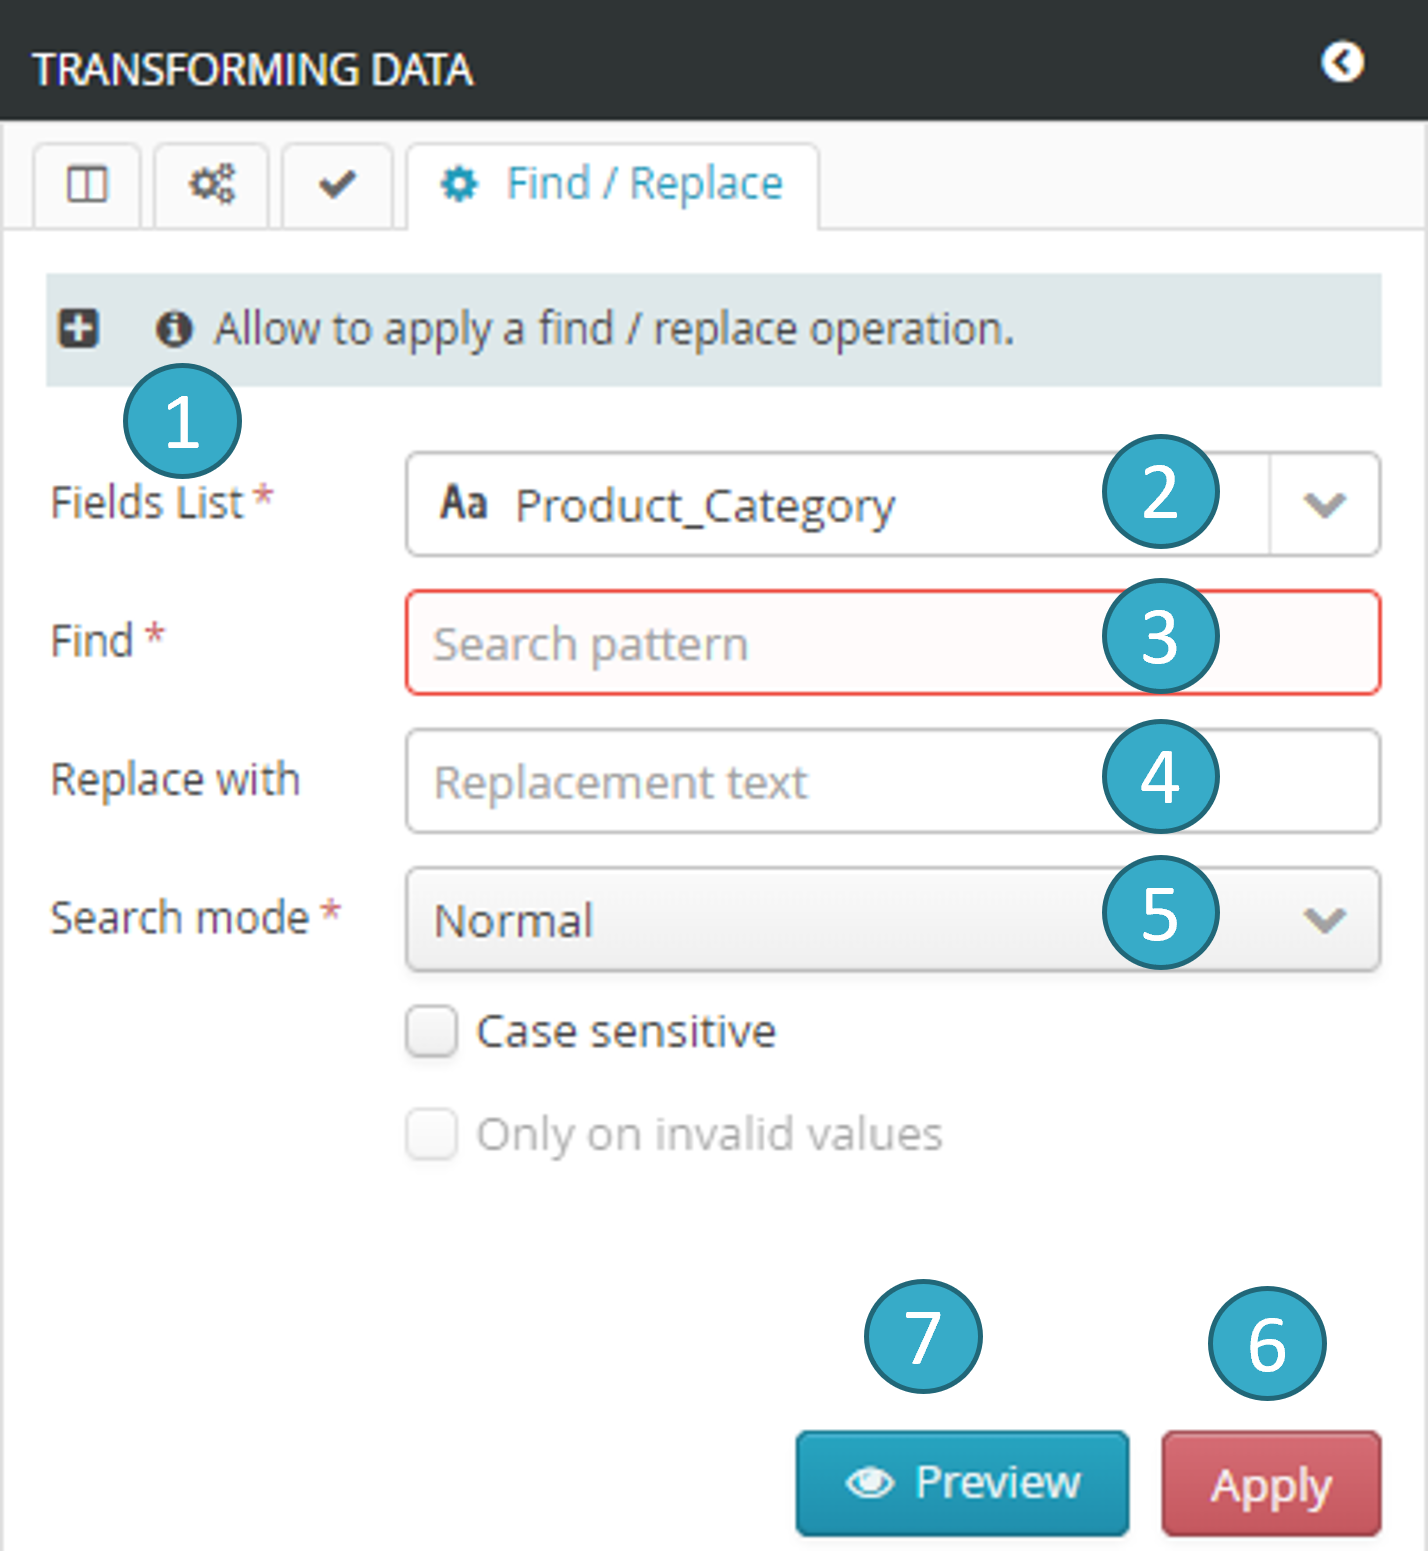
Integrated help
 : all transformations provide a summary of their purpose and how they can be used.
Select a field
 for the transformation. One or more fields, depending on the transformation, must be selected to be the reference.
Replacement text
 to be applied to each discovered occurrence.
Tale of Data offers almost 100 transformations. We recommend you select those that best meet your requirements as this will enhance the quality of the current dataset.
7.2.3.3. Data View
The main table can seamlessly display several million records and hundreds of fields. Data View provides horizontal pages to make it easier to browse the fields:
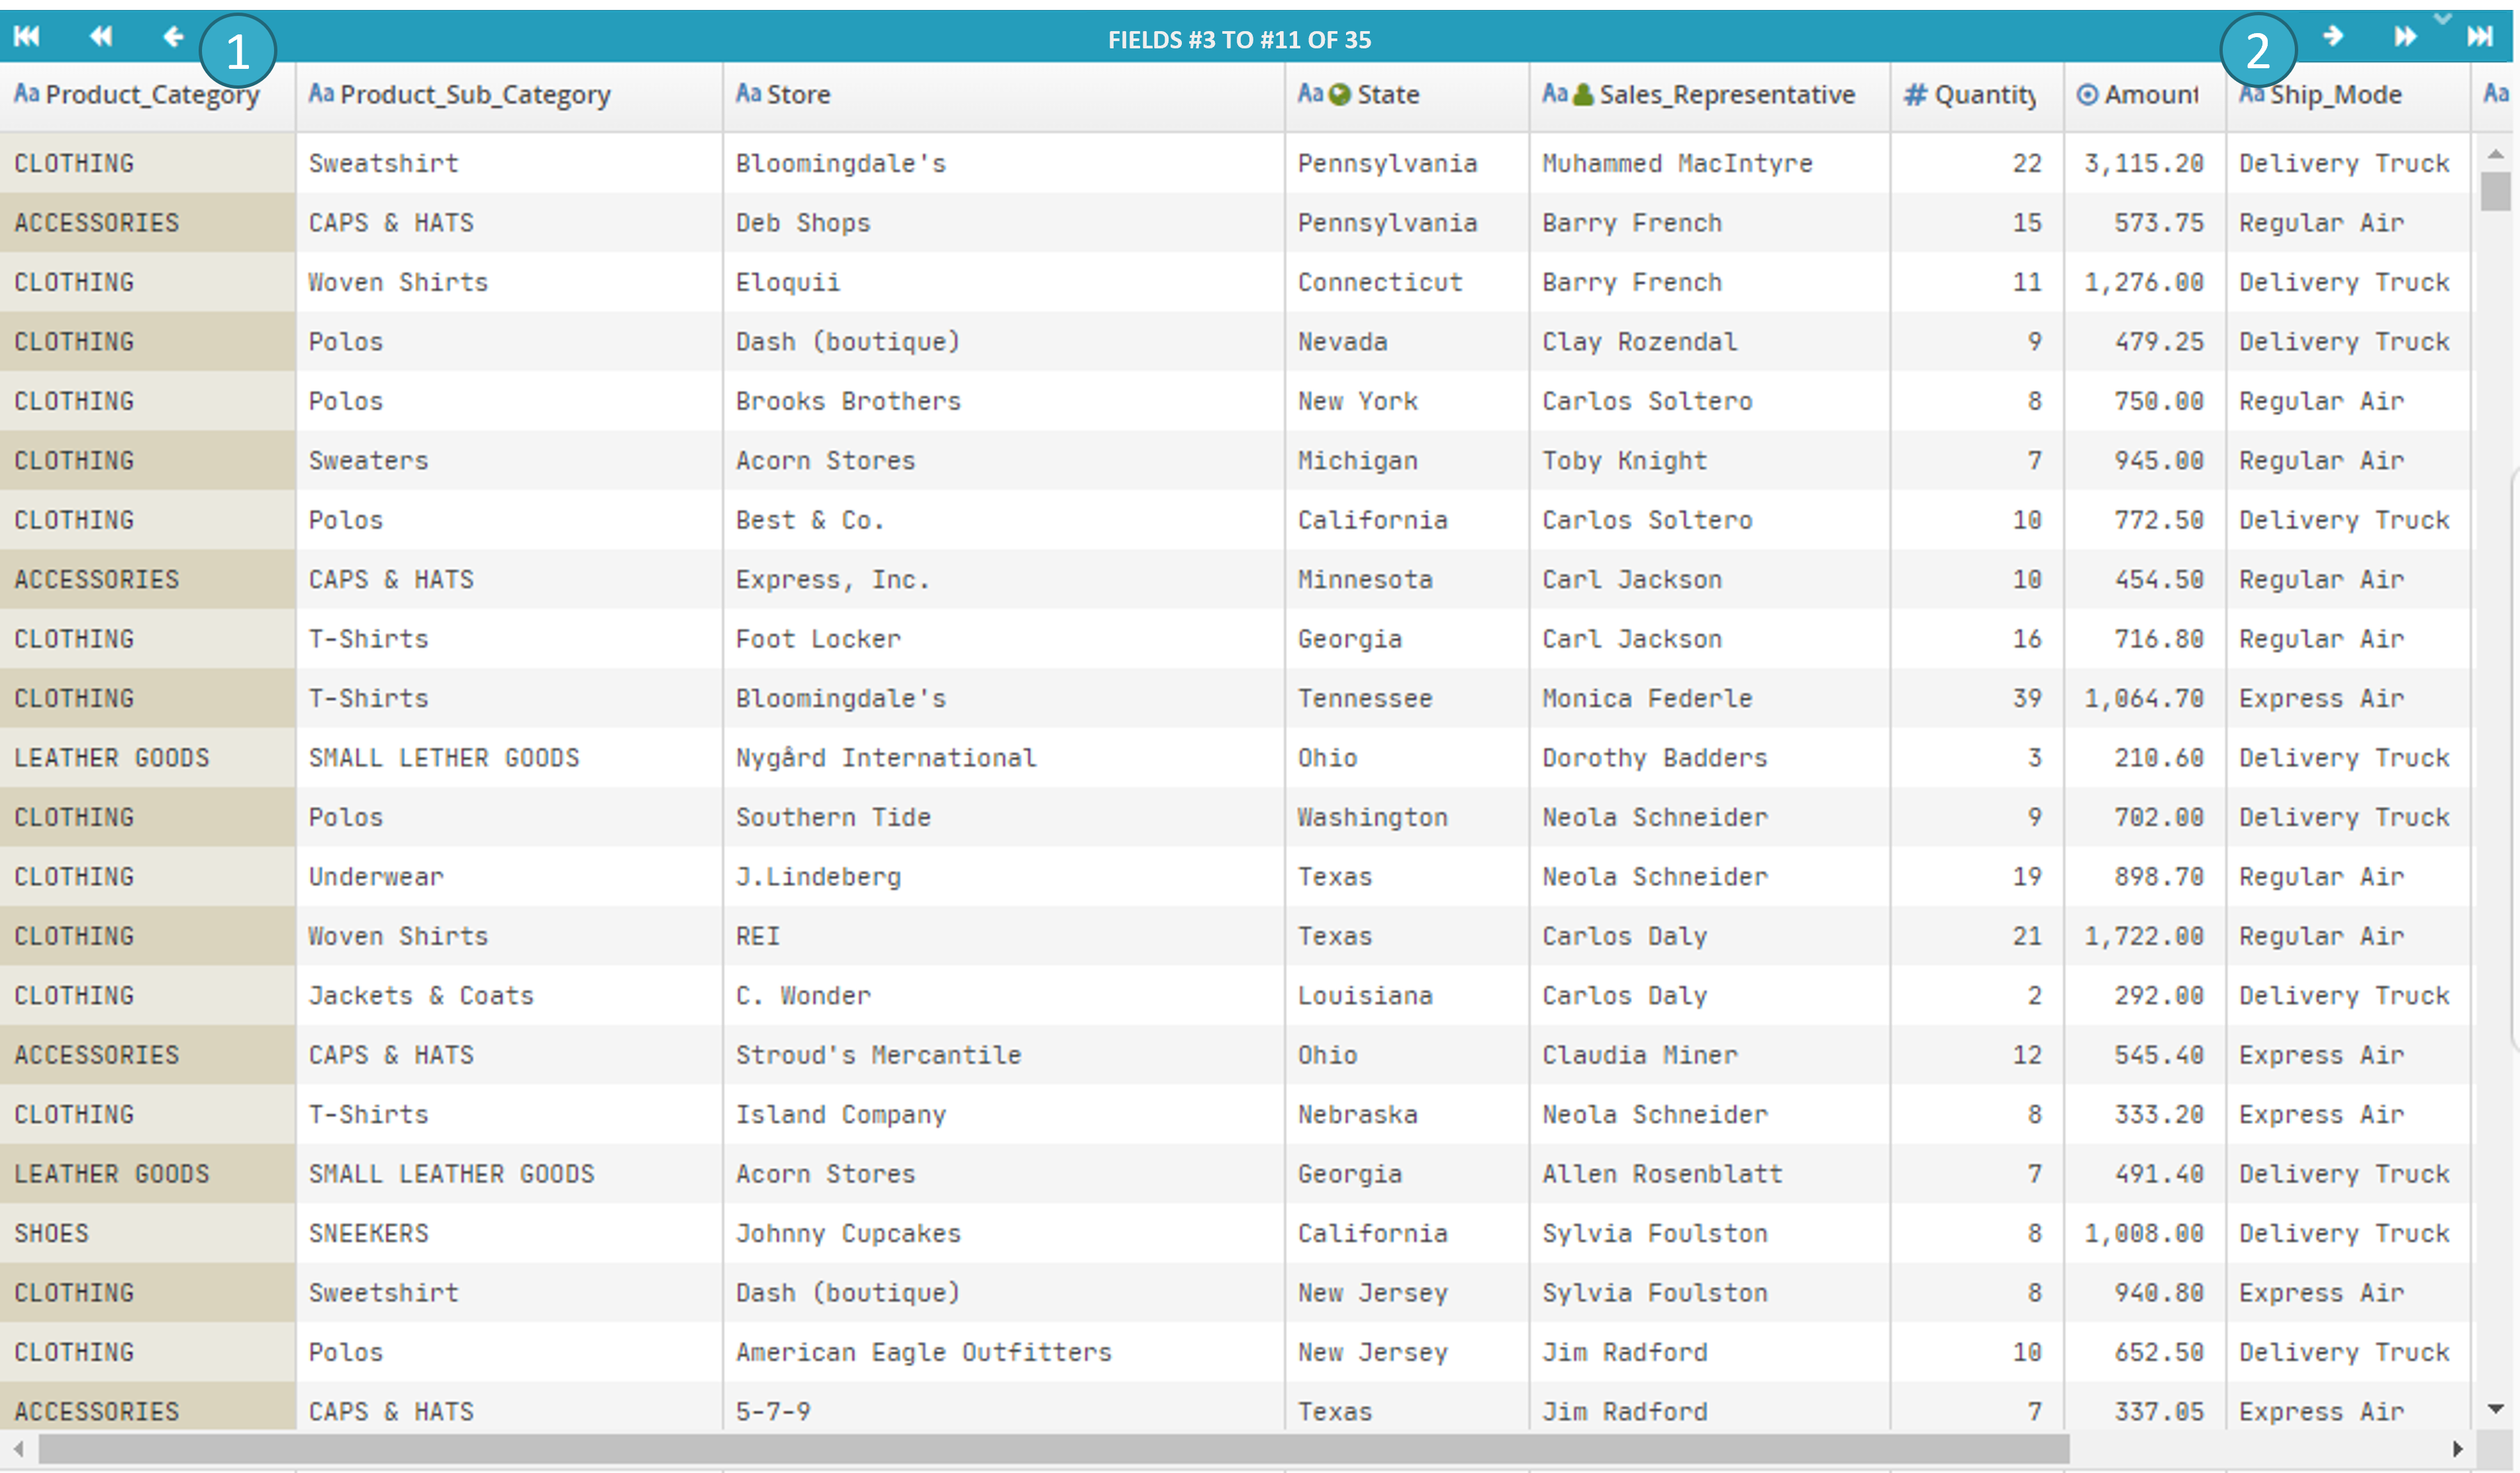
You can move very quickly to any field:
By using the left
 / right
  arrows (see fig. above: next/previous field, next/previous page, first/last page).
By typing a few of the letters in the field header:
 and
and  (fig. below).
By double-clicking a field in the Field Browser
 (fig. below).

7.2.3.4. Facet filters
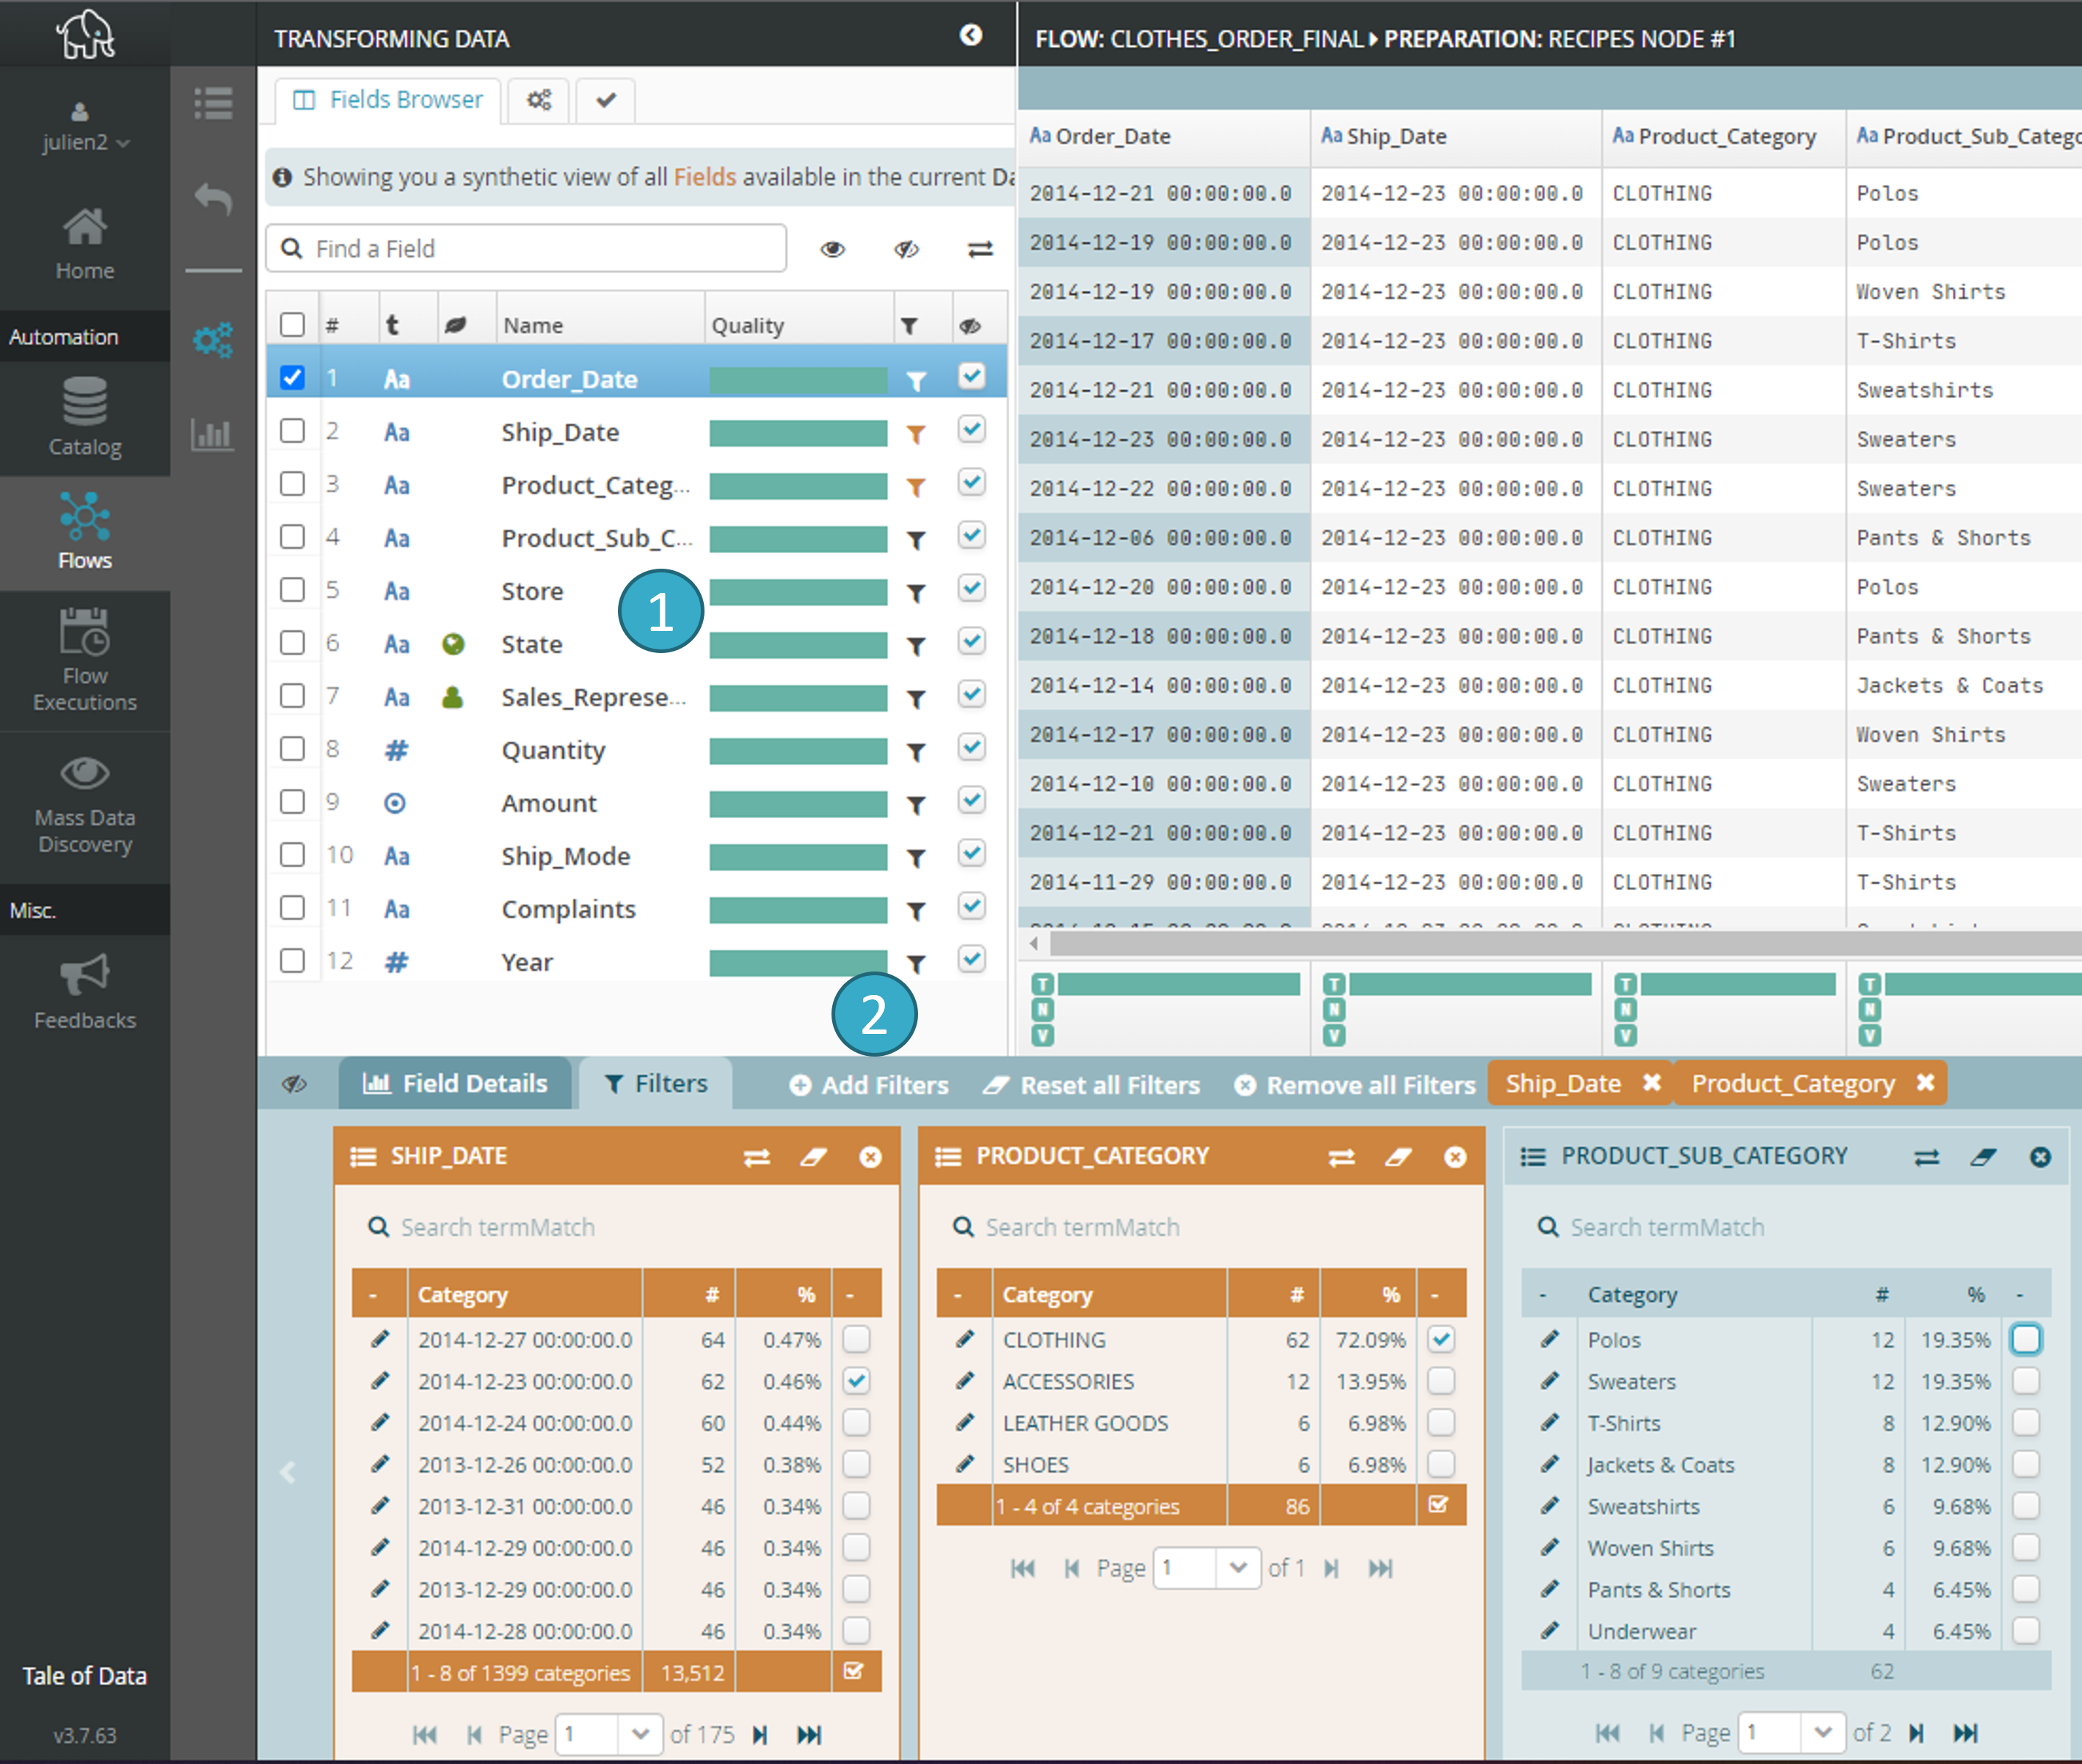
You can filter datasets using all types of criteria in order to apply transformations to a particular subset of records.
Tale of Data filters allow fast access to values distributed across all the fields.
7.2.4. Transformation History
Each Tale of Data transformation is saved to a list that is editable. Every action taken can be viewed and cancelled.
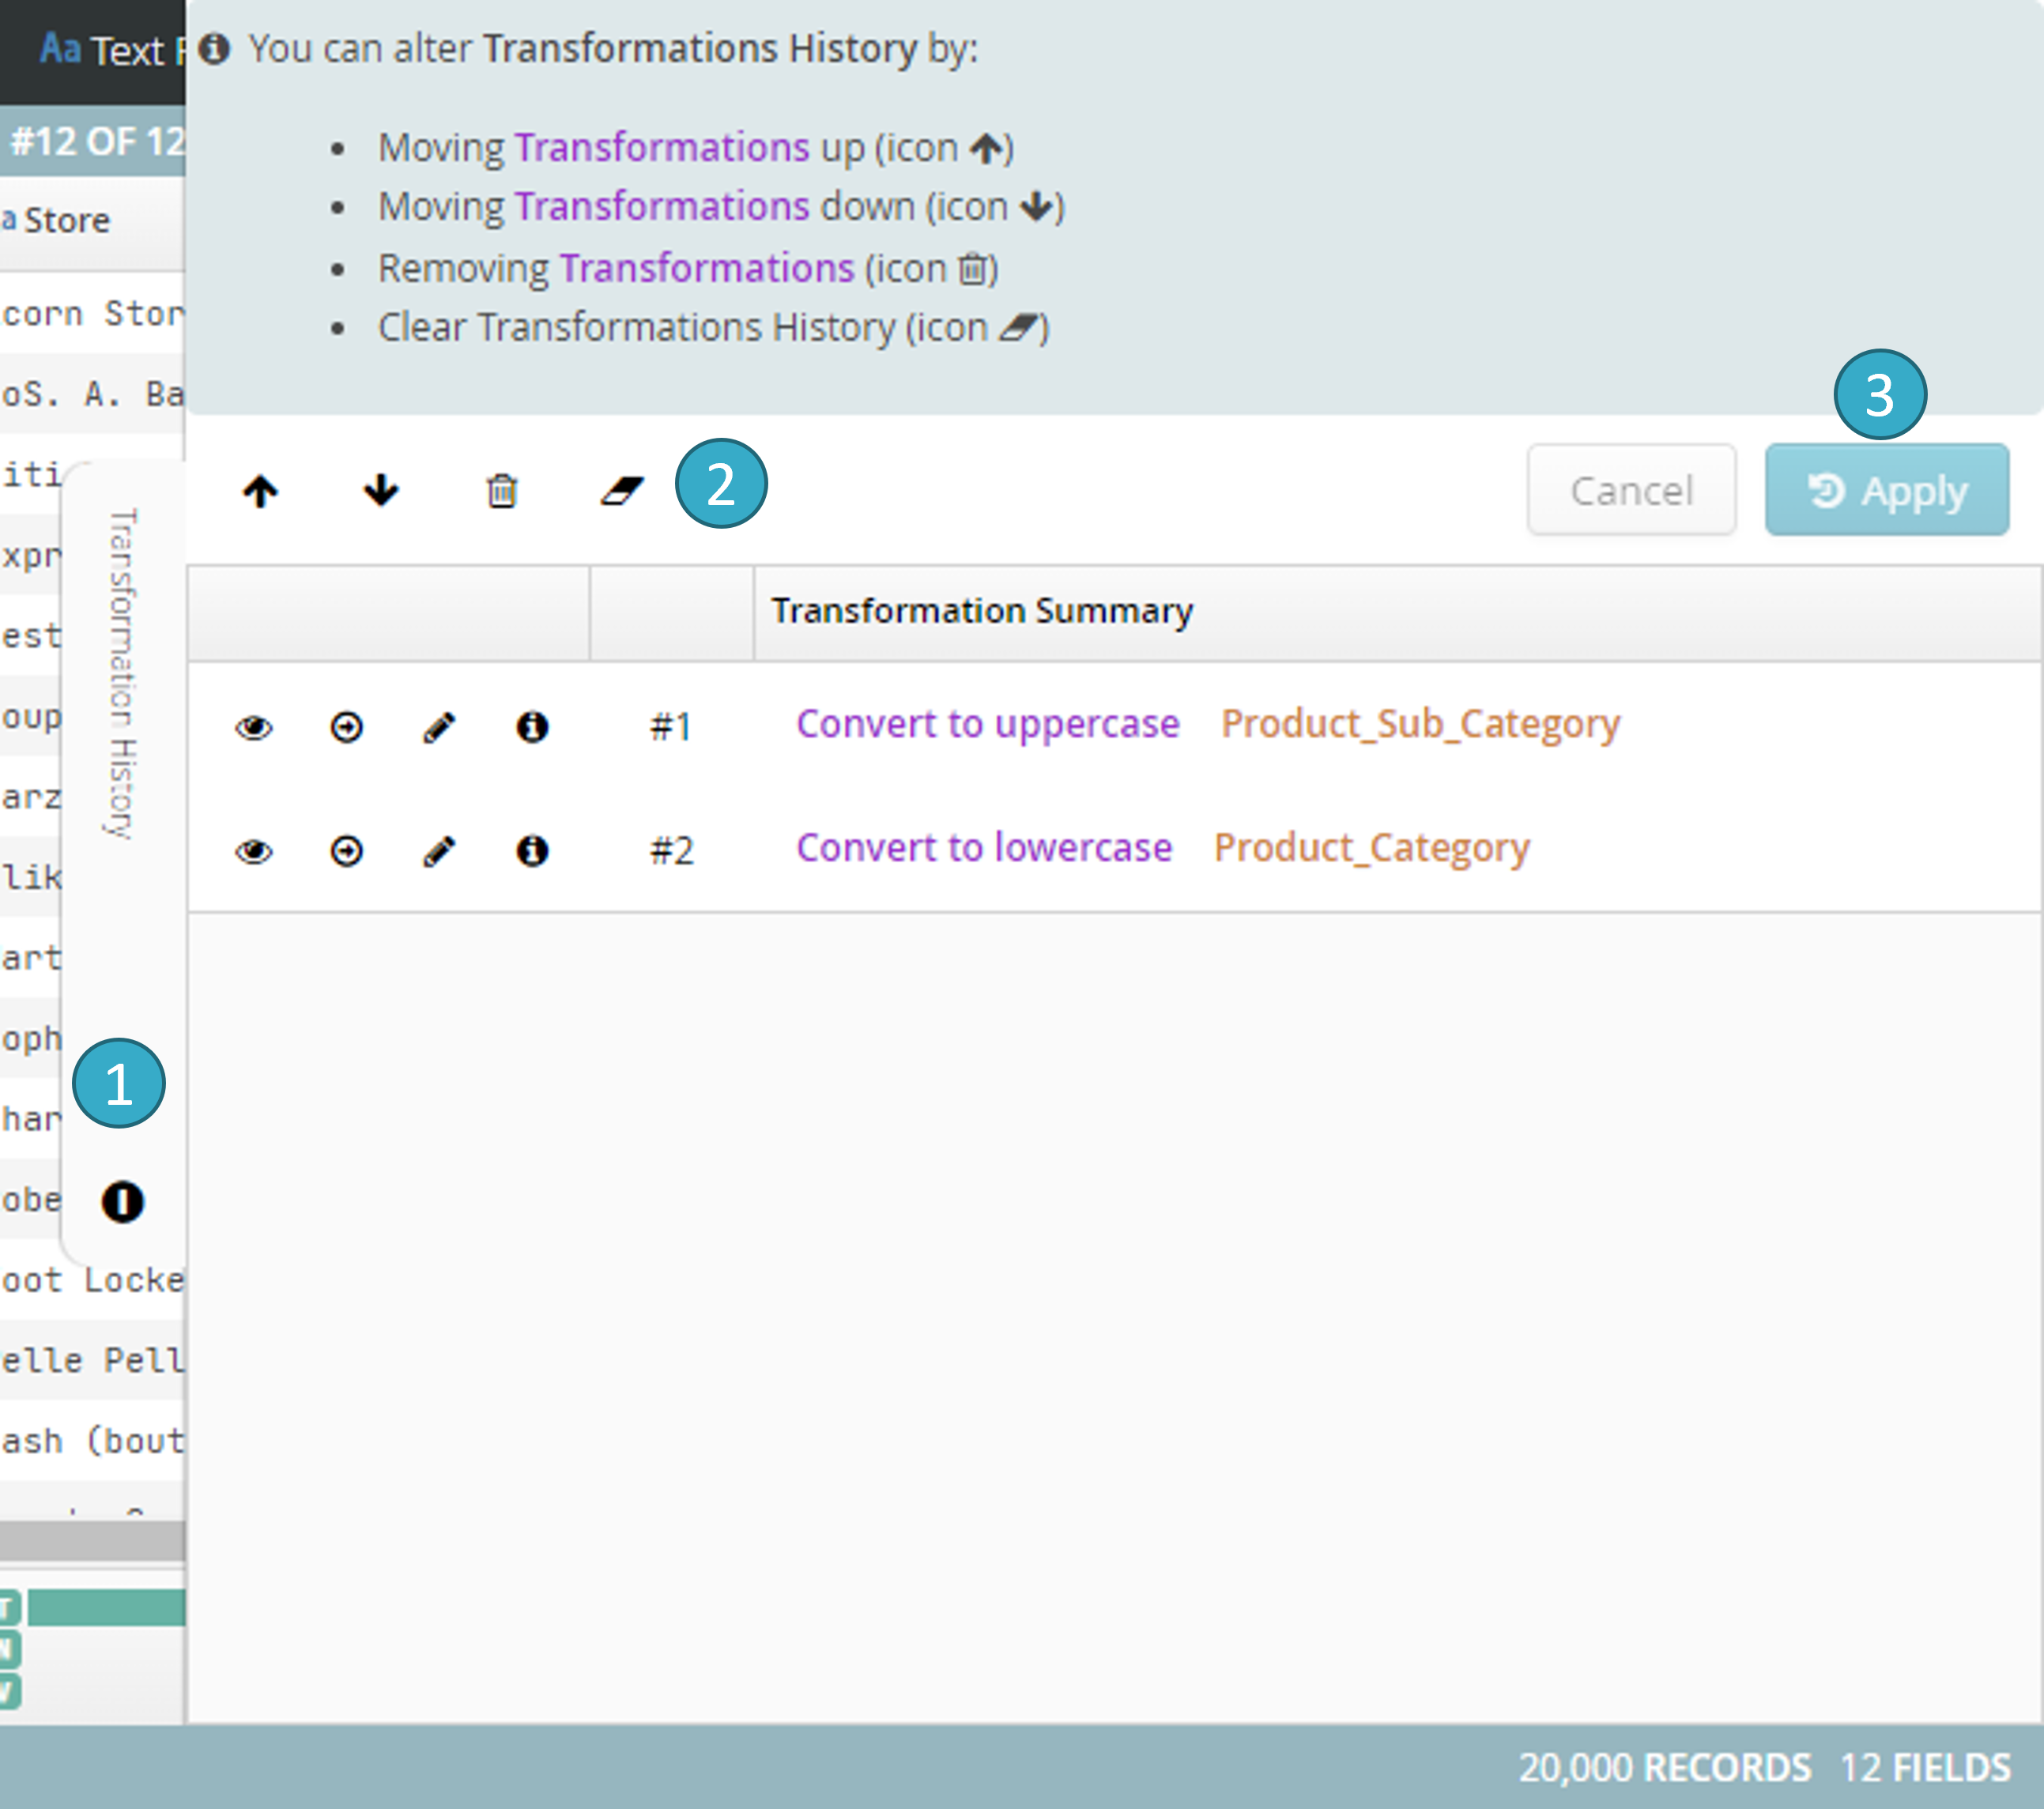
Sliding panel
 (to the right of Data View) displaying Transformation History.
Actions
 for moving the selected transformation up/down the list or for deleting it.
Apply
 lets you apply in one click all the changes made to the list of transformations. The system will then reapply the list, transformation by transformation, starting from the original status of the dataset.
7.2.5. View a transformation stage
In Transformation History you can at any time view the preparation as it was during a transformation by clicking the icon beside each transformation :
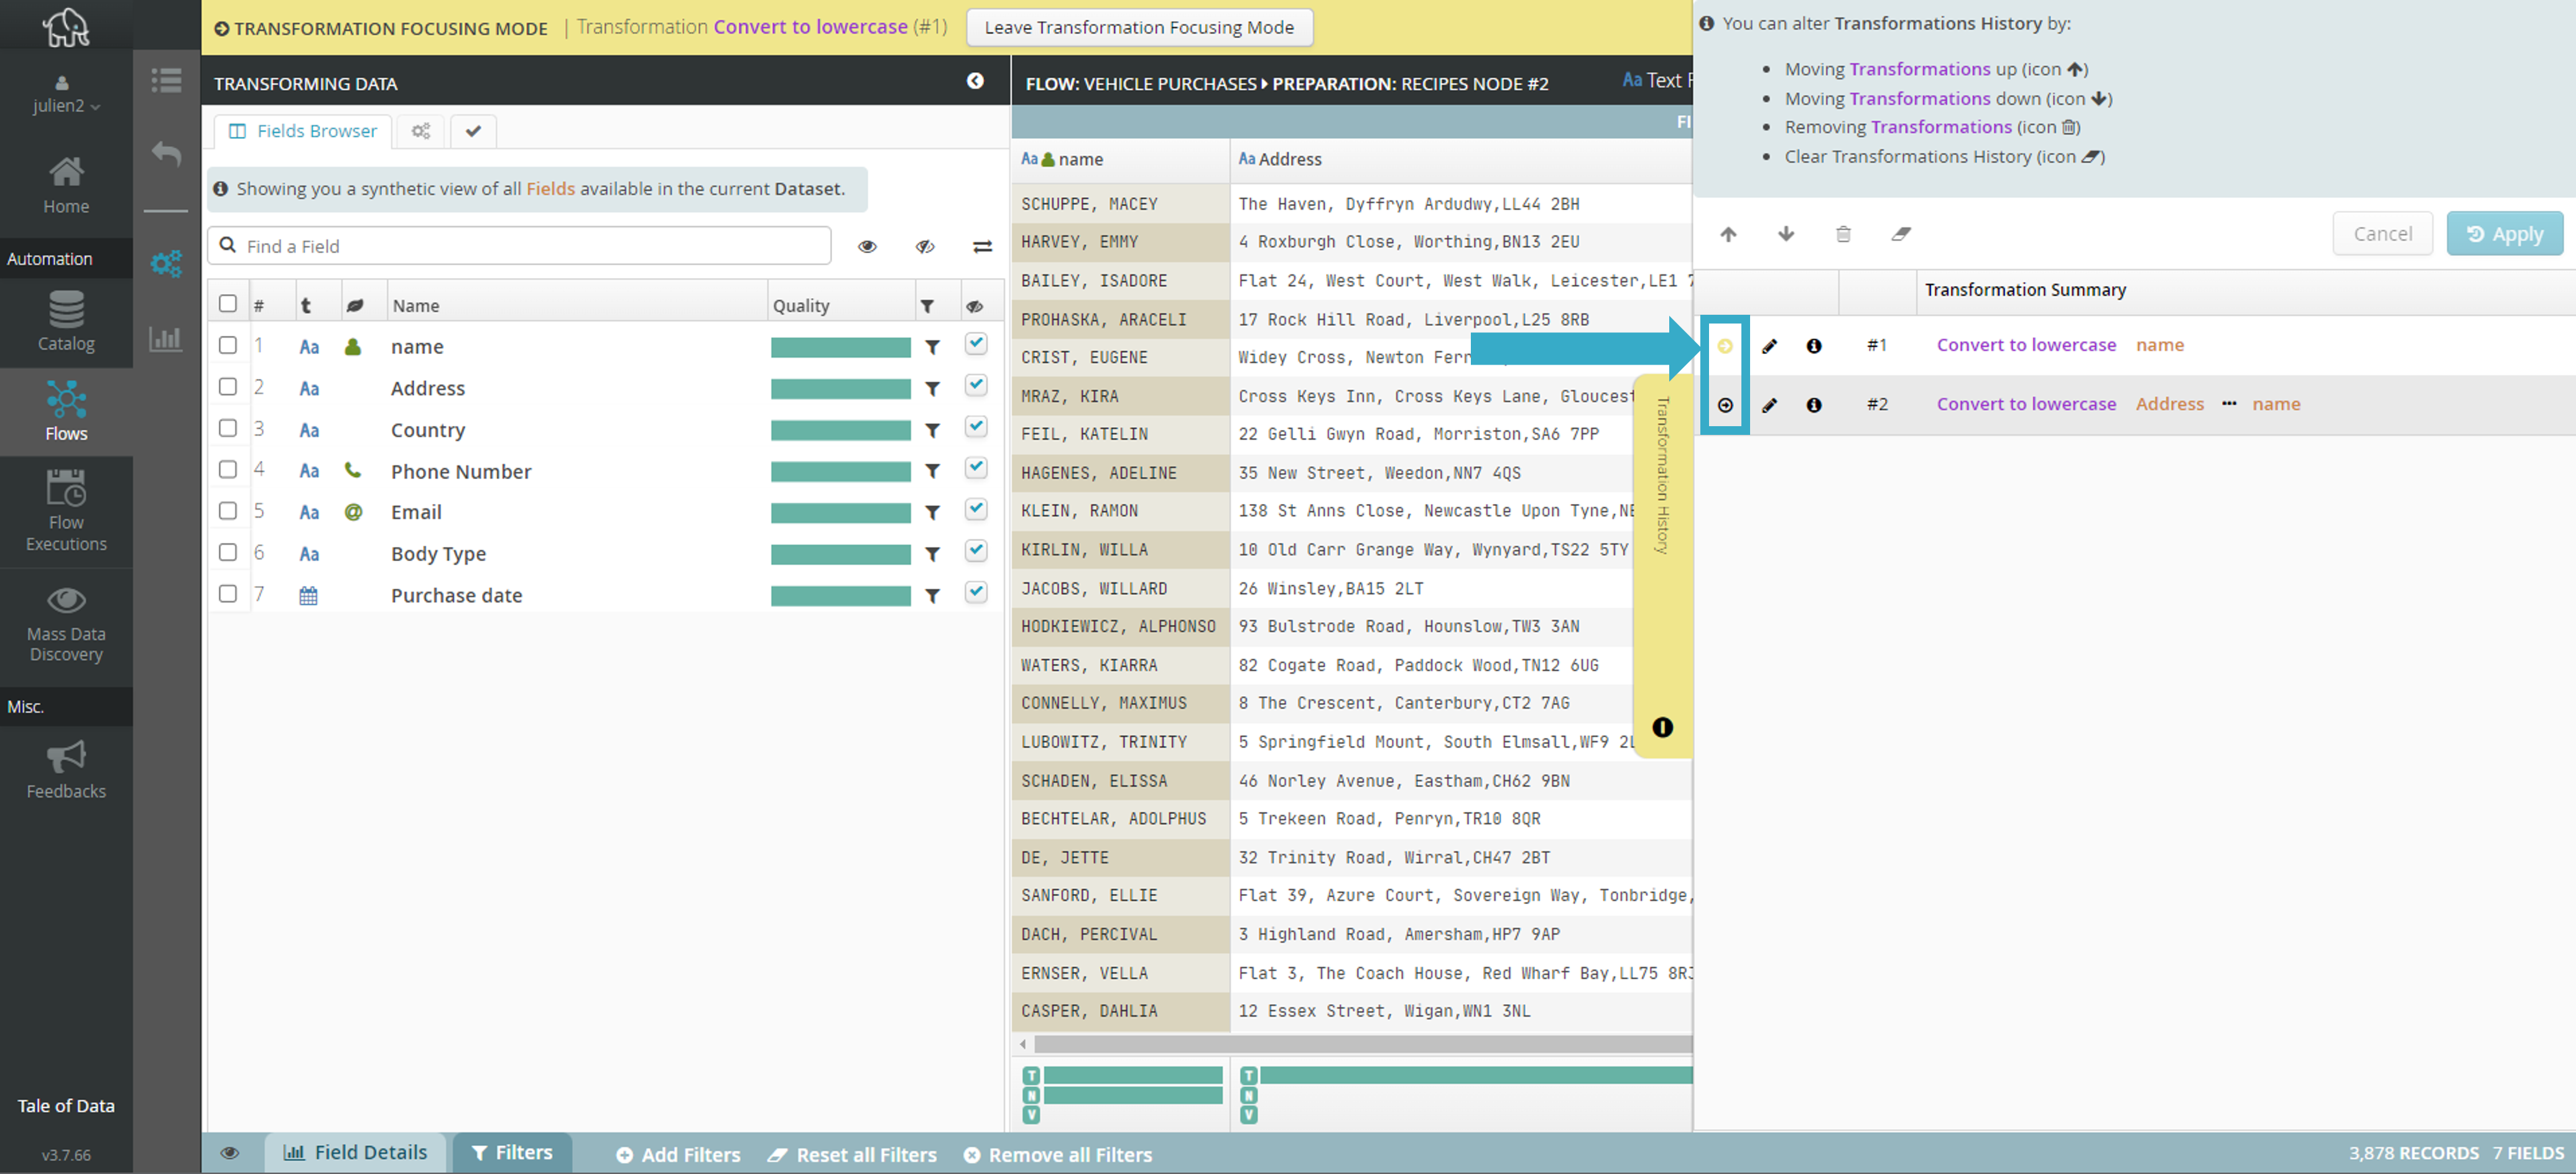
The preparation will then switch to the past, meaning that you can no long apply any changes. You can however:
View the preparation in its status at the time of the selected transformation.
Generate a quality report with the status applying at the time of the selected transformation.
View the report with the status applying at the time of the selected transformation in Visualizations.
To return to the present, i.e. to the latest transformation, click the icon for the transformation currently being viewed or the button on the bar that appeared when you switched to view mode.

7.2.6. Invalid transformations
Some transformations may be invalid (i.e. cannot be applied correctly). This will not prevent the application of the other transformations. They will be highlighted in the Transformation History as follows:

7.2.7. Editing a transformation
In Transformation History you can edit a transformation at any time by clicking the pencil icon that appears beside each of the transformations and changing the configuration:
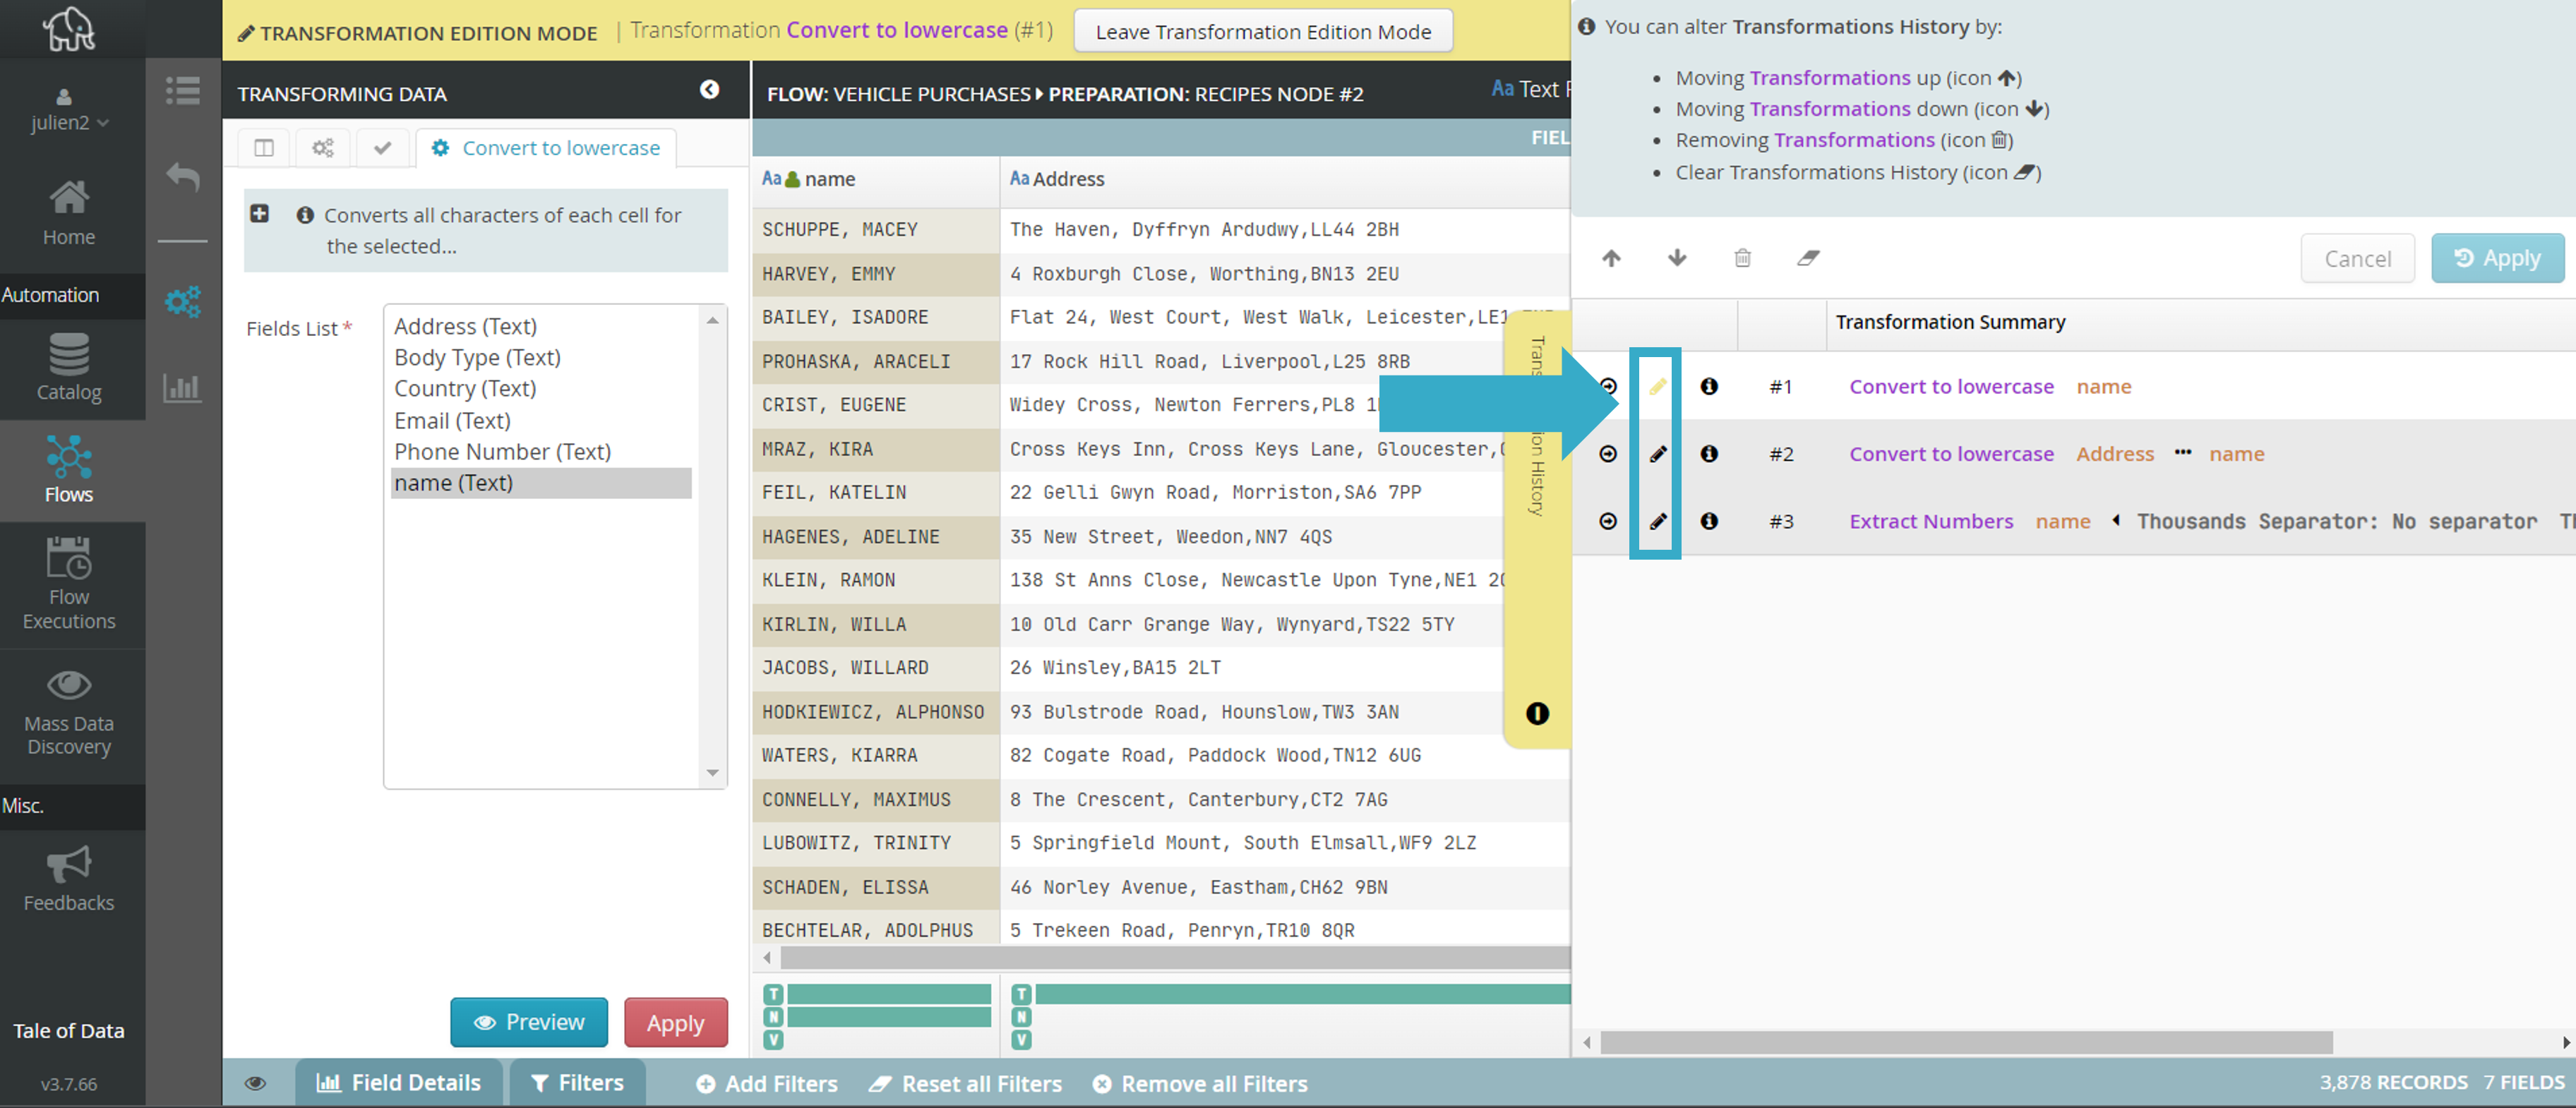
The preparation will then switch to the editor for the selected transformation, allowing you to change the configuration. To validate the new transformation configuration during editing, just click Apply as you do when you add a transformation.
Some functionalities are deactivated when you are in editing mode:
Reordering the Transformation History.
Access to the Field Browser, Transformation palettes and Record validation rules tabs.
Other views (Reports, Download).
To quit editing a transformation without saving changes, click the transformation icon or the button on the bar that appeared when you switched to edit mode.

Note
Certain types of transformations cannot be altered and once they have been created they cannot be changed. This applies in particular to transformations with row filtering. In these cases, a new transformation must be created if you want to achieve a different behavior.
